Shadows Over Innistrad Remastered Limited Ratings
The AI ratings are gathered with from the MTGA Assistant deck tracker. Pro ratings are provided by Nizzahon Magic. The Pro ratings and comments are made before the set officially releases while the AI ratings are dynamically updated with new data all the time.
- 5.0 The absolute best you can get.
- 4.5 Incredible bomb, but not unbeatable.
- 4.0 Good rare or top-tier uncommon.
- 3.5 Top-tier common or solid uncommon.
- 3.0 Good playable that always make the cut.
- 2.5 A solid playable that rarely gets cut.
- 2.0 A good playable, but is sometimes cut.
- 1.5 Filler card but sometimes gets cut.
- 1.0 Not good filler and often gets gut.
- 0.5 Almost Unplayable and mostly sideboard material.
- 0.0 Not playable at all.
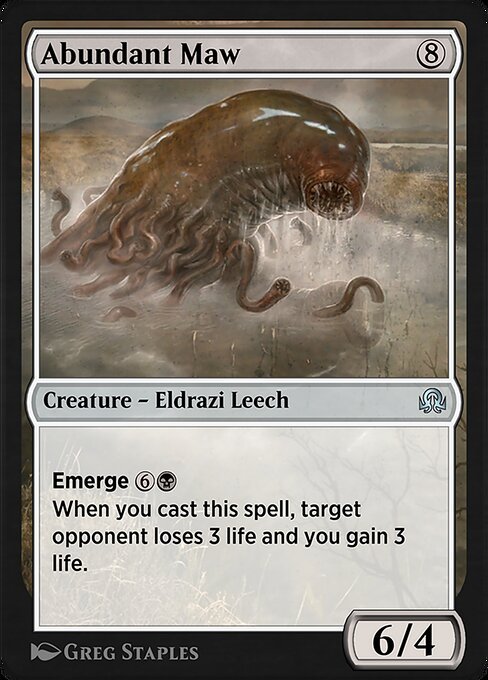
Abundant Maw
AI Rating: 1.8Pro Rating: 2.5
This has a big body and Lightning Helixes your opponent, so its hard to go wrong there! Especially because Black has plenty of good sacrifice fodder for Emerge.
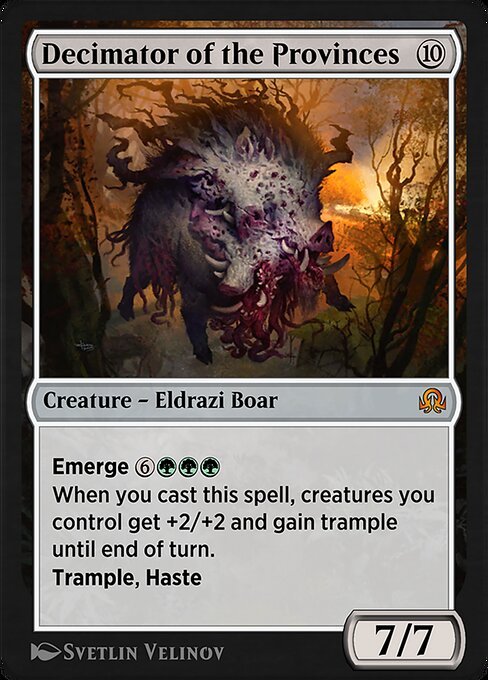
Decimator of the Provinces
AI Rating: 4.9Pro Rating: 4.5
Triple Green can be a little bit rough, but casting this for 6 or so is very doable, and when you do you’re at worst getting a 9/9 with Trample and Haste, and most of the time your board is going to populated by more than just the Decimator – in which case you’re just going to win the game. Now, you won’t always be able to Emerge effectively with this, and that hurts it’s stock a little bit, but I think the Decimator still reaches bomb status.
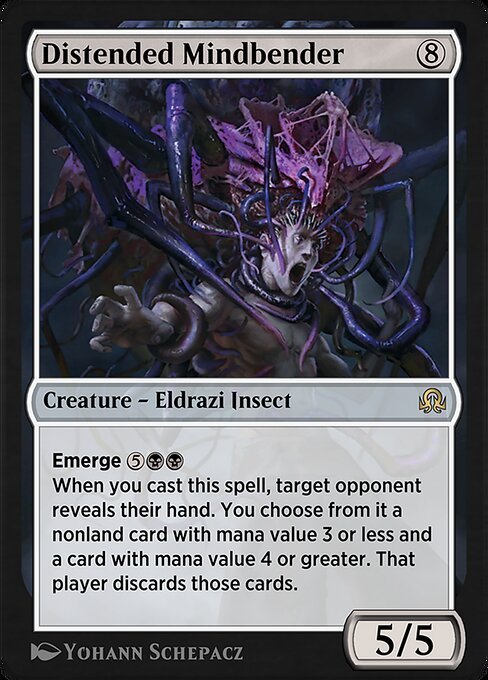
Distended Mindbender
AI Rating: 4.6Pro Rating: 3.0
Sometimes you get a 3-for-1 with this, which feels incredible! Most of the time you’ll be able to get at least a 2-for-1. There will be times when your opponent’s hand is empty and it doesn’t do anything, and those moments are going to stink – but you’re still talking about a 5/5, which is relevant on almost any board.
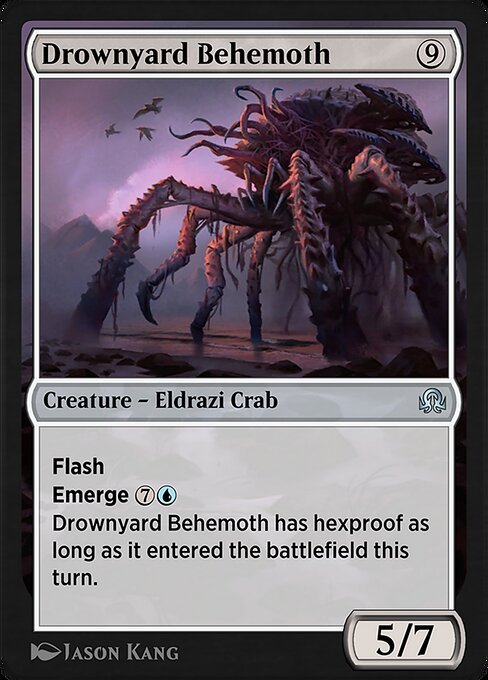
Drownyard Behemoth
AI Rating: 2.8Pro Rating: 2.5
The main thing you want to do with this is Flash it in and ambush block a smaller creature, and that’s most creatures! If you do that, you’re going to get a 2-for-1. Sometimes that situation doesn’t present itself, and you just find yourself casting this as a 5/7, and it doesn’t feel nearly as good in those cases, but Blue has enough good sacrifice fodder that this will still feel pretty decent.
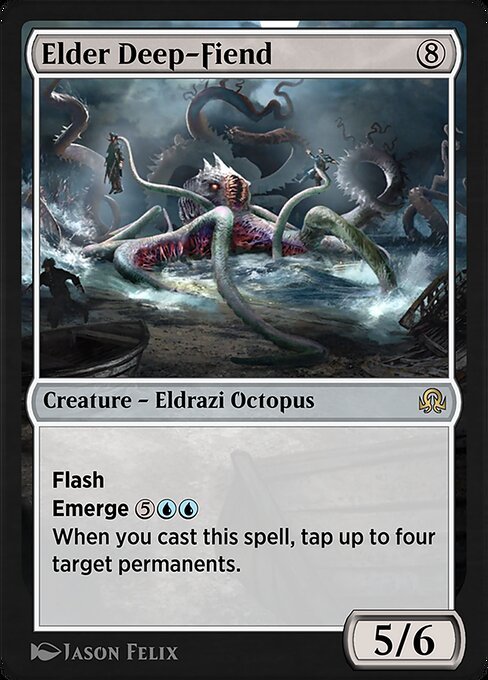
Elder Deep-Fiend
AI Rating: 4.4Pro Rating: 4.5
If you flash this in, it is going to drastically alter the state of the game for both you and your opponent. Tapping four permanents is no joke. You’re normally going to want to tap opposing creatures to allow you to attack in for a ton, but you can even use this to tap down lands and things like that. Blue has good sacrifice fodder too, so you don’t usually feel like you’re losing a whole card to cast the Fiend at a discount.
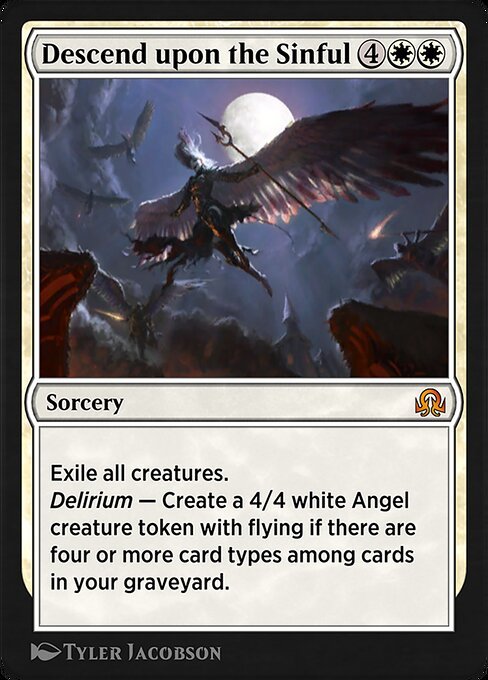
Descend upon the Sinful
AI Rating: 4.7Pro Rating: 4.5
If you can consistently get Delirium going, this is an amazing boardsweeper, because you’re always going to come out ahead thanks to the Angel. If you aren’t great at getting Delirium going – and White isn’t always going to get there – the card is obviously much worse, because you pay a ton of mana to wipe the board and then give your opponent a chance to rebuild first.
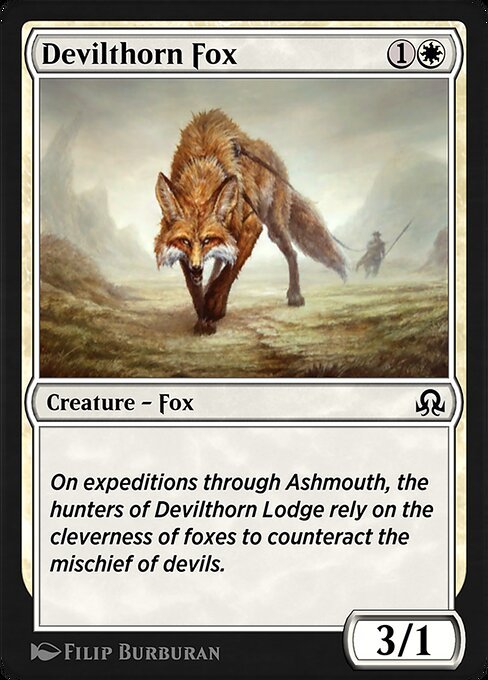
Devilthorn Fox
AI Rating: 1Pro Rating: 1.5
A vanilla two mana 3/1 was better back in 2016, and this will be far more playable in this format than it is in more recent ones.
Drogskol Shieldmate
AI Rating: 1.9Pro Rating: 2.0
This isn’t as impressive as it looks. +0/+1 to your whole board is not impactful in most situations. Still, it is a three mana ⅔ with Flash and upside, so it is super solid.
Faith Unbroken
AI Rating: 4.5Pro Rating: 2.5
This card is incredibly swingy. 4 mana to exile something and give a creature +2/+2 is an incredible rate, and if the creature and Enchantment stay around, your opponent loses. However, if your opponent finds a way to kill the Enchanted creature, they probably win, because you get absolutely blown out.
Faithbearer Paladin
AI Rating: 1.8Pro Rating: 2.0
This is better than it looks. A ¾ with lifelink is pretty beefy in this format, and represents a very real road block for aggro decks.
Fiend Binder
AI Rating: 1.4Pro Rating: 2.5
The stat-line is ugly for the cost, but tapping down an opposing creature every time it attacks can allow you to do tons of damage.
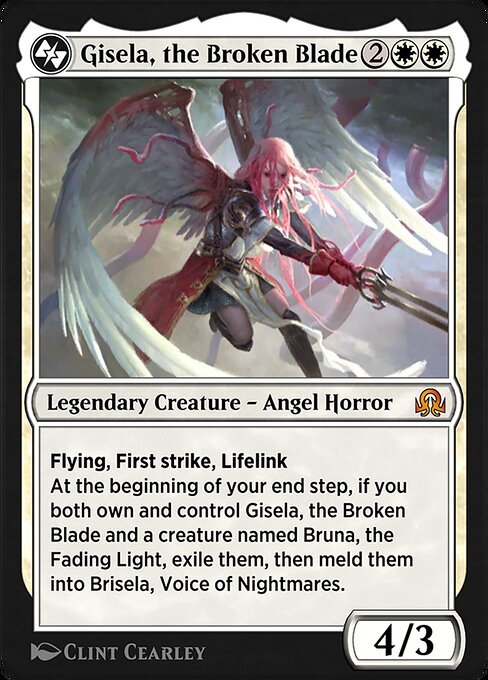
Gisela, the Broken Blade
AI Rating: 4.8Pro Rating: 4.0
Don’t count on transforming her, but you don’t really need to. Most of her value comes from her extreme efficiency and all those keywords.
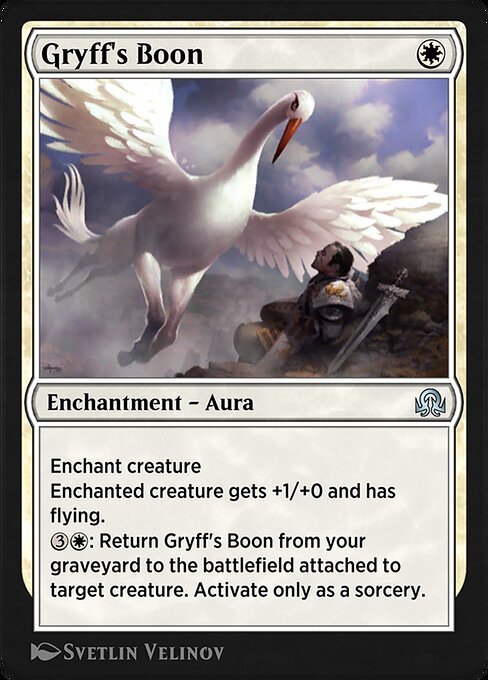
Gryff's Boon
AI Rating: 3.2Pro Rating: 3.5
This offers an incredibly efficient boost up front, as +1/+0 and Flying is enough to massively upgrade most creatures! What really makes it a quality Aura is the fact that you can constantly bring it back from the graveyard.
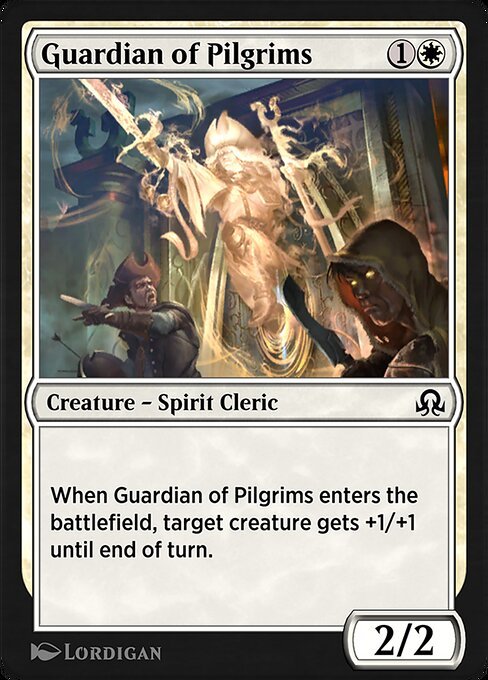
Guardian of Pilgrims
AI Rating: 2Pro Rating: 2.0
This has medium base stats, and has a medium ETB ability. So basically, it's medium.
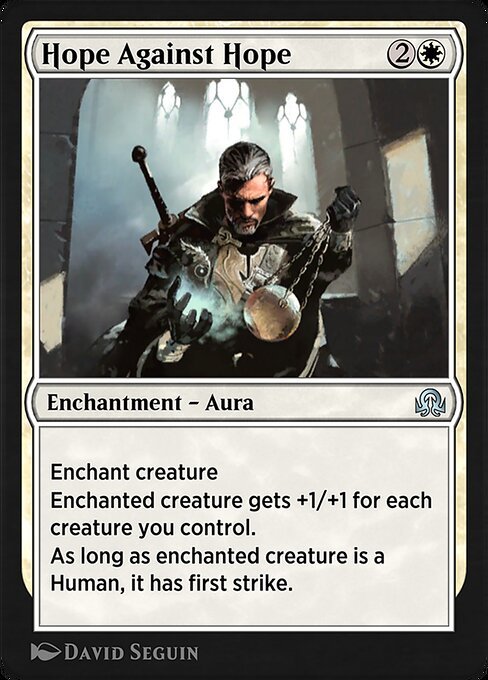
Hope Against Hope
AI Rating: 1.4Pro Rating: 1.0
This Aura isn’t really worth the downside. Sure, it can offer a massive boost – but there are times where it doesn’t offer a big enough one to off-set how dangerous playing this card is. Your board already has to be good in most scenarios, too. Getting 2-for-1’d is a big enough risk that you need your Auras to do more than this.
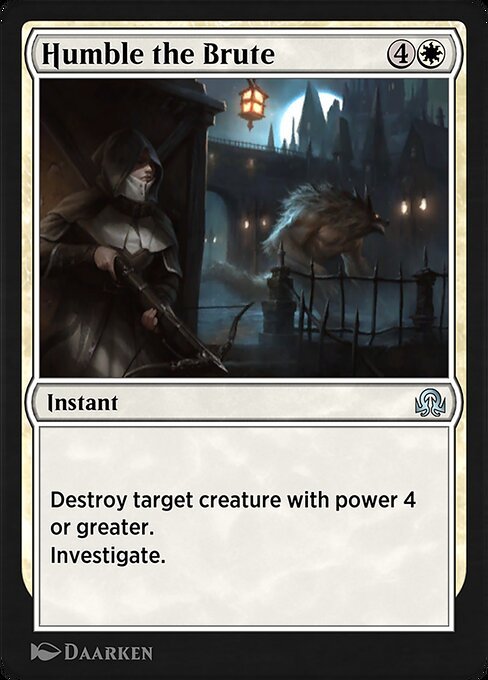
Humble the Brute
AI Rating: 2.1Pro Rating: 2.5
Between Werewolves and Eldrazi, this has enough targets against most opponents to be worth playing. It offers a very real 2-for-1 when it has a target. But still, there are plenty of times where your opponent doesn’t have anything you can kill with it, and that’s pretty rough.
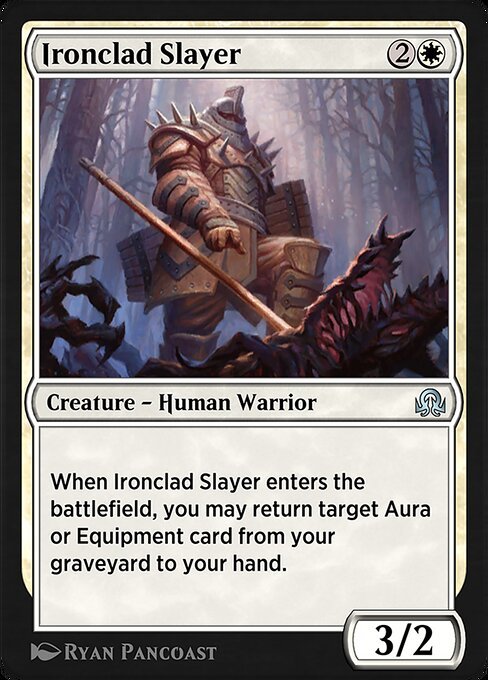
Ironclad Slayer
AI Rating: 2.4Pro Rating: 2.5
This format has some quality Auras and Equipment, especially in Green-White, so this is able to return a quality card a decent chunk of the time, and the fail case isn’t too terrible.
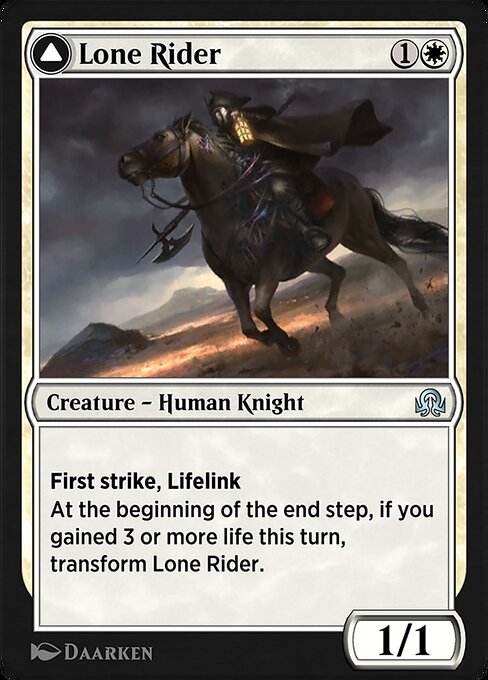
Lone Rider
AI Rating: 3.5Pro Rating: 3.0
In the right format, this would be bonkers! Unfortunately, this format doesn’t have a dedicated life gain archetype, so gaining 3 or more life with it and transforming it into It That Rides as One isn’t as easy you might think. It is certainly doable, but not something that happens with regularity.
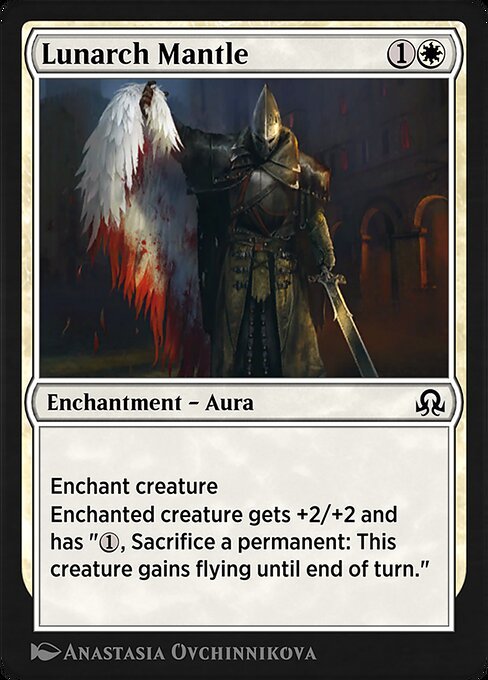
Lunarch Mantle
AI Rating: 1.5Pro Rating: 1.5
This offers a reasonable boost for the cost, but the downside of getting 2-for-1’d is still very real. This can work alright in really aggressive decks, but won’t always make the cut.
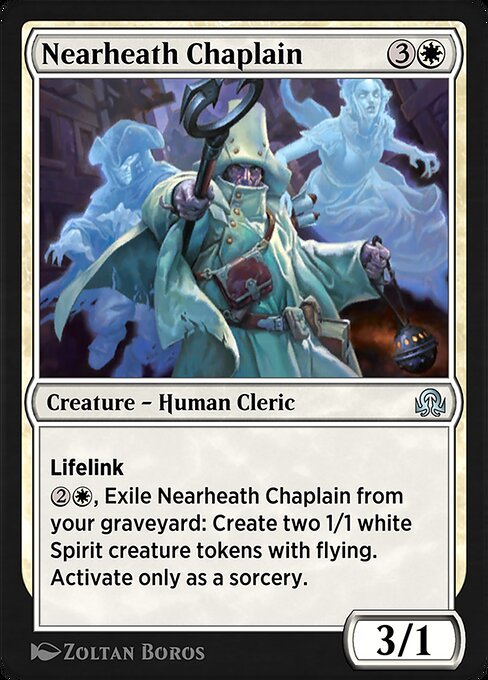
Nearheath Chaplain
AI Rating: 4.1Pro Rating: 4.0
A 4-mana 3/1 with lifelink definitely isn’t good, but you can exile this from your graveyard to make two 1/1 tokens! This feels like a 2-for-1 most of the time, it feels great to trade it off – and it can even be a really pesky attacker.
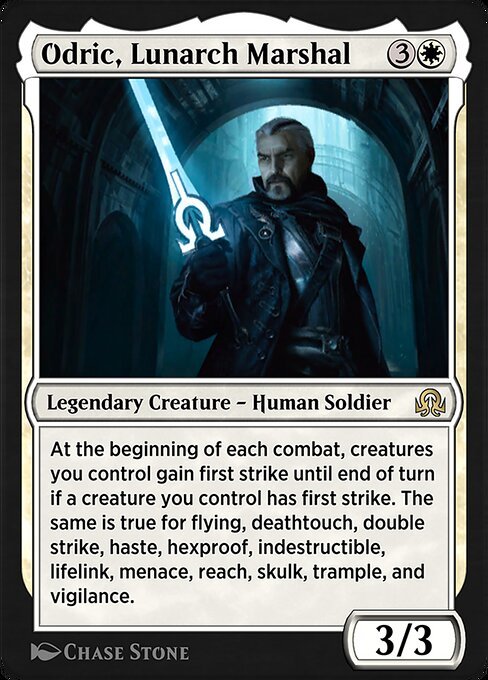
Odric, Lunarch Marshal
AI Rating: 3.8Pro Rating: 3.0
As long as you have at least one card in play with one of these keywords, Odric will feel worth it. The problem is, you don’t always have a board that gets it going.
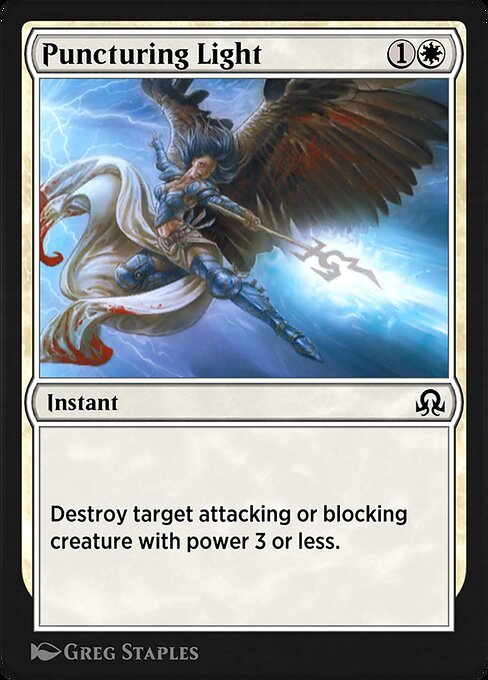
Puncturing Light
AI Rating: 2.2Pro Rating: 2.5
This can kill a decent number of creatures in the format, and it does it fairly efficiently. Obviously, it is a little too narrow to be premium, but its fine.
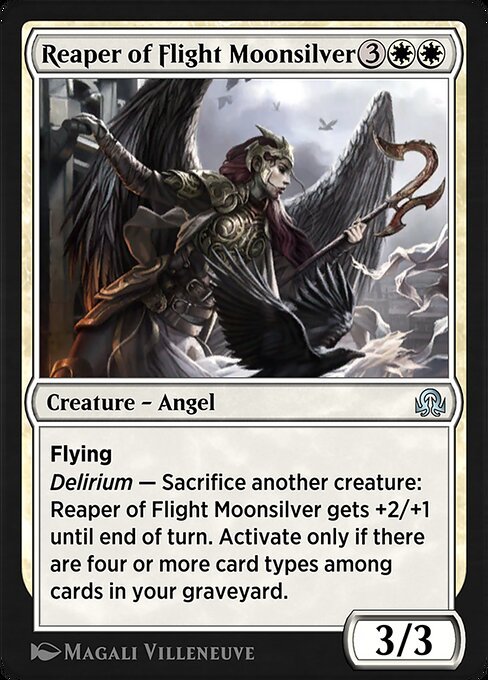
Reaper of Flight Moonsilver
AI Rating: 3Pro Rating: 2.5
The base stats here aren’t good – but if you have Delirium going, the Reaper can represent lethal on a lot of board states.
Selfless Spirit
AI Rating: 4.8Pro Rating: 4.0
This is a great aggressive two drop, and the ability to offer indestructibility to your whole board gives it some amazing upside that will really frustrate your opponent.
Sigarda's Aid
AI Rating: 3.3Pro Rating: 0.0
This is here for Historic and Explorer, not Limited. There aren’t any Equipment in this set that you can abuse with this.
Sigardian Priest
AI Rating: 2.5Pro Rating: 2.5
This format has a ton of humans in it, so you often can’t tap creatures that you desperately want to tap. That makes this a lot worse than something like Master Decoy, but its still solid.
Spectral Shepherd
AI Rating: 3.4Pro Rating: 3.0
UW is all about spirits, and it has a sub-theme of abusing ETB abilities. The Shepherd’s activated abilities can help you trigger them, while also allowing you to save your Spirits from removal.
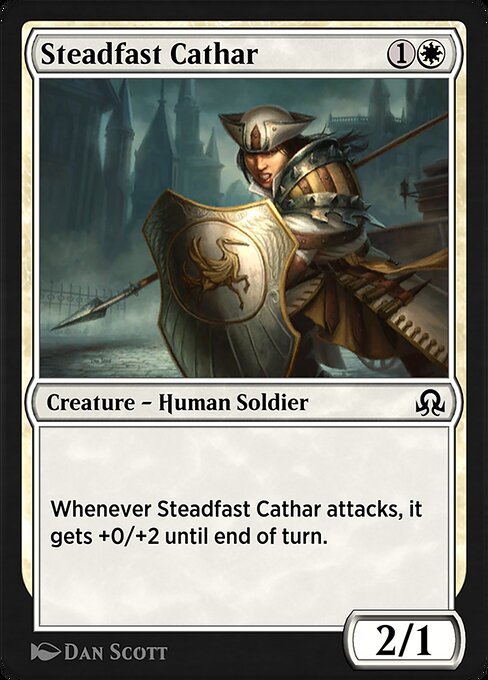
Steadfast Cathar
AI Rating: 2.3Pro Rating: 2.5
This is a solid two drop, as attacking as a ⅔ in the early game is pretty nice.
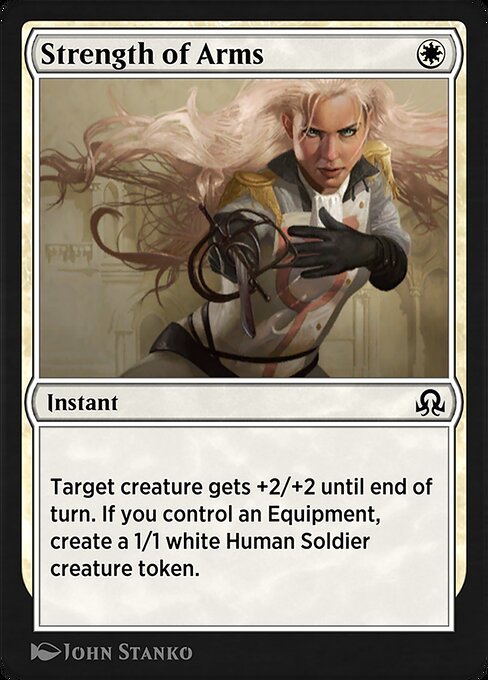
Strength of Arms
AI Rating: 1.5Pro Rating: 2.5
This is a nice trick. One mana for +2/+2 tends to play pretty well, and the times you can get a 1/1 token out of this feel really insane, and its very doable, especially in GW.
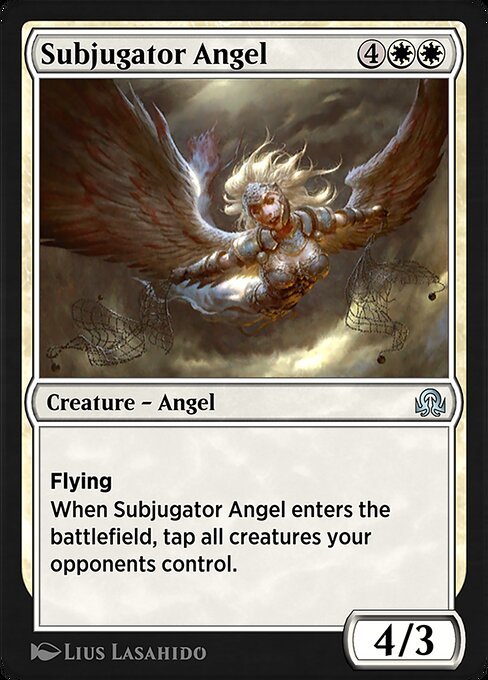
Subjugator Angel
AI Rating: 3.5Pro Rating: 2.5
This was an underperformer last time. The idea of tapping down your opponent’s whole board and swinging for lethal is easy to imagine, but there are lots of board states where the ETB ability is actually irrelevant. And in those cases, you’re playing a creature that has a pretty bad stat-line.
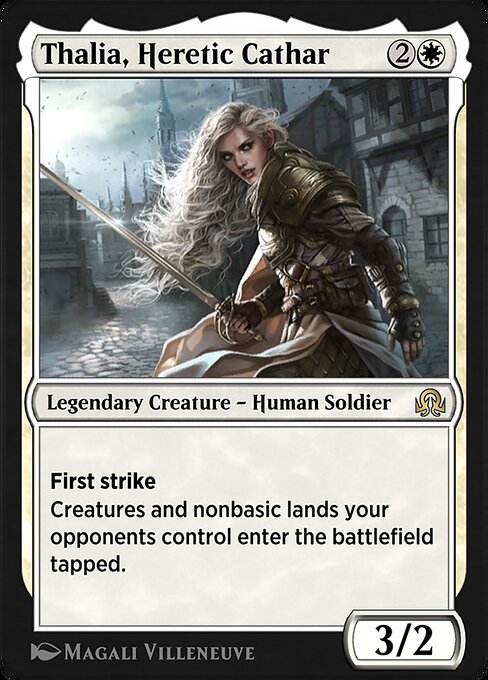
Thalia, Heretic Cathar
AI Rating: 4.9Pro Rating: 4.0
A three mana 3/2 with First Strike is a 3.0 at worse, and her static ability is pretty real! If you’re the beatdown, your opponent’s creatures entering tapped is going to end the game quickly.

Thalia's Lancers
AI Rating: 4.8Pro Rating: 3.5
A 5-mana 4/4 with First Strike is a card you basically always play. You won’t always be able to grab a legendary card with its ETB ability because they only appear at Rare and Mythic in this set. However, if you do end up with a couple of legendary creatures in your deck, this becomes one of the best cards in your deck.

Thraben Inspector
AI Rating: 3.7Pro Rating: 3.0
This is a nice one drop. Generating a clue is great value to add to a one mana ½, and it even has a useful creature type.
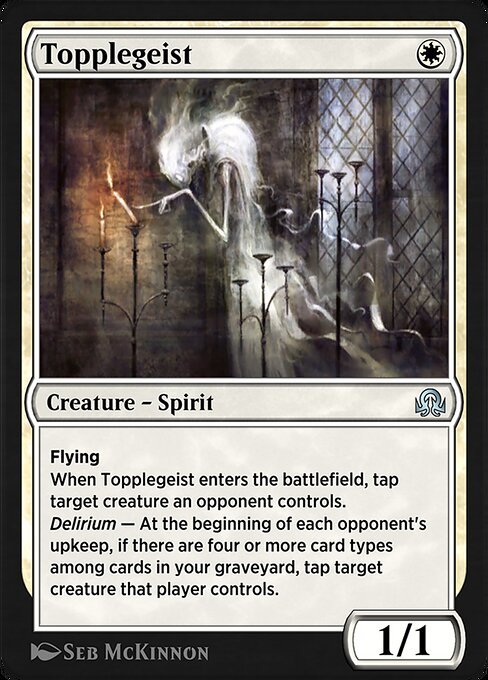
Topplegeist
AI Rating: 3.8Pro Rating: 3.5
Without Delirium, Topplegeist is already a playable card. Then, if you can get Delirium online, this becomes absolutely insane, as tapping down a creature every turn can really shift the game in your favor.
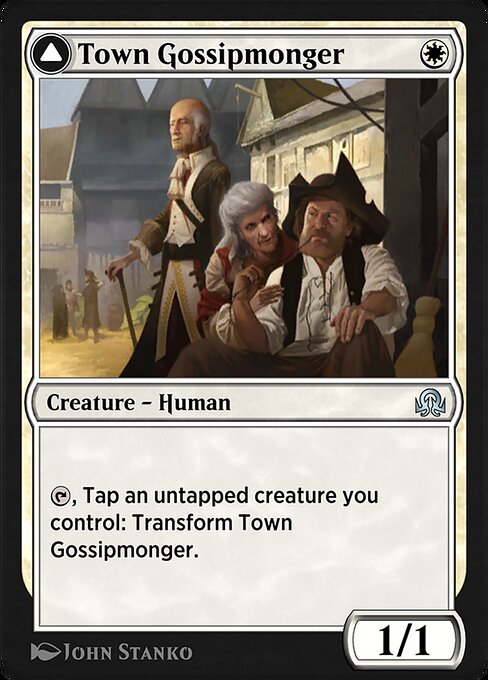
Town Gossipmonger
AI Rating: 3.8Pro Rating: 3.5
This is better than it looks. It is really easy to transform as early as turn two, and once it is Incited Rabble it is a really effective attacker, especially in the early game.
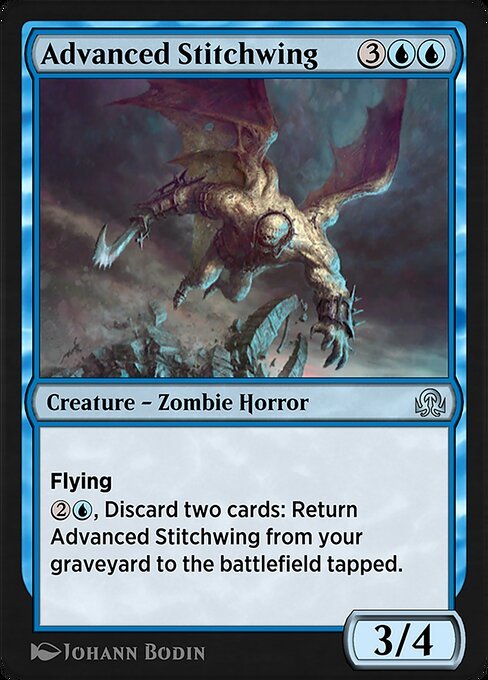
Advanced Stitchwing
AI Rating: 3.1Pro Rating: 3.5
This has decent base stats, and it is big enough that its ability to keep coming back from the graveyard is pretty great.
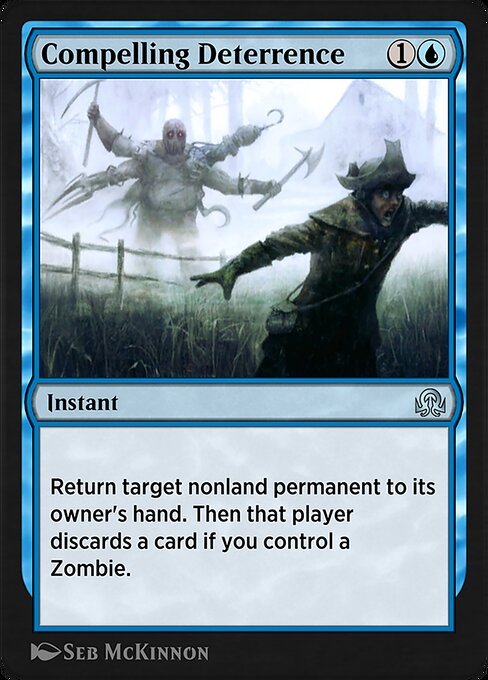
Compelling Deterrence
AI Rating: 2.4Pro Rating: 2.5
Two mana to bounce a non-land permanent is usually playable, especially in a format with a spell deck! The Zombie upside is nice too, especially in situations when your opponent has an empty hand, when this basically feels like Doom Blade!

Confirm Suspicions
AI Rating: 3.8Pro Rating: 1.5
Counter magic that is this expensive usually isn’t worth playing in Limited. The three clues are enough upside for this to make a cut in the most controlling decks, but you won’t play it most of the time.
Convolute
AI Rating: 1.5Pro Rating: 1.5
This is passable counter magic, and performs especially well in the early game, but the fact it gets worse the longer the game goes on is rough.
Curious Homunculus
AI Rating: 3.2Pro Rating: 3.5
This can help you ramp into some nice spells, and once it transforms it becomes a really problematic threat. Spell and graveyard decks are very real in the format, so transforming it is very doable.
Daring Sleuth
AI Rating: 2.9Pro Rating: 3.5
This starts with passable base stats, and transforming it is pretty easy in Blue. Once transformed, it is a creature your opponent really has to account for, since it can generate a ton of clues.
Deny Existence
AI Rating: 1.2Pro Rating: 2.0
Most decks have enough creatures for this to be playable, though it is always rough to try to use one of these when your opponent casts a noncreature spell.
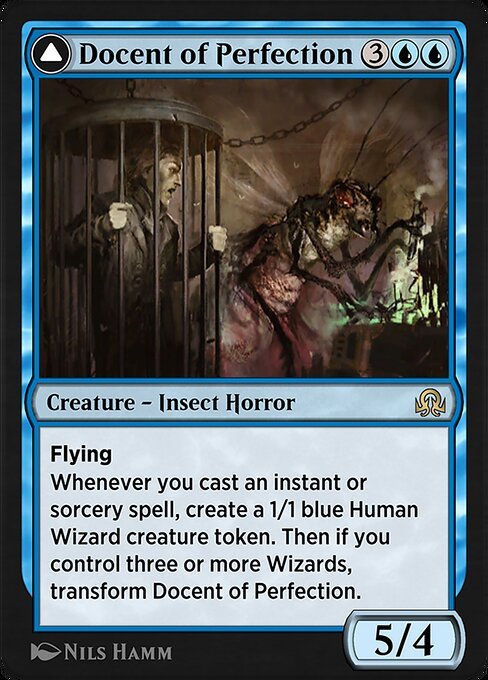
Docent of Perfection
AI Rating: 4.8Pro Rating: 5.0
A 5-mana 5/4 that spits out a token every time you cast a spell is already a bomb, so the fact that this transforms into an even larger creature that also buffs all of your Wizards is absolutely incredible.

Drag Under
AI Rating: 3Pro Rating: 2.5
Bouncing something at Sorcery speed and going down a card normally isn’t worth it. However, this replaces itself, which makes a really big difference! It means you still get the tempo but don’t go down a card, and there’s a spell deck in this format, so any spell that draws you a card already gets more value.
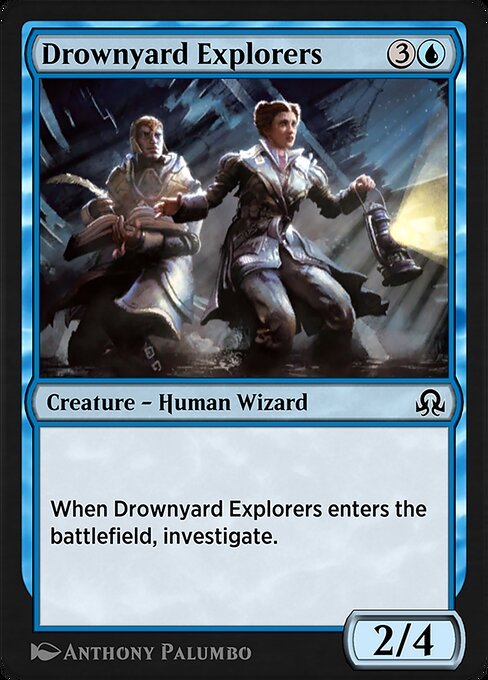
Drownyard Explorers
AI Rating: 1.7Pro Rating: 2.0
This has decent defensive stats, and eventually draws you a card. It is a fine card for the grindy Clue decks, though most other decks aren’t that interested.
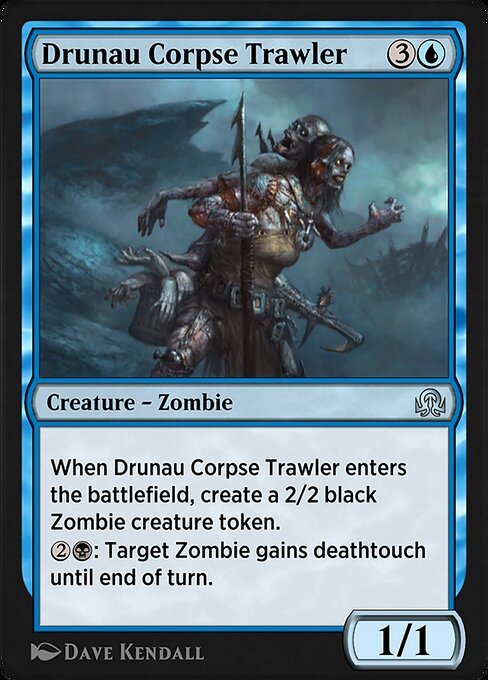
Drunau Corpse Trawler
AI Rating: 2.1Pro Rating: 3.5
Four mana for a 2/2 and a 1/1 isn’t a great rate – but the ability to give deathtouch to zombies is pretty nice. This gets a big upgrade from the fact that it is great to sacrifice to Emerge creatures, too.
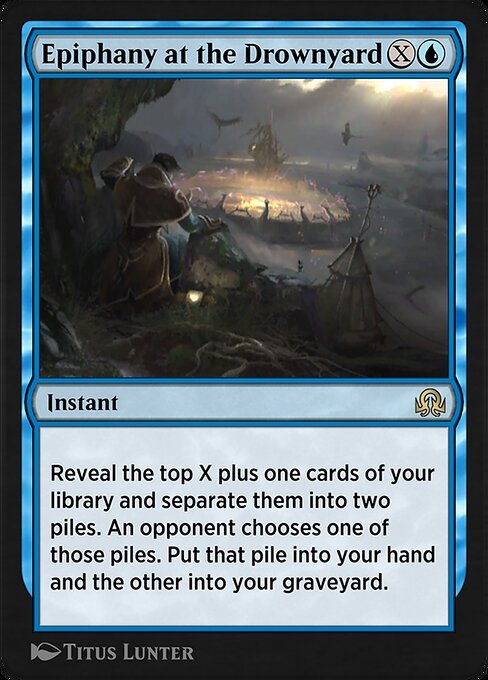
Epiphany at the Drownyard
AI Rating: 3.7Pro Rating: 3.0
This has the capacity to draw you a ton of cards and load your graveyard at Instant speed, and that’s never bad.
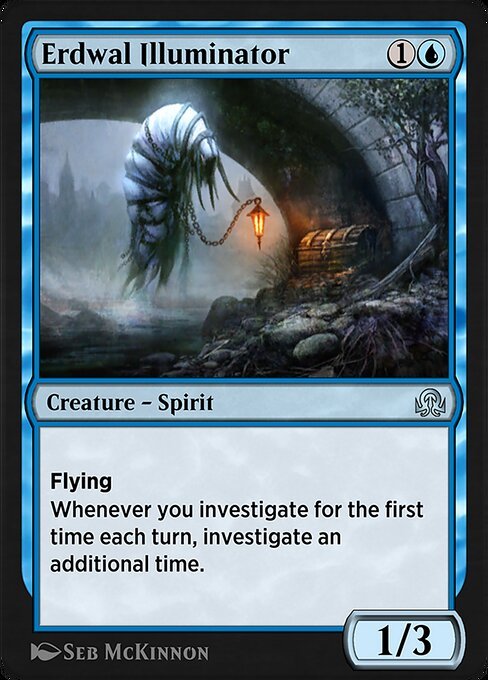
Erdwal Illuminator
AI Rating: 3.8Pro Rating: 3.5
Blue has a lot of ways to make Clues, so the Illuminator does a great job of generating extra value, which also having some pretty solid stats.
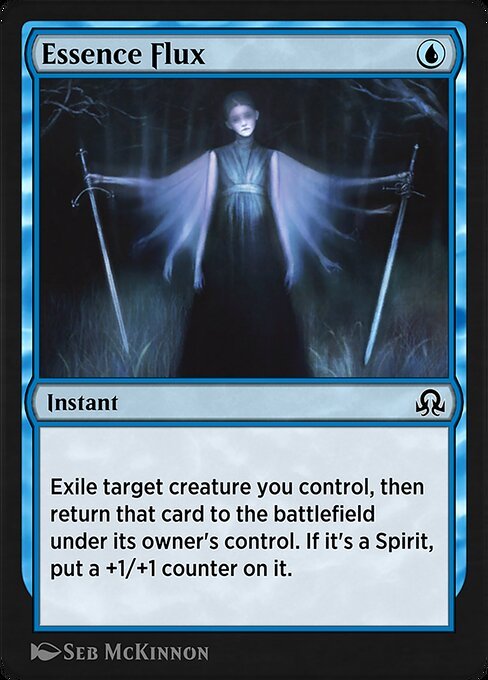
Essence Flux
AI Rating: 1.5Pro Rating: 0.0 // 2.5
The Blue-White Spirit deck has a blink/flicker sub-theme, as Essence Flux tells you. If you have enough Spirits with ETB abilities, this is playable. But there are many decks it doesn’t work out in, even Blue/White ones!
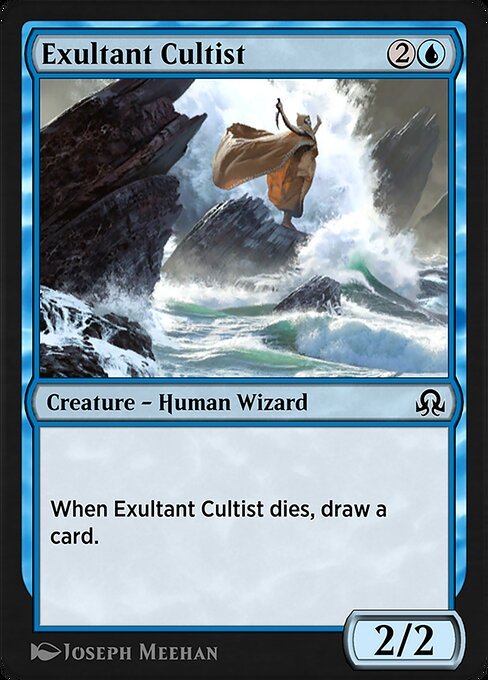
Exultant Cultist
AI Rating: 1.5Pro Rating: 2.5
This is good sacrifice fodder, and can be especially spicy with Emerge. Even in the absence of those things, the fact you can trade this off for a 2-for-1 feels pretty good.
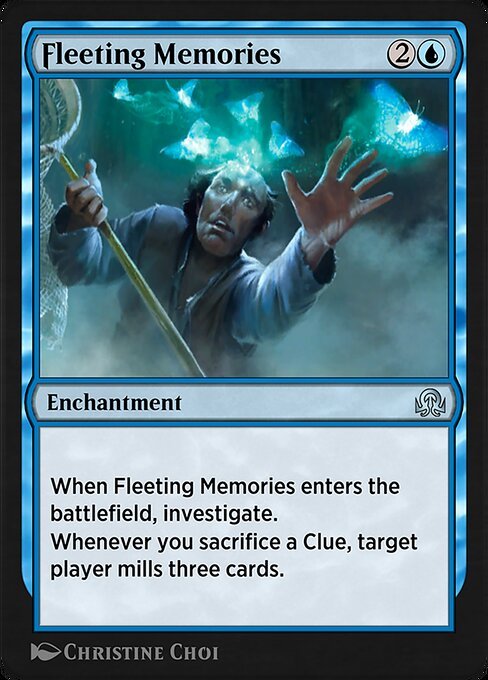
Fleeting Memories
AI Rating: 2.7Pro Rating: 1.0
Clues are good and all, but this isn’t a great format to try and mill your opponent out in. Several decks in this format want cards in their graveyard. Turning on their delirium and Flashback cards isn’t really something you want to be doing. There are some clue-heavy control decks where this can work out as a win condition, but you’re really playing with fire.
Fogwalker
AI Rating: 2Pro Rating: 2.5
This does not tap down a creature – keep that in mind! It only keeps it from untapping, so if the creature isn’t already tapped, its ETB ability doesn’t do anything. A two man ⅓ with Skulk is definitely difficult to block, though, and this even has a useful creature type.
Forgotten Creation
AI Rating: 3.6Pro Rating: 3.0
A 4-mana 3/3 isn’t great, and Skulk on a 3/3 is kind of funny – because it means there are lots of creatures that can effectively block it. Its ability to help you reload your hand can also be fairly situational and awkward, but if you’re given the time to set it up, pitching lands to draw extra cards is pretty good.

Geist of the Archives
AI Rating: 1.6Pro Rating: 3.0
This is surprisingly good. It can block lots of creatures in the format, and a free Scry every upkeep does a great job of improving the quality of your cards.
Geralf's Masterpiece
AI Rating: 4.3Pro Rating: 4.5
This is usually well-worth the five mana you spend, and the fact this massive zombie won’t stay dead often allows it to take over the game.
Imprisoned in the Moon
AI Rating: 2.1Pro Rating: 2.5
This was Rare last time, downshifting it to Common will have a pretty significant impact on the format. That said, it isn’t amazing removal in Limited. Giving your opponent extra mana isn’t great, but it is usually better than whatever their best creature is. Still, you don’t really feel like you get a full card of value when you play this.

Ingenious Skaab
AI Rating: 2.4Pro Rating: 3.5
This is an amazing common. If you took away its ability to change its stats OR Prowess, it would still be pretty high quality – but it has both! This is incredibly difficult to block, and it can hit really hard so that’s kind of a problem for your opponent.
Invasive Surgery
AI Rating: 0.7Pro Rating: 0.0
Yeah, no. This is far too narrow, even if you have Delirium active.
Jace, Unraveler of Secrets
AI Rating: 5Pro Rating: 4.0
This is a great planeswalker. If you’re behind, his bounce effect can help you out, and if you’re ahead his +1 will give you insurmountable card advantage.

Jace's Scrutiny
AI Rating: 1.9Pro Rating: 2.0
This is a little better than it might look at first, largely because the format has both a Spell deck and an Investigate deck. This ultimately replaces itself thanks to the Clue, and the -4/-0 can end up blanking an attack at worst, and sometimes you can even set up a really advantageous combat situation where your opponent actually loses a card.

Laboratory Brute
AI Rating: 0.9Pro Rating: 1.5
You want to be milling yourself in this format, but there are lots of better cards out there that can do the job.
Manic Scribe
AI Rating: 2.8Pro Rating: 2.0
This is another really awkward mill card. Milling can benefit your opponent enough in this format that going this route is highly questionable. That said, the Scribe is capable of milling the opponent out all on its own.
Mausoleum Wanderer
AI Rating: 3.8Pro Rating: 3.0
There are enough Spirits in the set for this to be pretty nice. It starts with decent evasive stats, and will often attack as a 2/2.
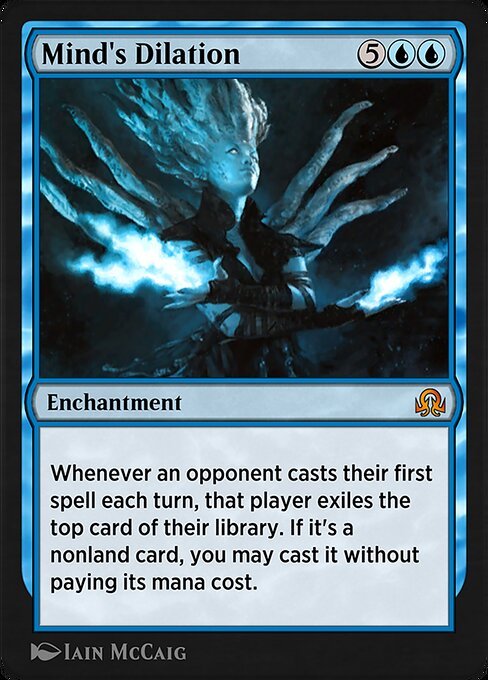
Mind's Dilation
AI Rating: 4.4Pro Rating: 0.0
This costs way too much, and with the average power level of cards in Limited, it is going to take awhile before you feel like you are getting your mana’s worth out of it.

Nebelgast Herald
AI Rating: 3.6Pro Rating: 3.5
On its own, this is a three mana 2/1 flyer that taps down an opposing creature. You would always play that, and this comes with the additional upside of making every spirit you control tap something down. This can really allow you to attack for tons of damage, especially in the air.
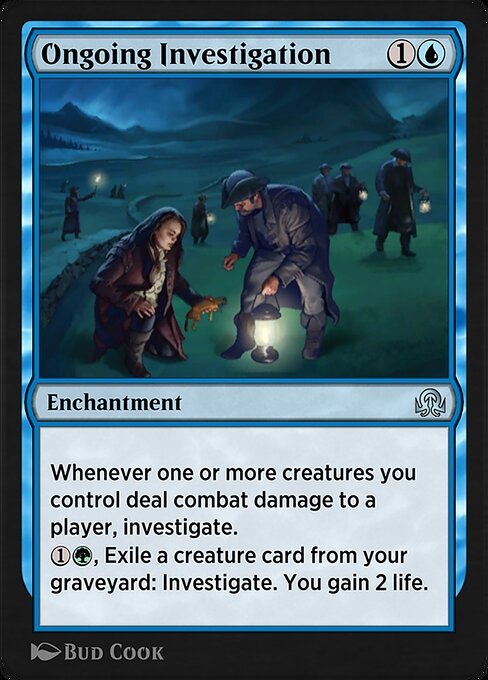
Ongoing Investigation
AI Rating: 3.5Pro Rating: 4.0
This is an amazing engine. Generating clues is great, and this gives you two separate ways to do that. If your graveyard is loaded up, you can get clues that way, and if you have a good board state, attacking will get you those clues. Pretty hard not to extract massive amounts of value out of this.
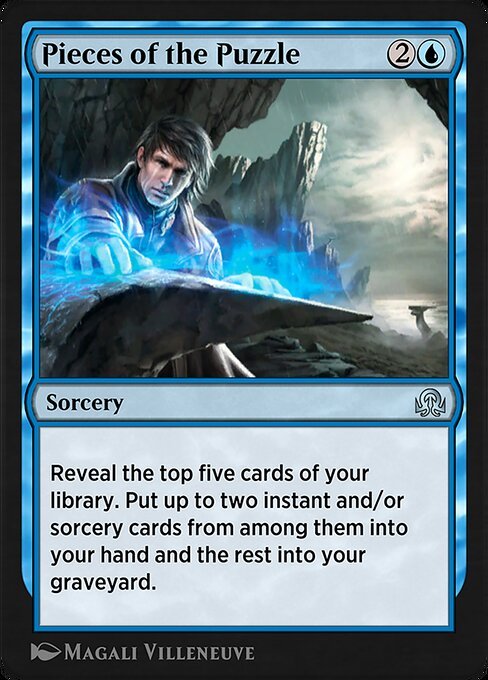
Pieces of the Puzzle
AI Rating: 2.6Pro Rating: 2.5
If your deck is spell heavy enough (so, mostly UR) this ends up being better than divination, especially because it loads your graveyard too! Outside of Blue-Red it becomes more questionable, though.
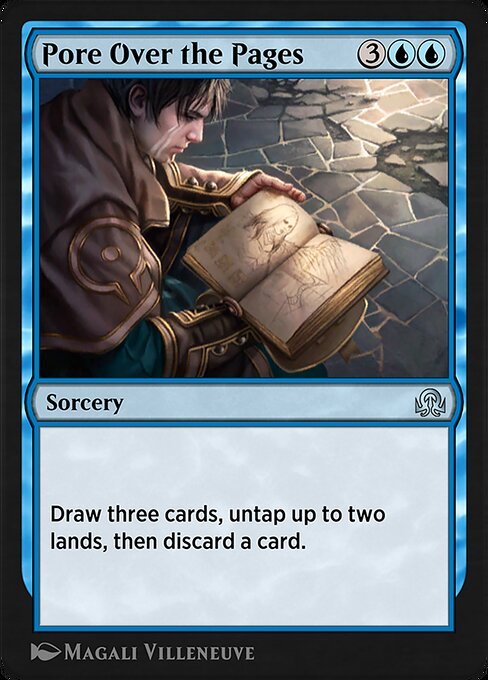
Pore Over the Pages
AI Rating: 2.6Pro Rating: 3.0
Paying 5 to draw 3 and discard a card isn’t amazing, but the fact this untapped two lands shouldn’t be overlooked. Most of the time, this allows you to add to the board thanks to the new cards you drew, making it much different than your typical sorcery speed draw spell.
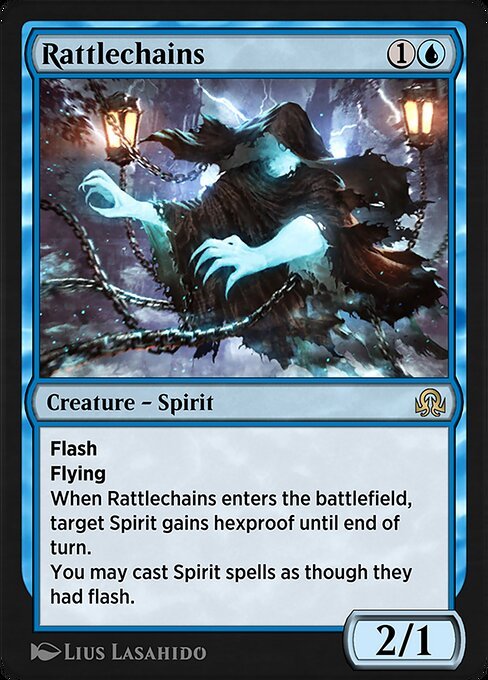
Rattlechains
AI Rating: 3.9Pro Rating: 4.0
This starts with great aggressive stats, and offers a significant upgrade to your spirits. It feels especially incredible when you flash this in to blank an opposing removal spell.
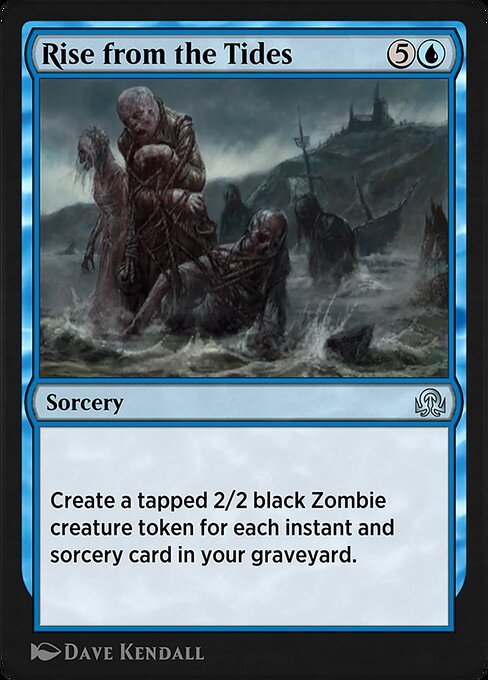
Rise from the Tides
AI Rating: 3.3Pro Rating: 0.0 // 3.5
This is a legit buildaround in the format. Milling yourself is a very real theme, as are Instants and Sorceries, so it isn’t uncommon for Rise from the Tides to work as a nice win condition in a Blue control deck. Obviously it is horrible in any deck that isn’t actually good at both of those things, but the ceiling here is very high.
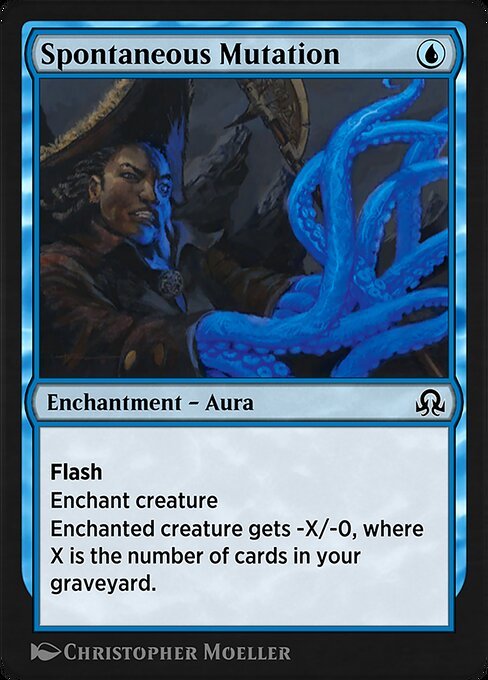
Spontaneous Mutation
AI Rating: 1.8Pro Rating: 1.5
Like most -X/-0 Auras, this isn’t very good – even with Flash! It doesn’t get close enough to removing an entire card to feel like its worth it. It does get a small boost because of all the Prowess in the set, but you’re still hoping to play something better.
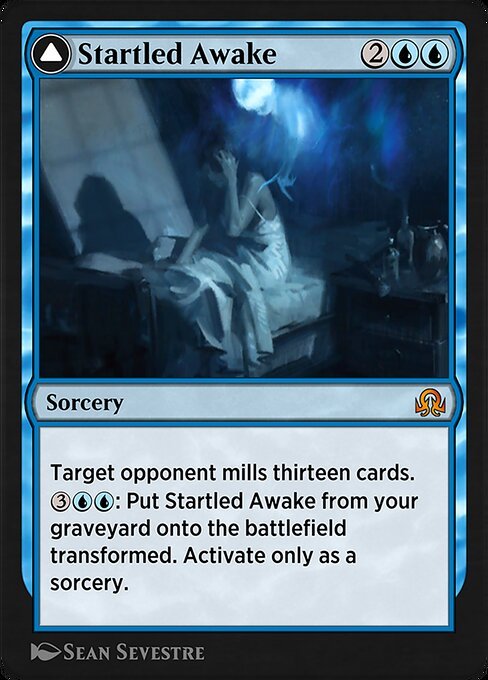
Startled Awake
AI Rating: 5Pro Rating: 3.0
This is really slow, but it is actually a legitimate win condition. Milling your opponent’s stuff can definitely backfire in a format with Delirium and other graveyard stuff, but milling thirteen at a time stands a good chance of finishing your opponent off before it matters too much. You certainly need to be a good control deck to make it work, so keep that in mind.
Stormrider Spirit
AI Rating: 1.3Pro Rating: 2.0
The Spirit decks in this format have lots of cards that let them operate at instant speed, so this having Flash works pretty well. You can leave up counter magic and removal, and if you don’t need it, add a very real body to the board. You can of course also Flash it in and ambush block stuff, which can feel pretty great.
Summary Dismissal
AI Rating: 3Pro Rating: 1.5
The stack doesn’t usually get very large in Limited, so this is mostly just a 4-mana counterspell that can go after abilities as well as spells. That’s not great.

Take Inventory
AI Rating: 3Pro Rating: 1.0 // 3.5
This card can get really silly, especially in Blue-Red decks that can generate awesome value from spells that draw cards. Obviously, you want to get multiples of these, so that they can scale as the game goes on. Even if you only have two, you probably play them – and if you end up with 4+, it feels amazing.
Tattered Haunter
AI Rating: 2.2Pro Rating: 2.0
This is a reasonable two-drop, though it does suffer from the fact that it is awful against the format’s flying tokens.
Thing in the Ice
AI Rating: 4.7Pro Rating: 4.0
There’s a well-supported spell deck in this format, so flipping this is fairly doable. It takes awhile to get there of course, but paying two mana for a 7/8 that bounces a bunch of stuff is a great deal! This format does have a lot of Horrors, though, so sometimes you won’t bounce everything.
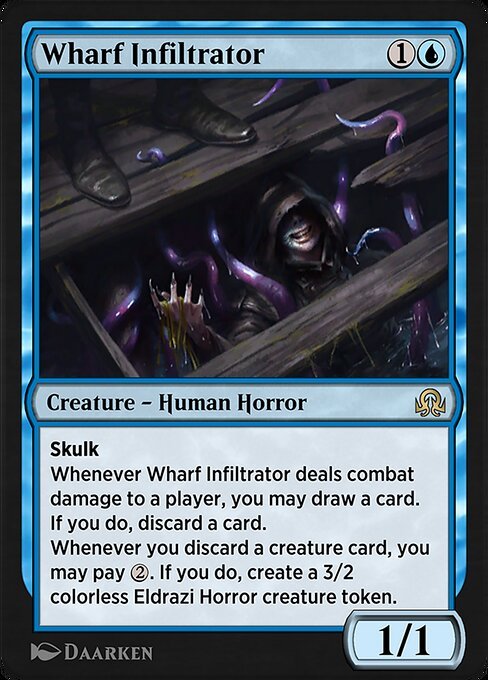
Wharf Infiltrator
AI Rating: 4.2Pro Rating: 3.5
This is difficult to block, so its pretty great that you get to loot when it hits your opponent, and you can even discard creature cards to the loot effect and still add a 3/2 to the board – which is a pretty great deal for two mana.
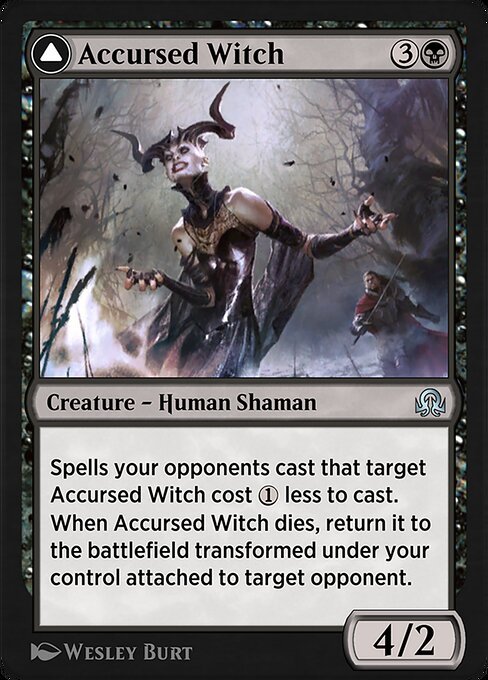
Accursed Witch
AI Rating: 3.9Pro Rating: 3.5
This hits hard, can trade for many things, and when it dies it becomes a serious problem for your opponent. As a curse, it drains your opponent 1 life every upkeep, which really snowballs. It is especially nasty to sacrifice this to cast something with Emerge!
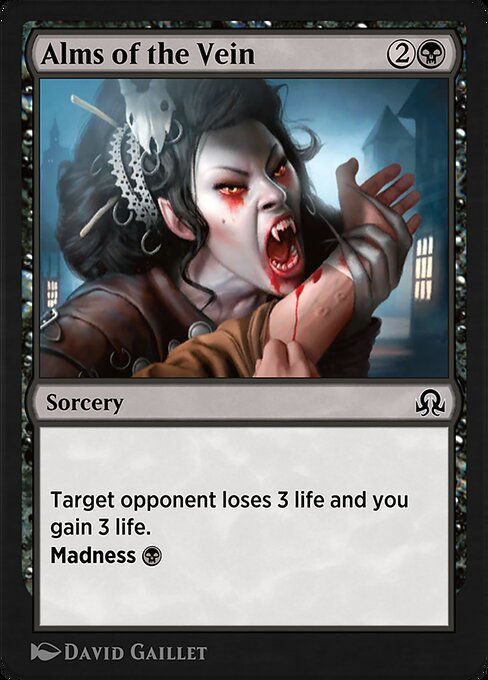
Alms of the Vein
AI Rating: 1Pro Rating: 1.0
Even if you can consistently cast this for its Madness cost, Alms of the Vein is fairly disappointing. The six point life swing is nice, but doesn’t feel worth a card most of the time.
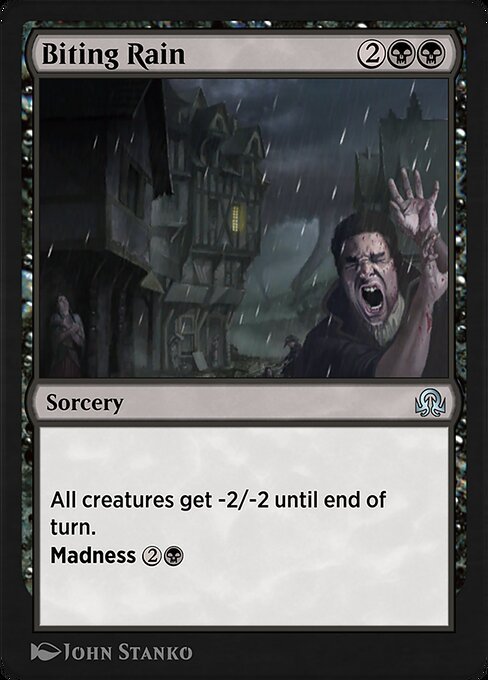
Biting Rain
AI Rating: 3.1Pro Rating: 2.5
If you’re going to end up in a control deck, Biting Rain is a nice inclusion, as it does a great job of keeping aggro decks in check. Obviously, if you’re an aggro deck, you don’t want this.
Borrowed Malevolence
AI Rating: 1.6Pro Rating: 2.0
This doesn’t feel amazing no matter how you cast it. If you can Escalate it, the boost it offers your creature and the -1/-1 it gives an opponent’s can be pretty nice, but three mana is steep enough that I don’t love this.
Call the Bloodline
AI Rating: 2.8Pro Rating: 0.0 // 3.0
In the right deck, this can be very powerful! There is a lot of Madness in this set, especially in Black-Red, and this is one of the best ways to get Madness going, since it also lets you add a very real body to the board.
Certain Death
AI Rating: 1.6Pro Rating: 2.5
This is certainly clunky, but it deals with anything and drains 2 life, which helps offset how expensive it is.
Collective Brutality
AI Rating: 4.7Pro Rating: 3.5
The -2/-2 mode is a solid removal spell, so having the option to gain access to the other two modes is great – especially because discarding cards can be so good in this format.
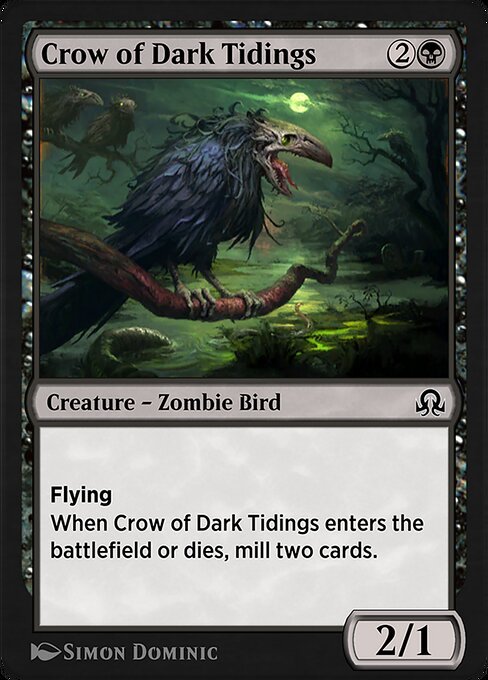
Crow of Dark Tidings
AI Rating: 1.6Pro Rating: 3.0
This is a great card for getting Delirium going, and that’s definitely something you want to be doing – especially in Black/Green and Black/White. It even attacks in the air quite effectively!
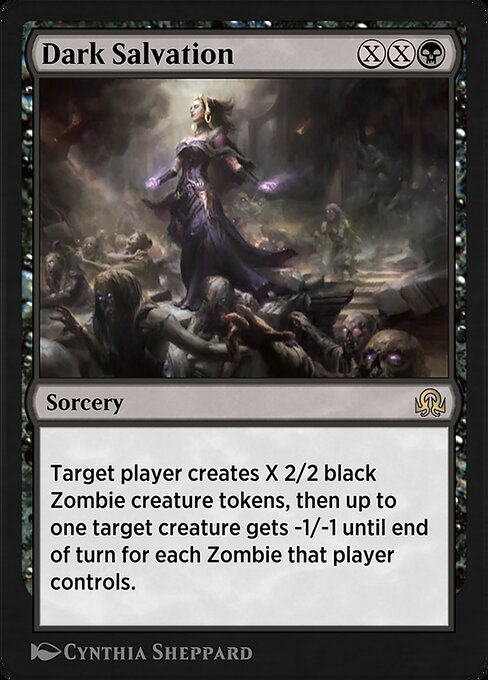
Dark Salvation
AI Rating: 4.6Pro Rating: 5.0
Even if your deck has 0 other zombies, this is really strong. If you pay 2 for X, it means you pay 5 total mana for two 2/2s and give -2/-2 to an opposing creature. That’s amazing value, and this gets even better if you can pump more mana into it and/or you have more Zombies lying around.
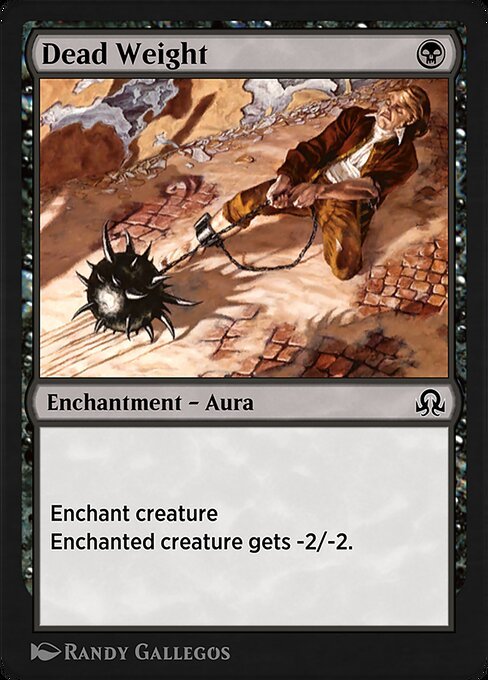
Dead Weight
AI Rating: 3.5Pro Rating: 3.5
This is premium removal, kills many things for only one mana. It is also a little better than normal in this format because of Delirium.
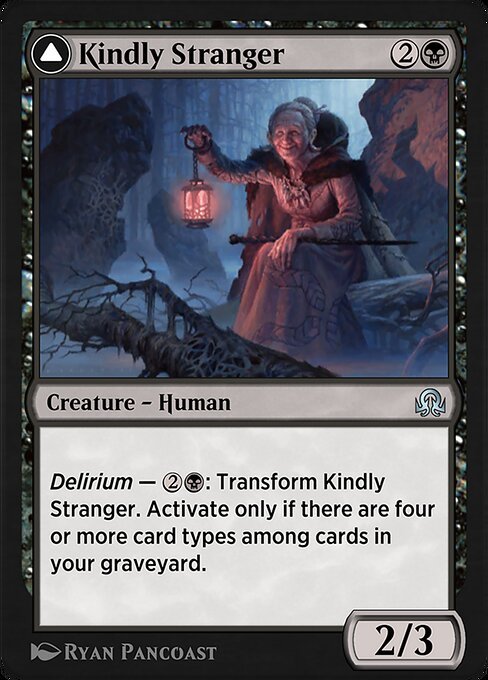
Kindly Stranger
AI Rating: 3.6Pro Rating: 4.0
If Delirium is online, this is basically a 6-mana 4/3 that destroys a creature when it enters the battlefield. That’s insanely strong! Now, it does take some set up, and sometimes you don’t have six mana to do it all at once, but either way, the Stranger is very powerful.
Diregraf Colossus
AI Rating: 4.3Pro Rating: 4.0
You have to be a heavy Zombie deck to unlock this card’s full potential, but once you’re there this is great. It is especially nice that you get a payoff whether or not you play it before or after all of your other Zombies.
Dusk Feaster
AI Rating: 2.1Pro Rating: 2.5
This is pretty bad if you can’t get delirium going. The good news is, by the time you’re going to want to cast this, you’re pretty likely to have it in a deck like Black-Green. At that point, it is a 5-mana ⅘ Flyer – which is pretty nice!
Ever After
AI Rating: 5Pro Rating: 3.0
Loading the graveyard is pretty easy in this format, and because this can reanimate two things, you have a pretty reasonable chance to bring back 6+ mana worth of cards.
Gavony Unhallowed
AI Rating: 1.2Pro Rating: 2.0
This starts with some pretty bad stats, but it can definitely grow in this format, especially in a deck like Black-White, which has a substantial amount of Sacrifice stuff.
Ghoulcaller's Accomplice
AI Rating: 1.8Pro Rating: 3.0
This has solid base stats, and the fact you can get a Zombie out of it from the graveyard is great! Obviously, the rate on that second body isn’t amazing, but card advantage is card advantage. It also means you can discard or mill this and still get some nice value out of it.
Gisa's Bidding
AI Rating: 2.9Pro Rating: 3.5
This is great, it was an Uncommon last time, so downshifting it to Common is pretty spicy. Without Madness, it is a passable rate. With Madness it is downright nasty. Three mana for two 2/2s at Instant speed is a great rate. Casting this for its Madness cost is very doable, too.

Graf Harvest
AI Rating: 1.5Pro Rating: 2.0
Menace to Zombies upgrades a decent number of board states, and this isn’t a bad mana sink either.
Graf Rats
AI Rating: 1.4Pro Rating: 1.0
You don’t play this unless you’re very desperate for a two drop or you have Midnight Scavengers.
Grotesque Mutation
AI Rating: 1.4Pro Rating: 2.0
This is a decent trick. While the small toughness boost isn’t going to always keep your creature alive, the lifelink can really alter a race in your favor.
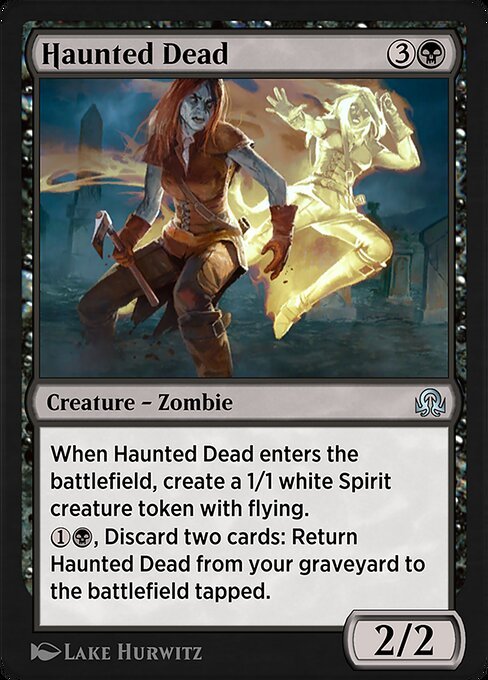
Haunted Dead
AI Rating: 3.9Pro Rating: 3.5
4-mana for a 2/2 and a 1/1 Flyer is decent, and this can keep coming back from your graveyard! Discarding two cards might sound steep, but in this format, you can get a ton of upside out of discarding cards.
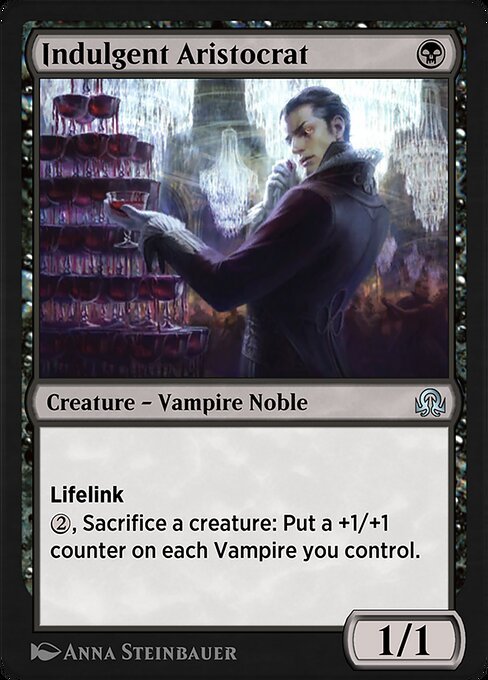
Indulgent Aristocrat
AI Rating: 3.3Pro Rating: 3.5
This is a great Vampire payoff. It is a bit awkward sometimes that you have to sacrifice something to put the counters on your creatures, but if you’ve got enough Vampires in play that is well worth the price.
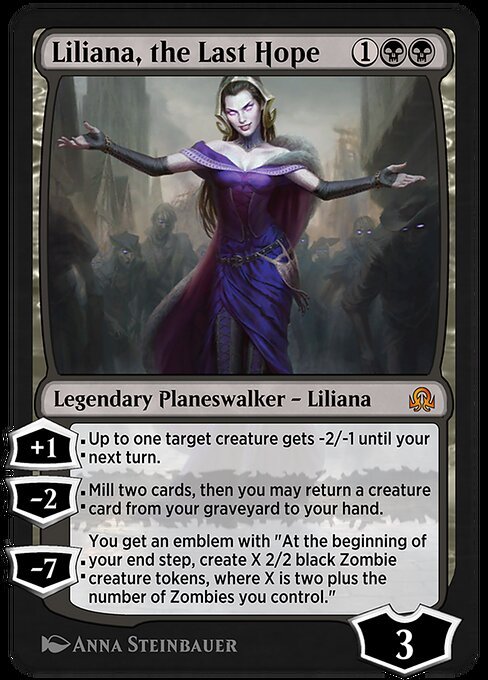
Liliana, the Last Hope
AI Rating: 5Pro Rating: 4.0
If you play her on turn three, she will often allow you to run away with the game. You’ll often use her +1 to kill your opponent’s only creature, and then start alternating between her -2 and the +1. She is great for loading your graveyard in a format where that really matters, and she grants some real card advantage too.
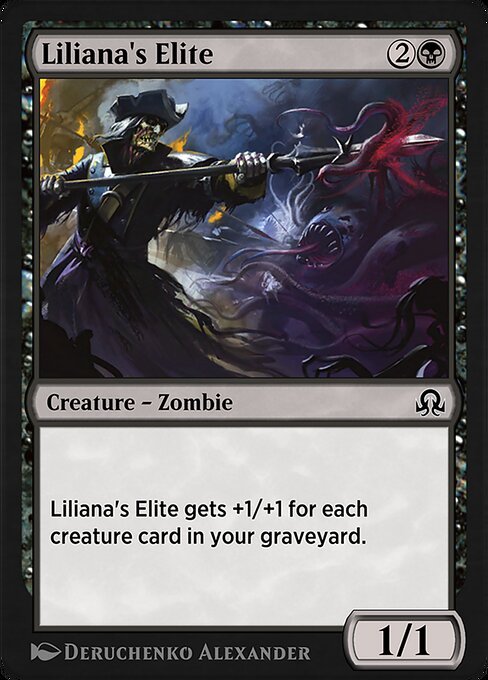
Liliana's Elite
AI Rating: 1.1Pro Rating: 1.5
Even in this graveyard-centric format, Liliana’s Elite often isn’t worth it. The upside here is that it is a large vanilla creature, and the downside is that it is awful in the early game, and mediocre in the mid-game.
Macabre Waltz
AI Rating: 2Pro Rating: 2.5
You want one of these in virtually every Black deck. It is great at bringing back your best creatures, and it can even help you load the graveyard!
Merciless Resolve
AI Rating: 0.8Pro Rating: 1.5
There are some expendable bodies in this format for sure, and the fact you can sacrifice a land is nice. But this is still fairly clunky for the effect, which often amounts to you breaking even on cards. That’s not especially exciting.
Midnight Scavengers
AI Rating: 3.3Pro Rating: 2.5
This can give you a pretty nice 2-for-1, and if you have Graf Rats in your deck it has the potential to become an incredibly scary creature.
Mindwrack Demon
AI Rating: 5Pro Rating: 4.5
A 4-mana ⅘ with Flying and Trample can end the game in a hurry, and it even helps you load your graveyard. And that’s important, because if you don’t have Delirium online the Demon can backfire! The good news is, in most decks milling four cards on turn 4 is likely to get you pretty close to Delirium, if not entirely there.
Morkrut Necropod
AI Rating: 0.5Pro Rating: 2.5
This is a pretty scary creature. A 7/7 with Menace is a real pain to block! It does come with a pretty big downside, but giving up expendable creatures or lands to swing with this thing isn’t too shabby.
Noosegraf Mob
AI Rating: 4.8Pro Rating: 4.0
This is a strange card that would normally be really hard to evaluate – but luckily this is a reprint set, and I’ve played with this card a lot! It is a 6-mana 5/5 that shrinks and spits out a 2/2 any time a player casts a spell. The end result is often 6 mana for 6 2/2s, which is a rate you would always pay. It also means that it is hard for your opponent to remove profitably, because they end up giving you at least one 2/2 when they target it.
Olivia's Bloodsworn
AI Rating: 3.4Pro Rating: 3.5
On its own, this is a two mana 2/1 Flyer that can give itself Haste, but if you’re in Black-Red you’re going to have plenty of other Vampires around.
Olivia's Dragoon
AI Rating: 2.8Pro Rating: 3.0
This card would be solid in any format, but in this one it is even better! It has a useful creature type and can help you get Delirium and Madness cards going.
Pick the Brain
AI Rating: 1.5Pro Rating: 0.5
Yeah, Coercion is never worth it in Limited, and the Delirium upside here may as well be flavor text.
Relentless Dead
AI Rating: 4.6Pro Rating: 4.0
This packs a lot of power for a two drop! A 2/2 Menace is already something you should be on board with, so the fact it can keep coming back to your hand and it can reanimate zombies from your graveyard is awesome additional upside.
Rise from the Grave
AI Rating: 2.4Pro Rating: 2.0
Most decks will have loaded graveyards in this format, so this card overperforms a bit. It still doesn’t always have a good target, though.

Ruthless Disposal
AI Rating: 1.8Pro Rating: 2.5
This can definitely kill some stuff, but because it asks for so much, the end result is often still a 3-for-2, which isn’t exactly amazing. Now, if you have good sacrifice fodder and cards you want to discard anyway, you can offset the downside. This has a high ceiling, but also a miserable floor.
Sanitarium Skeleton
AI Rating: 1Pro Rating: 1.0 // 2.5
If you need sacrifice fodder, this is pretty nice. If you don’t, you aren’t playing it.
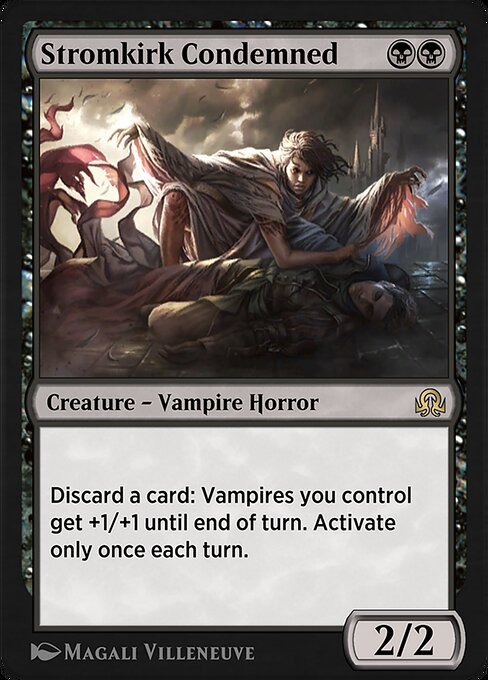
Stromkirk Condemned
AI Rating: 5Pro Rating: 3.5
On its own, this is a two mana 2/2 that can buff itself by discarding a card, and if you’re in Black you’re likely to have a bunch of Vampires, cards with Delirium, and cards with Madness – and this works great with all of that.
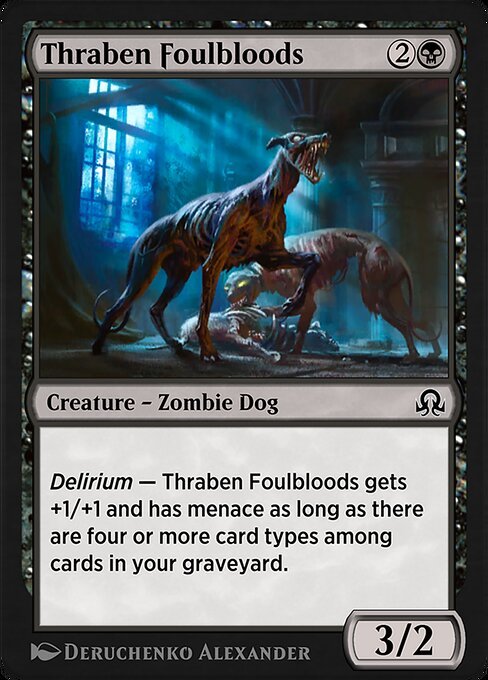
Thraben Foulbloods
AI Rating: 1.4Pro Rating: 2.5
A three mana 3/2 isn’t very good, but a three mana 4/3 with Menace is! Delirium is very accessible too, though you won’t usually have it when you’re playing this on turn three.
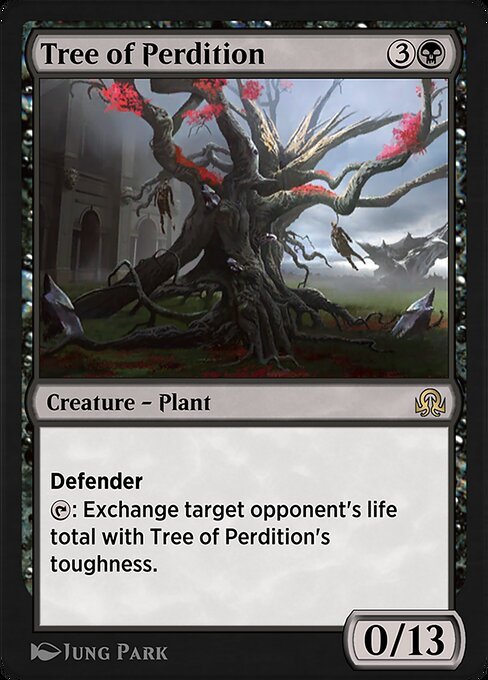
Tree of Perdition
AI Rating: 1.9Pro Rating: 1.5
A 0/13 can block most things, and the ability can definitely be useful sometimes – but if your opponent has more than 13 life it doesn’t do a whole lot.
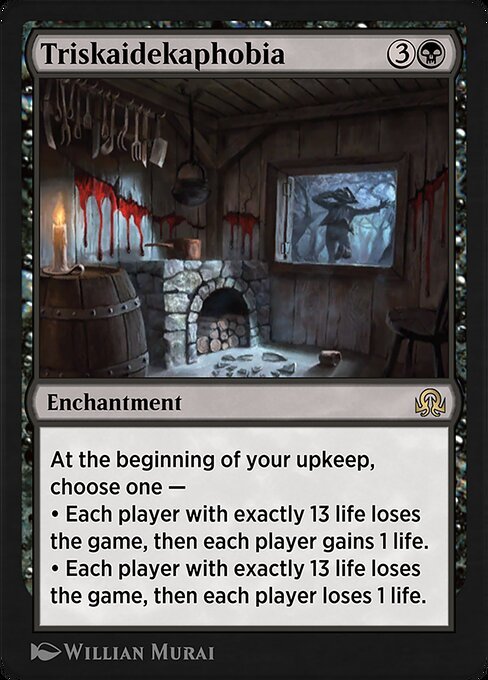
Triskaidekaphobia
AI Rating: 3.2Pro Rating: 2.0
Believe it or not, this is better than it looks! The fact you can manipulate life totals until they line up just right means you can actually get this alternate win condition to work. Now, it still isn’t an amazing card, but at first glance it looks unplayable. It is a passable win condition in control decks, and a lot of fun!
Voldaren Pariah
AI Rating: 4.8Pro Rating: 4.0
A 5-mana 3/3 Flyer with Madness isn’t too bad, but the Pariah’s ability to transform is what makes it truly frightening. It becomes a 6/5 Flyer that makes your opponent sacrifice three creatures! You sacrificing three of your own creatures to get there can be a big ask, but the fact you can do it at instant speed makes it easier than you might think.
Weirded Vampire
AI Rating: 1.9Pro Rating: 1.5
This is bad if you don’t cast it with Madness, and mediocre when you do.
Alchemist's Greeting
AI Rating: 3.4Pro Rating: 3.0
If you’re only casting this normally, it is clunky as heck. If you have enough discard outlets though, it becomes a premium removal spell.
Assembled Alphas
AI Rating: 4.5Pro Rating: 3.0
A six-mana 5/5 isn’t particularly good, but it does punish your opponent fairly harshly for blocking it! It is effectively impossible to block by anything with less than 3 toughness, and no matter what the Alphas do make sure to do some damage in the process. That said, the situations where you can’t attack feel pretty bad with this thing, since it isn’t a particularly good blocker.
Avacyn's Judgment
AI Rating: 3.7Pro Rating: 4.0
Even if you have no discard outlets, this is a nice removal spell. It can take down one X/2 or a couple of X/1s. If you have discard outlets this gets really crazy, as it becomes an instant speed version of Blaze that lets you divide damage however you want, which is amazing.
Bedlam Reveler
AI Rating: 4.3Pro Rating: 3.5
If you’re a spell-heavy deck, this is quite powerful. The big downside the card has is that you don’t really want to cast it while you still have a significant number of cards in your hand. But the good news is, by the time you can actually cast this, you probably need to reload your hand anyway.
Blood Mist
AI Rating: 2.1Pro Rating: 0.0
This is bad. It isn’t worth the mana or the card. Double strike on one creature can sometimes be pretty sweet, but the fact it only works on one creature and only on your turn is rough. You basically already need a really good creature or this is irrelevant.
Bloodmad Vampire
AI Rating: 2.2Pro Rating: 2.5
A three-mana 4/1 isn’t a terrible rate for an aggro deck, and this has big upside! Sometimes you can cast it for two, and it gets bigger when it gets in for a hit. Madness increases your chance of making that happen, too, since you can effectively flash it in at the end of your opponent’s turn sometimes.
Borrowed Hostility
AI Rating: 1.1Pro Rating: 0.0
This is bad. It is a build-your-own Sure Strike, except it costs twice the mana – and it isn’t like Sure Strike is that impressive to begin with.
Burn from Within
AI Rating: 4.3Pro Rating: 4.0
X spells like this are usually not ever efficient, but the fact they scale all game long is quite powerful! You can finish your opponent off with it, and if you have enough mana, it can deal with anything!
Collective Defiance
AI Rating: 4.5Pro Rating: 4.0
A three mana sorcery that does 4 to a creature is a premium removal spell, so the fact you can pump more mana into this to get the other two modes is really good.
Conduit of Storms
AI Rating: 2.6Pro Rating: 3.0
A three mana ⅔ that gives you a mana every time it attacks isn’t too bad, and this can transform into a fairly impressive Eldrazi Werewolf.
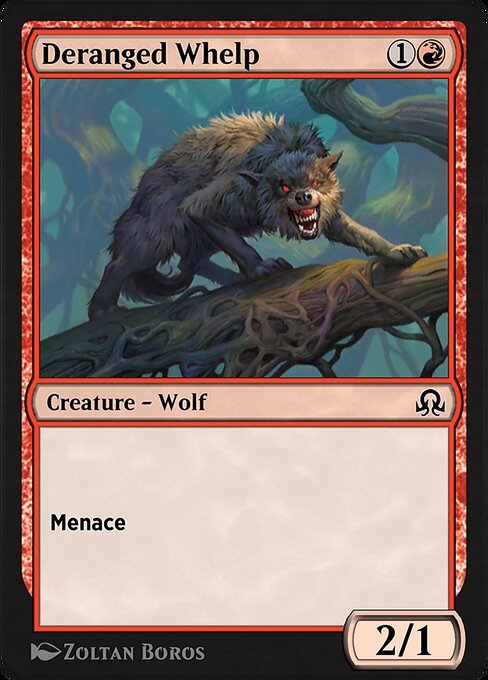
Deranged Whelp
AI Rating: 2.7Pro Rating: 2.5
This is a solid little two-drop and it has a useful creature type.
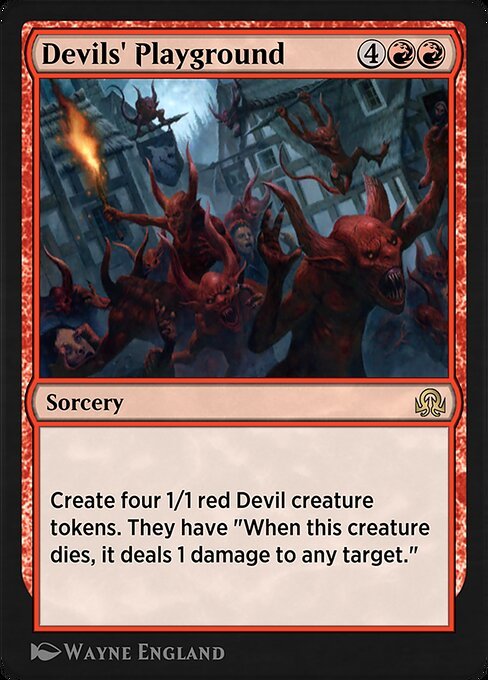
Devils' Playground
AI Rating: 3.9Pro Rating: 3.5
Devil tokens are incredibly obnoxious because they ping things when you die, and this gives you four of them. This often makes it impossible for your opponent to attack you, and gives you a fairly impressive Devil army that is also hard to block.
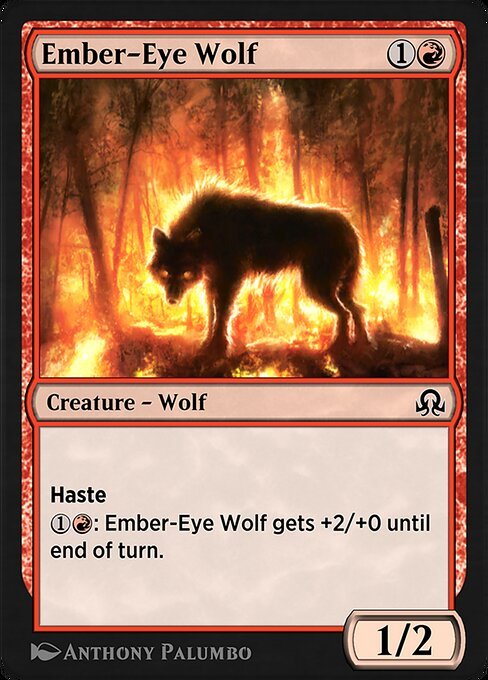
Ember-Eye Wolf
AI Rating: 1.7Pro Rating: 2.5
This overperformed last time. A lot of the time, this sort of creature that can buff its power for mana isn’t very impressive, because you end up having to spend a lot of mana just to make it trade. However, adding Haste to the mix, along with a useful creature type, makes a significant difference. This even has a bit of Fireball potential in the late game.
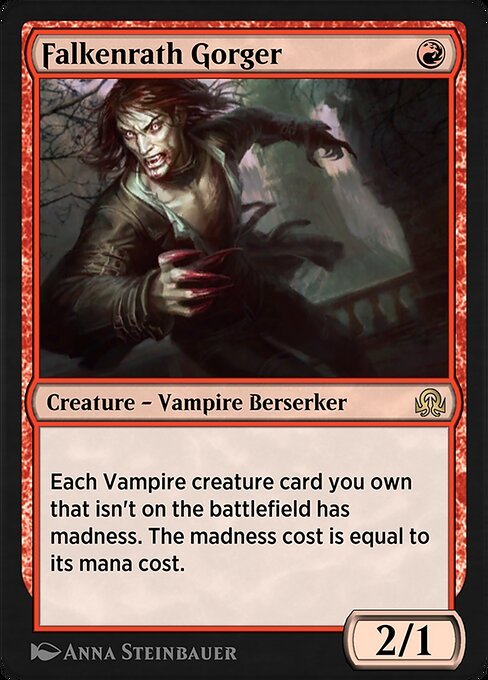
Falkenrath Gorger
AI Rating: 4.3Pro Rating: 2.5
Black/Red is already loaded up with Vampires and discard outlets, so the Gorger giving all of your Vampires Madness actually comes up. That said, many vampires in the set already have Madness, so it isn’t always going to do something. Still, it is a one mana 2/1 with upside – hard to go wrong there.
Fiery Temper
AI Rating: 4.1Pro Rating: 4.0
Even without Madness this would be a great Common, with Madness, which basically gives it the potential to be Lightning Bolt, it is one of the best Commons in the set.
Flameblade Angel
AI Rating: 4.8Pro Rating: 3.0
A 6-mana 4/4 Flyer isn’t amazing, but there’s some upside here. Pinging your opponent any time you or your creatures take damage can really complicate things for your opponent, as they have to be very careful if there life is even remotely low.
Furyblade Vampire
AI Rating: 3.6Pro Rating: 2.5
It is a bit of a bummer that you have to discard the card at the beginning of combat in this case, because it makes it harder to pull off Madness shenanigans, but this is often a two mana 4/2 with Trample that helps you cast things for their reduced Madness costs.
Galvanic Bombardment
AI Rating: 3.6Pro Rating: 2.5 // 4.0
You’ll always play this even if you only have one copy, and it becomes far better the more copies you have. If you have 4+, it becomes one of the best cards in your deck.
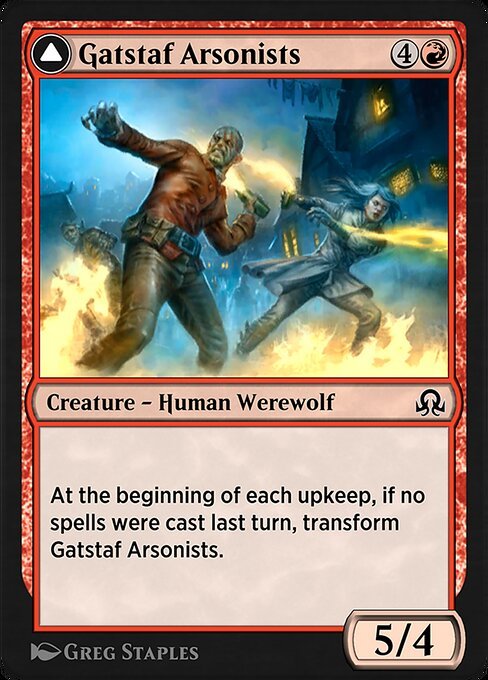
Gatstaf Arsonists
AI Rating: 2Pro Rating: 2.5
This is a solid finisher. A 5-mana 5/4 is obviously not great, but a 5-mana 6/5 with Menace? Yeah, that closes out a lot of games.
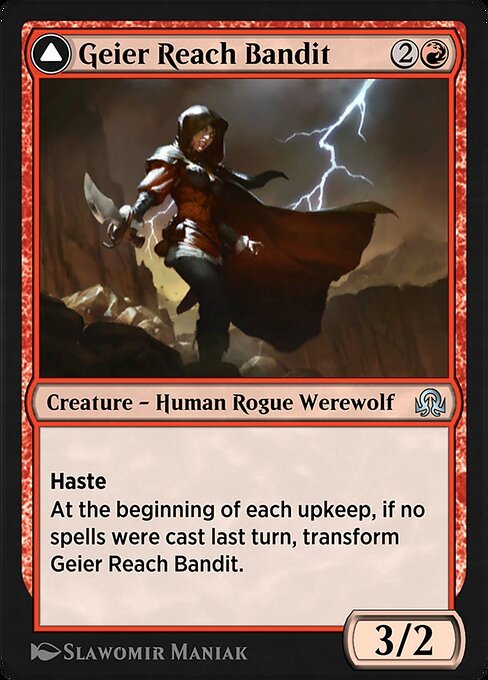
Geier Reach Bandit
AI Rating: 3.8Pro Rating: 4.0
A three mana 3/2 with Haste is a great starting point, and when this transforms it not only gets +1/+1 – it also makes it so all of your werewolves immediately transform when they enter the battlefield, which is a pretty big upgrade.
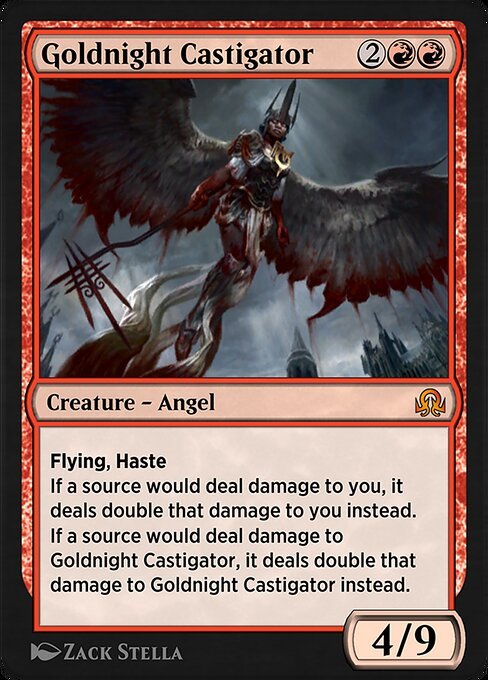
Goldnight Castigator
AI Rating: 4.2Pro Rating: 2.0
This is better than it looks! That’s not to say it is good, but I think most people will look at this and think it is unplayable, but it isn’t. A 4-mana 4/9 with Haste can very quickly close out a game and is incredibly difficult to kill. The downside is massive of course, but the upside is worth the risk in some decks.
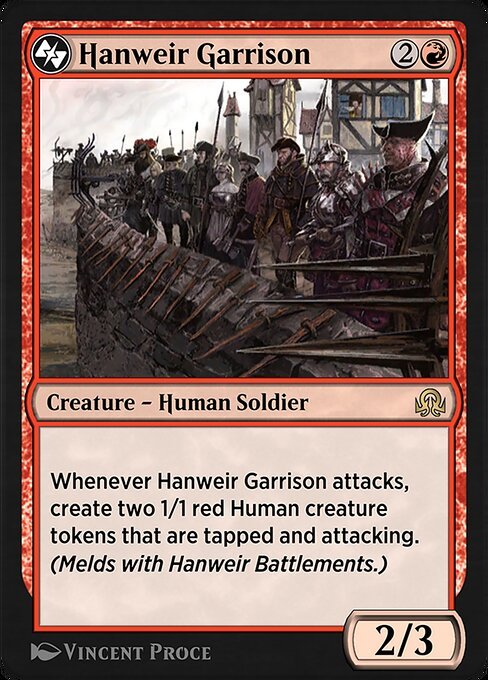
Hanweir Garrison
AI Rating: 4.7Pro Rating: 3.5
If this can attack even once, it ends up giving you pretty absurd value! It isn’t always able to attack, since its only a ⅔, but it can do it often enough that its pretty great.
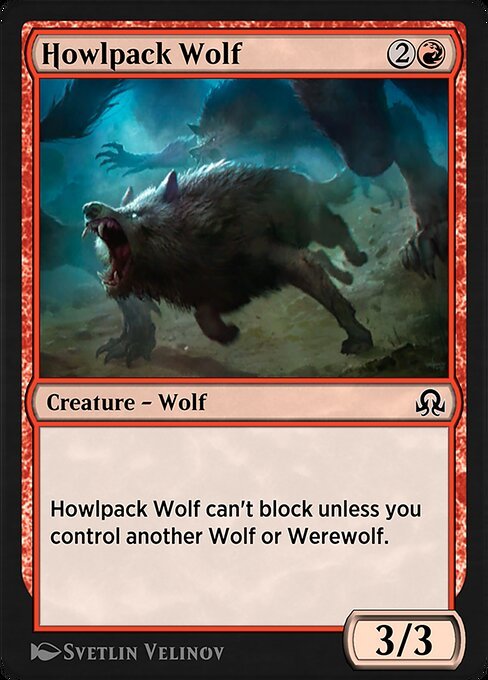
Howlpack Wolf
AI Rating: 1.6Pro Rating: 2.0
This has decent stats, and if you're in Red/Green it basically has no downside.
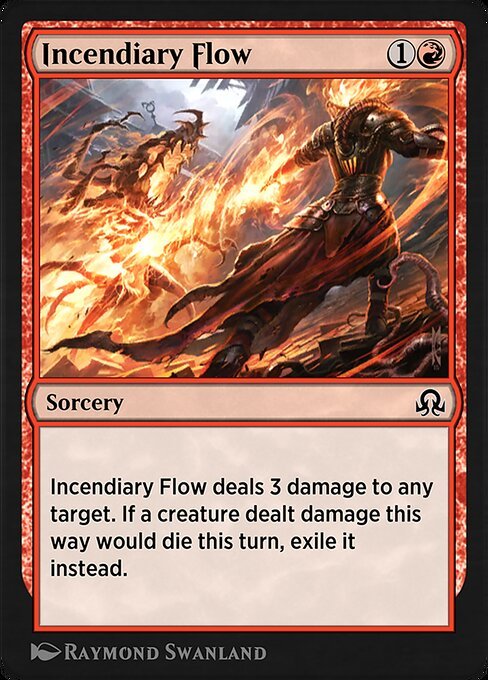
Incendiary Flow
AI Rating: 4.1Pro Rating: 4.0
Two mana to do 3 to a creature is always premium removal, and this has exile upside that really matters.
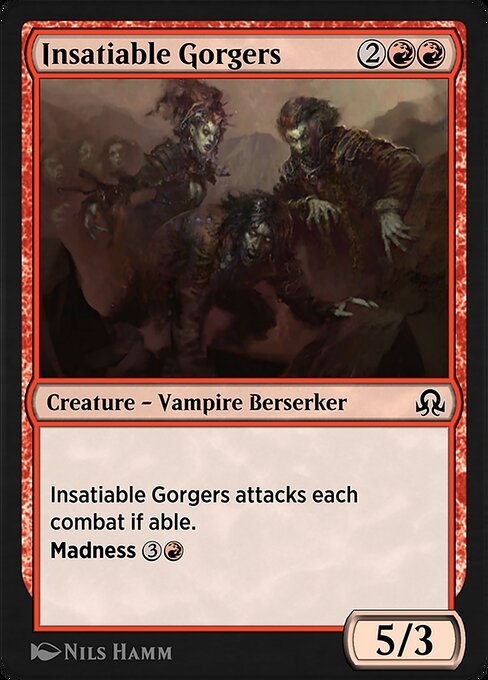
Insatiable Gorgers
AI Rating: 1.9Pro Rating: 2.5
A 4-mana 5/3 isn’t too bad, even if it has to always attack, and the Madness upside is nice to have.
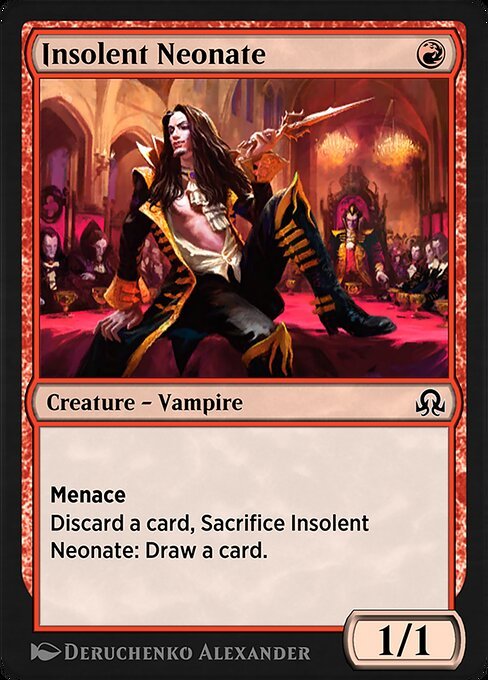
Insolent Neonate
AI Rating: 2.2Pro Rating: 2.5
This is a solid one drop that can chip in for some nice damage early, and then cash itself in for a card later in the game.
Lightning Axe
AI Rating: 3.9Pro Rating: 3.5
There’s lots of stuff in this format that you want to be discarding, and you will often find yourself able to cast this for only a single mana and cast whatever you discard. At that point, you’re really negating the downside of the Axe, and it just becomes an incredibly efficient removal spell with major upside. You won’t always be able to do that of course, but it happens often enough that this is premium removal.
Mad Prophet
AI Rating: 3.1Pro Rating: 2.0
This is a nice repeatable way to get Madness going, but the stat-line means it dies to several one mana removal spells in the format, and that downside hurts.
Magmatic Chasm
AI Rating: 0.8Pro Rating: 0.0 // 2.0
You’re not going to play this unless you’re an all-in aggro deck, and even then it is sometimes a real problem that flyers can still block.
Make Mischief
AI Rating: 1.6Pro Rating: 2.0
In a roundabout way, this does give you three damage for three mana. If you look at this as a three mana 1/1 devil that does 1 to something on ETB it sounds a lot better, as you get to add to the board while picking something off. If you can’t kill something with the 1 damage it does get a lot worse.
Mirrorwing Dragon
AI Rating: 5Pro Rating: 5.0
This has incredible base stats and it is incredibly costly to kill. If your opponent finds a way to kill the Dragon, they get copies of that removal spell for every creature they control, and that usually means they come out way behind. It also has the upside of multiplying your combat tricks, which comes up as well. This is a massive bomb.
Nahiri's Wrath
AI Rating: 3.9Pro Rating: 2.0
You aren’t usually going to come out ahead when you use this – since you end up using the Wrath, and you have to discard a card for each creature or planeswalker you kill. That’s definitely card disadvantage. However, there are cards in this format that like to be discarded, which certainly makes this better - and there are definitely times where this can utterly reshape the board. There will also be times when it doesn’t do anything, though – and unfortunately those will be more common.
Pyre Hound
AI Rating: 2.3Pro Rating: 1.0 // 3.5
This is a buildaround, but it is also an incredibly important and powerful Common for the Blue-Red deck. It gets massive in that deck, and the Trample is a real problem for your opponent.
Ravenous Bloodseeker
AI Rating: 2.6Pro Rating: 2.5
This is a nice discard outlet that can be pretty obnoxious to block in the early game.
Rush of Adrenaline
AI Rating: 1.4Pro Rating: 2.0
This is a decent trick. The toughness boost of only 1 does mean your creature will die more often with this than you might like, but +2 power and trample for one mana can also result in huge blowouts.
Scourge Wolf
AI Rating: 3.5Pro Rating: 4.0
A two mana 2/2 with First Strike is something you always play, so the fact this can gain double strike in the mid-game is a great upgrade.
Shreds of Sanity
AI Rating: 2.5Pro Rating: 2.0
If you’re in Red there’s a good chance you have a nice mix of Instants and Sorceries, and if you do, this is a pretty nice way to get back some removal spells.
Sin Prodder
AI Rating: 5Pro Rating: 3.5
A three mana 3/2 with Menace is a great starting point, and that’s good – because this ability isn’t quite as good as it looks. It actually gives your opponent some very real control over what you draw, and sure, sometimes the decision is hard because they might take some extra damage, but the fact they can just make you draw a land when you reveal it can be rough. The decision just doesn’t punish your opponent as much as you’d think. Don’t get me wrong, this card is still really good because of the baseline and the upside of drawing you extra cards, but it kind of looks like it would be a bomb, and it doesn’t get particularly close.
Stensia Masquerade
AI Rating: 3.2Pro Rating: 2.0
If you’re a Vampire deck, playing one of these is decent. The fact it has Madness means you can treat it as a trick sometimes that gives First Strike to all of your attackers. Buffing your Vampire is nice too! The problem here is that this card is pretty bad if you’re behind.
Stromkirk Occultist
AI Rating: 3.3Pro Rating: 4.0
They downshifted this to Rare, which is pretty spicy! A three mana 3/2 Trample isn’t a bad starting point, so when you add in the Madness upside and the fact that this can effectively draw you cards, and we’re talking about an incredibly efficient and powerful creature.
Thermo-Alchemist
AI Rating: 3.8Pro Rating: 3.5
This is a great payoff in Blue-Red, but most Red decks in the format have enough instants and sorceries in them to make the Alchemist playable.
Tormenting Voice
AI Rating: 2.3Pro Rating: 2.5
This is better in this format than it is in pretty much any other! It helps you get Delirium and discard things with Madness, on top of also being a nice card for the Blue-Red spell deck since it triggers all of your payoffs.
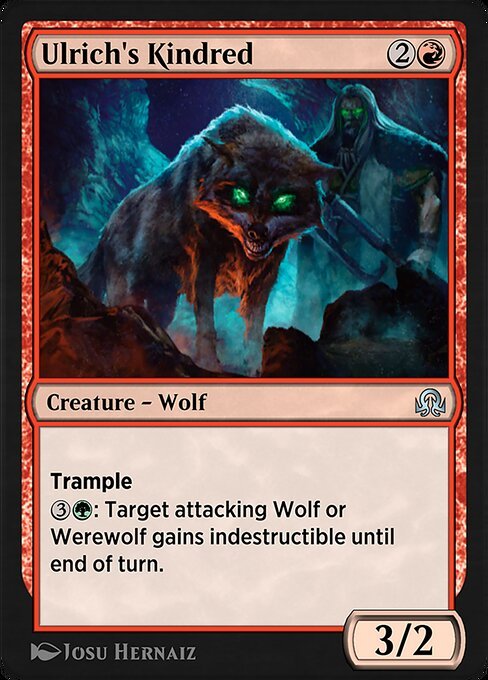
Ulrich's Kindred
AI Rating: 2.9Pro Rating: 3.0
This has a solid baseline, and granting indestructibility to your werewolves can be great! That said, the ability is fairly costly, and if your opponent has mana up when you try to use it, prepare to get blown out.
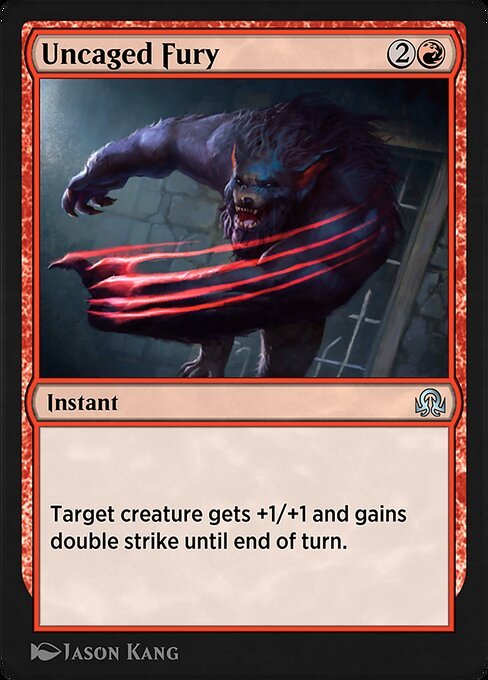
Uncaged Fury
AI Rating: 3.4Pro Rating: 2.5
This is a very nice trick. It is a little expensive, but it makes most creatures win combat, and it has the potential to allow an unblocked creature to just finish off your opponent. The first copy should be valued fairly highly.
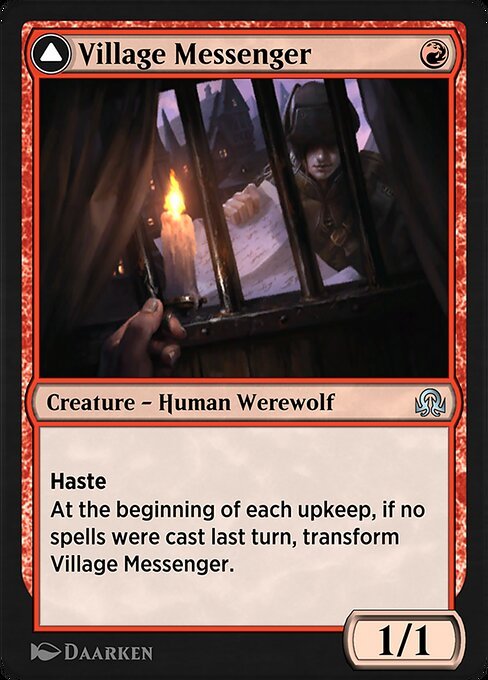
Village Messenger
AI Rating: 3Pro Rating: 2.5
This is great on turn one, especially if you’re on the play. You get to play this and get in for a damage, and if your opponent doesn’t have a one drop, this turns into a 2/2 Menace – and it's going to stay that way for quite some time. If you get it later in the game, it is significantly less impressive, but a 2/2 Menace can at least be relevant on most board states.
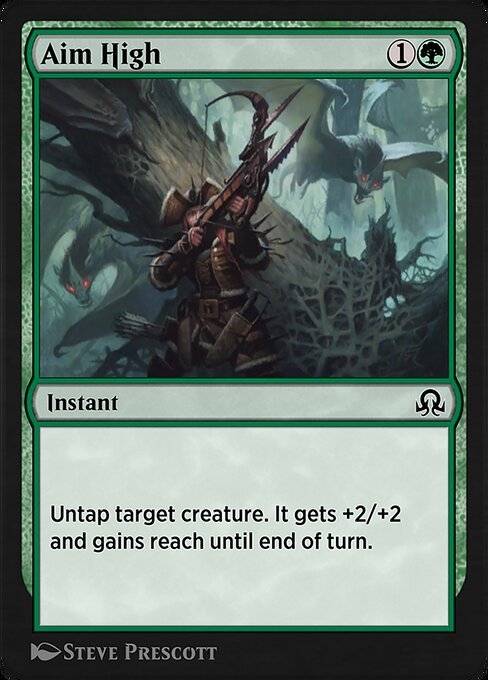
Aim High
AI Rating: 1.3Pro Rating: 1.5
This type of trick is rarely good. The stats boost is medium for two mana, and Reach and untapping are mostly only relevant on defense, which is the worst possible time to use a trick.
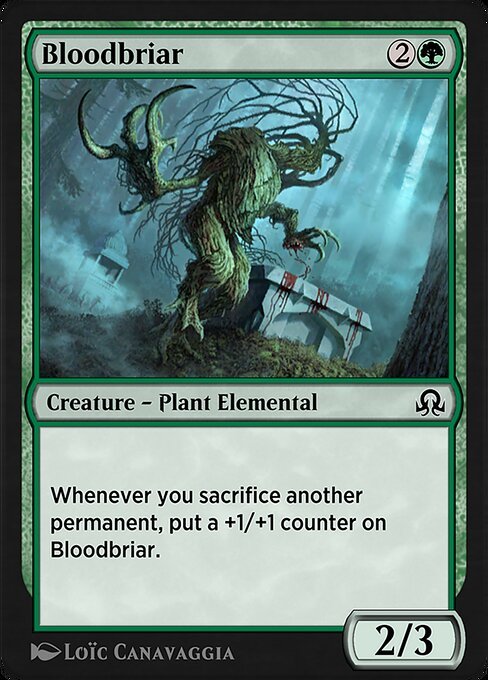
Bloodbriar
AI Rating: 1.6Pro Rating: 2.5
This is a pretty real payoff for sacrifice decks, and it has passable base stats.
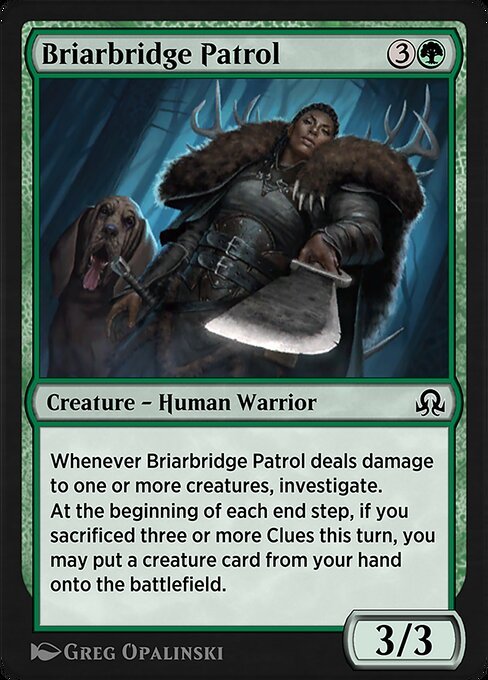
Briarbridge Patrol
AI Rating: 2.3Pro Rating: 3.0
This isn’t quite as good as it looks, which is partly why they downshifted it from Uncommon. A 4-mana 3/3 isn’t very good, and while this has a big text box, it doesn’t do anything that good. It does generate Clues for you whether it blocks or gets blocked, which means you do ultimately get a 2-for-1 out of it pretty often. I wouldn’t count on being able to effectively utilize the card’s other ability, though. These sorts of effects always underperform in Limited, partly because you can’t really build a deck with enough monsters to cheat into play. So, you don’t often have something worth putting into play with the effect – oftentimes, it is better to just hold on to all of your clues.

Byway Courier
AI Rating: 3.2Pro Rating: 3.5
This is good at trading off for things, and the Clue it gives you means you’re going to get a 2-for-1.
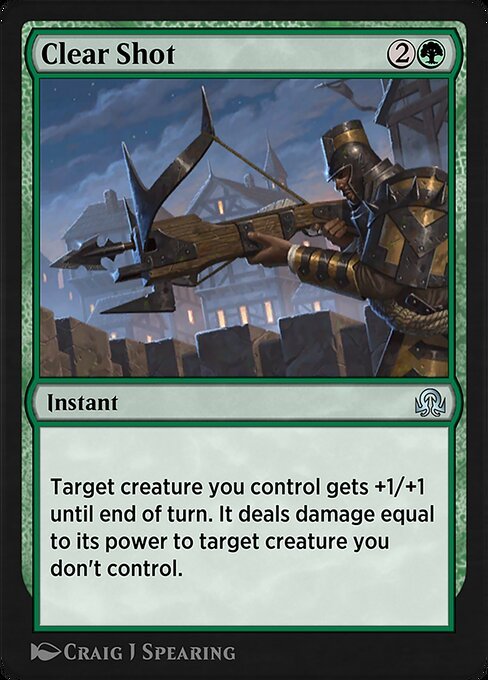
Clear Shot
AI Rating: 4Pro Rating: 4.0
This is great removal. Because of the stats boost, it makes most creatures capable of taking something down, and sometimes you can even get a 2-for-1 – like if the +1/+1 helps a creature win combat.
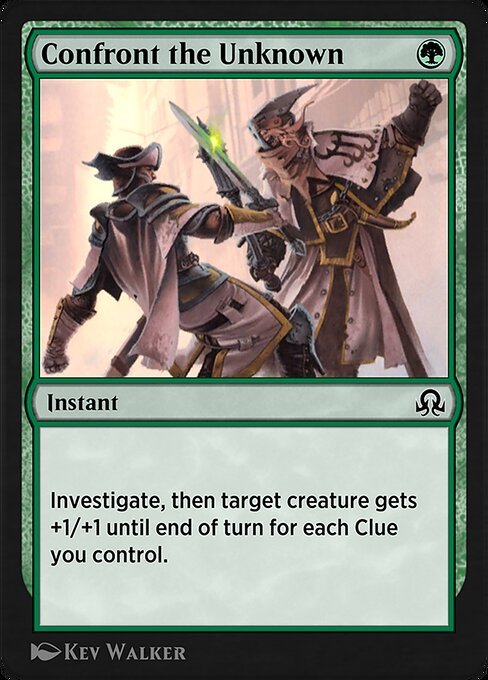
Confront the Unknown
AI Rating: 2Pro Rating: 1.5
This only gives +1/+1 a little too often to be anything special. Some really clue-heavy decks can get some good use out of this, but it isn’t exactly the payoff you’re hoping for.
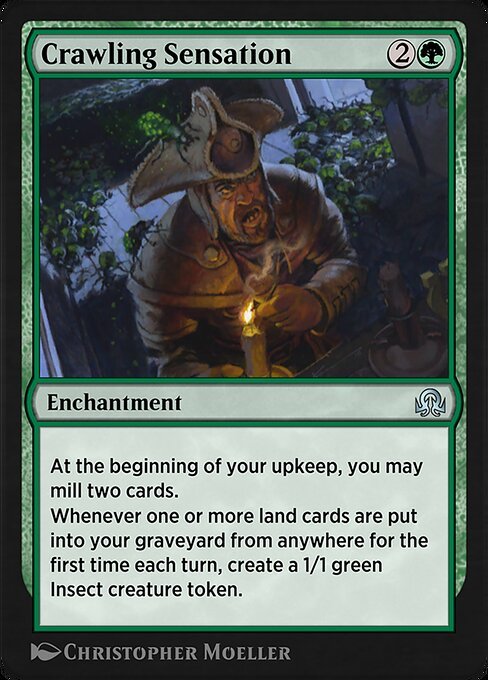
Crawling Sensation
AI Rating: 2.4Pro Rating: 0.0 // 4.0
This is an amazing buildaround. It quickly gets you Delirium, and it adds to the board while loading up your graveyard with all that sweet, sweet value. That said, it doesn’t work in just any deck – it is mostly here for Black/Green.
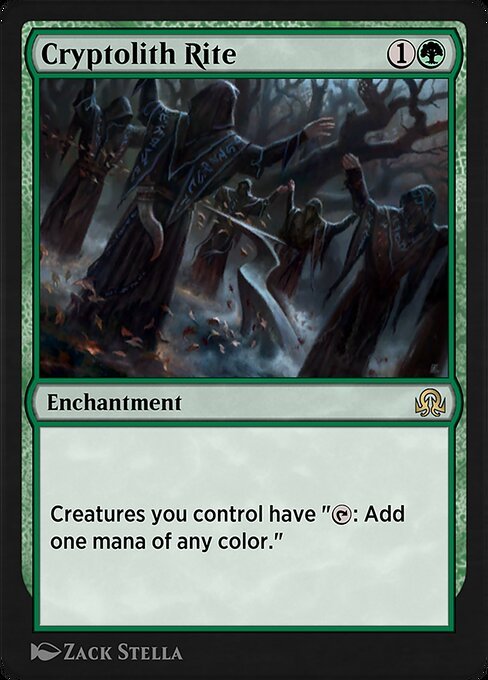
Cryptolith Rite
AI Rating: 2.5Pro Rating: 1.0
This format has some interesting things to ramp into, but this still isn’t worth using in Limited. You often don’t have anything to use the mana on, and when you do, it usually isn’t worth using up this card to help you cast it.
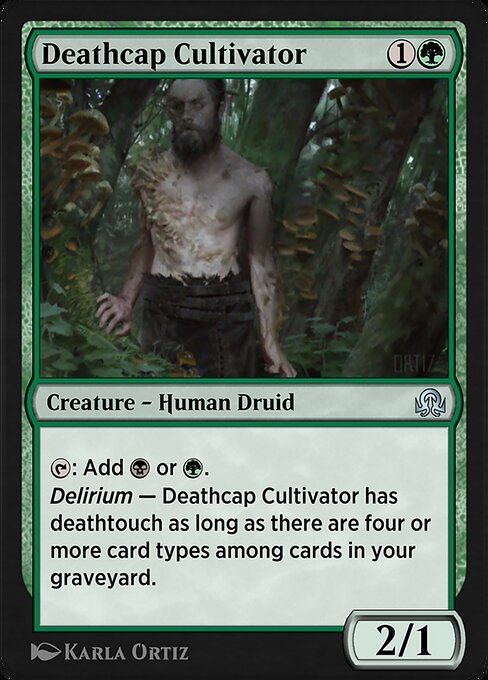
Deathcap Cultivator
AI Rating: 4Pro Rating: 4.0
This is a nice mana dork that can even fix your mana, and the fact it can get deathtouch is pretty nice. Most mana dorks stop being good in the late game, but adding deathtouch means this always has an impact on the board.

Duskwatch Recruiter
AI Rating: 4.1Pro Rating: 4.5
This is a very strong Uncommon. It has good base stats, and on the front side it has a very powerful activated ability that will allow you to outcard your opponent in the later stages of the game. The front side is kind of the one you want the most, but the Werewolf side isn’t too shabby either.
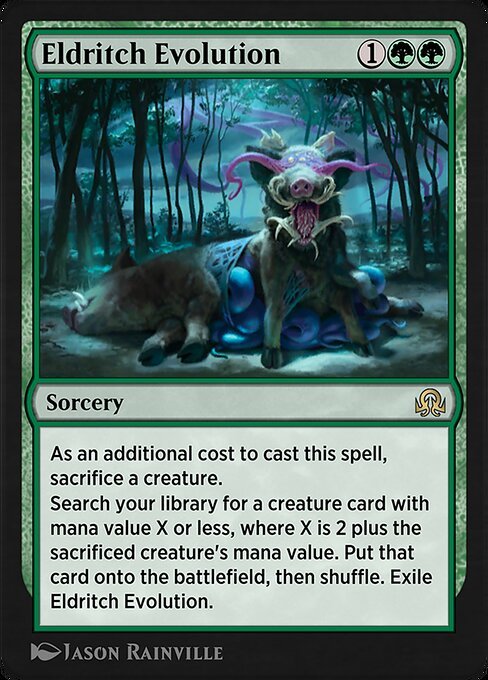
Eldritch Evolution
AI Rating: 3.5Pro Rating: 1.0
This is not very good in Limited. Most of the time, you 2-for-1 yourself for a slightly better creature than what you already had.
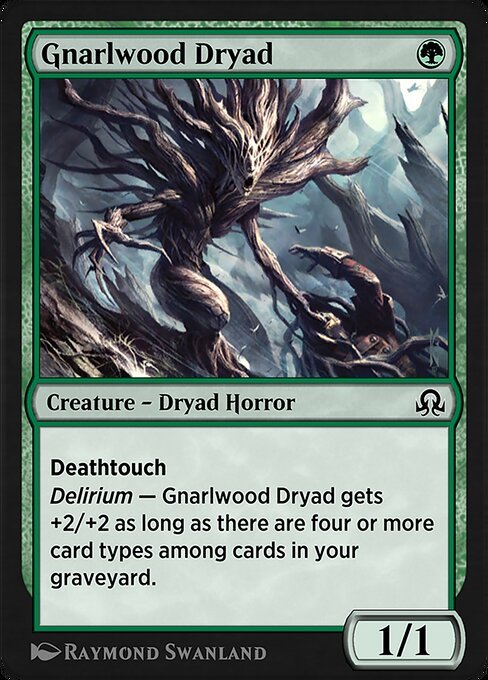
Gnarlwood Dryad
AI Rating: 2.2Pro Rating: 3.0
A one mana 1/1 with deathtouch is always playable, and this has the upside of becoming much more relevant in the mid to late game.

Graf Mole
AI Rating: 2.7Pro Rating: 3.0
This is a nice Clue payoff with solid stats. The life it gains you can really help you buy yourself the time to draw all of your extra cards.
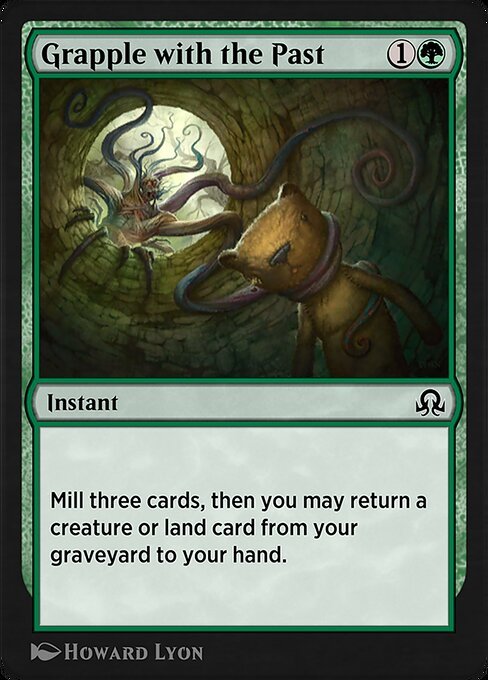
Grapple with the Past
AI Rating: 2.1Pro Rating: 2.5
You usually want one of these in Green. It helps you get delirium and helps you get value out of the graveyard.
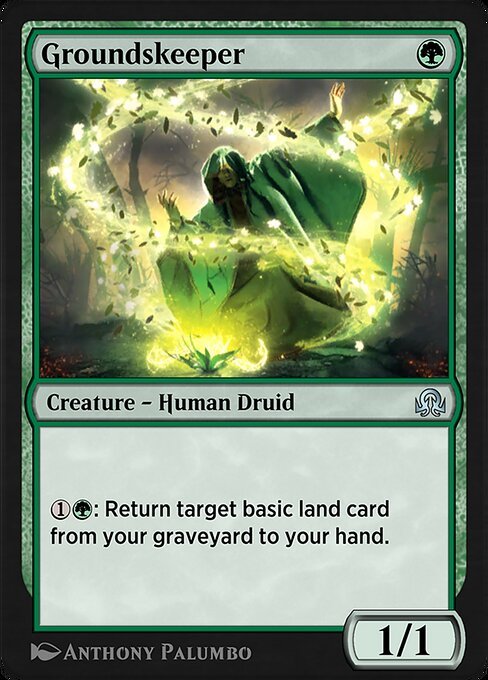
Groundskeeper
AI Rating: 0.9Pro Rating: 1.0
You do mill yourself a lot in Green, so the idea here is that if you milled a land you need, you can get it back. Mostly, though, that isn’t worth doing.
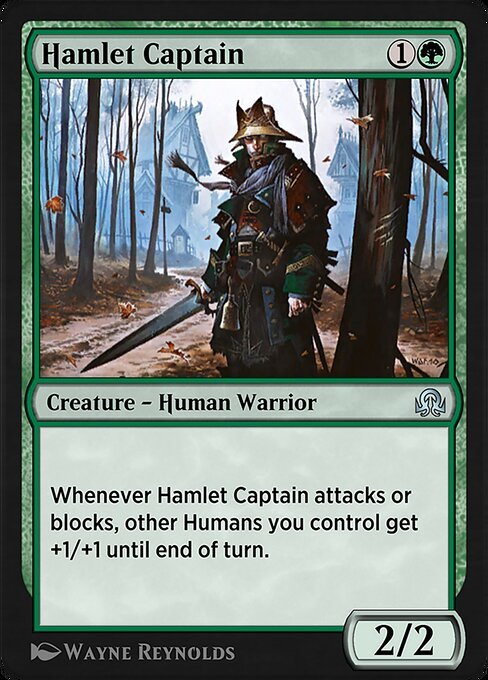
Hamlet Captain
AI Rating: 3.6Pro Rating: 3.5
This is a nice Human payoff that can make most boards significantly better. It doesn’t buff itself, though, so it often goes down in one attack.
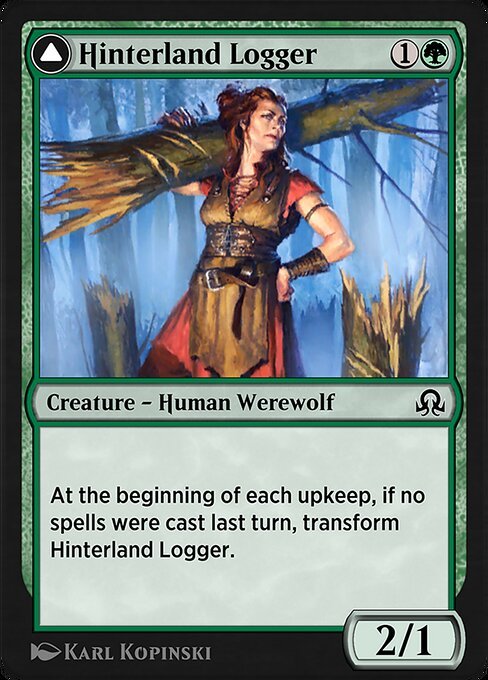
Hinterland Logger
AI Rating: 3.1Pro Rating: 3.0
This is a nice two drop. If you’re on the play and your opponent doesn’t have their own two drop, it can easily become a 4/2 Trampler in the early game, which is terrifying! That size is relevant all game long, too.
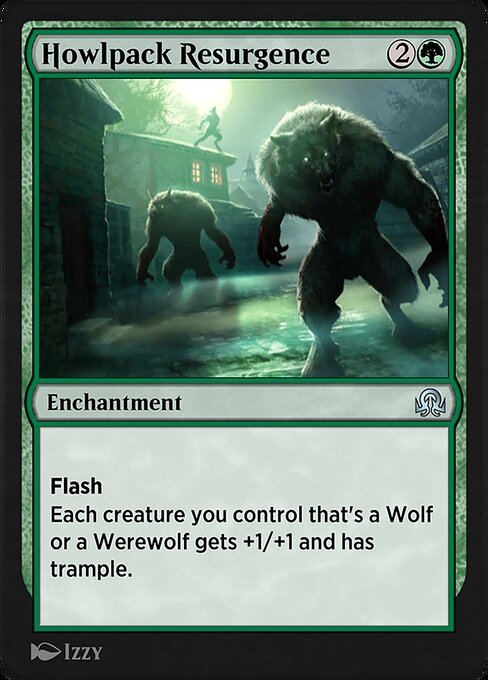
Howlpack Resurgence
AI Rating: 3.1Pro Rating: 3.5
This works pretty well if you have lots of Wolves or Werewolves, and even plays quite well with them. Because it has Flash, you can pass the turn, have your wolves and werewolves transform, and then play this on your opponent’s turn. If this can buff most of your board, its great – but you don’t play it until you have 10+ wolves or werewolves.
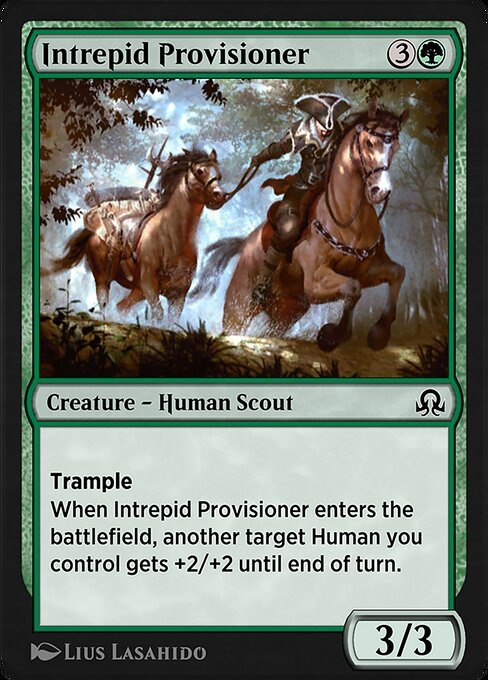
Intrepid Provisioner
AI Rating: 1.5Pro Rating: 3.0
This is a solid Human payoff. The +2/+2 it offers often gives you a much better situation to attack with, and the 3/3 Trample body isn’t the worst thing.
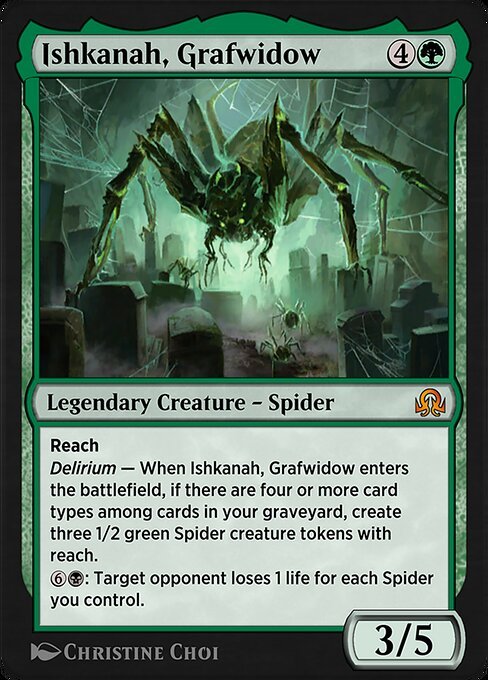
Ishkanah, Grafwidow
AI Rating: 4.8Pro Rating: 5.0
Ishkanah is insane if you have Delirium, and getting it going by turn five is very doable. You end up paying 5 for a ⅗ and 3 1/2s with Reach. You don’t even really need to be in Green-Black to get her going, though obviously also having access to her activated ability is better.
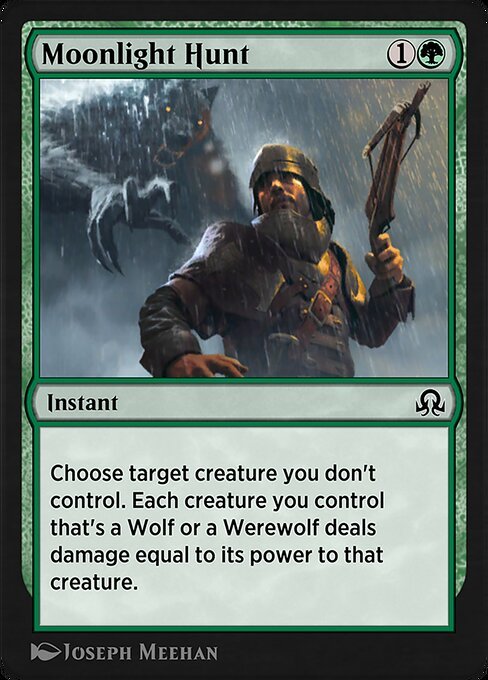
Moonlight Hunt
AI Rating: 2.1Pro Rating: 2.5
This is a fairly effective removal spell, as you can often use it effectively even with just a single Wolf or Werewolf. Your deck does need to be loaded up with them for this to be at its best, though – as if you don’t have a wolf or werewolf in play, this does stone nothing.
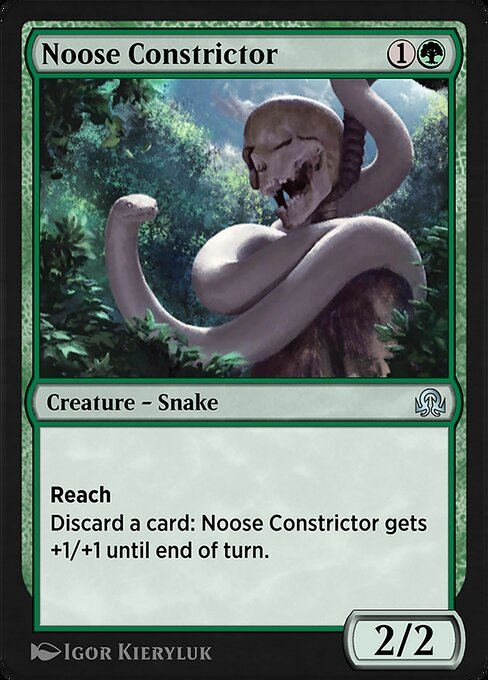
Noose Constrictor
AI Rating: 3.4Pro Rating: 3.5
This is a great two-drop that has nice stats, can threaten to become quite large, and helps you do things with Madness and Delirium.
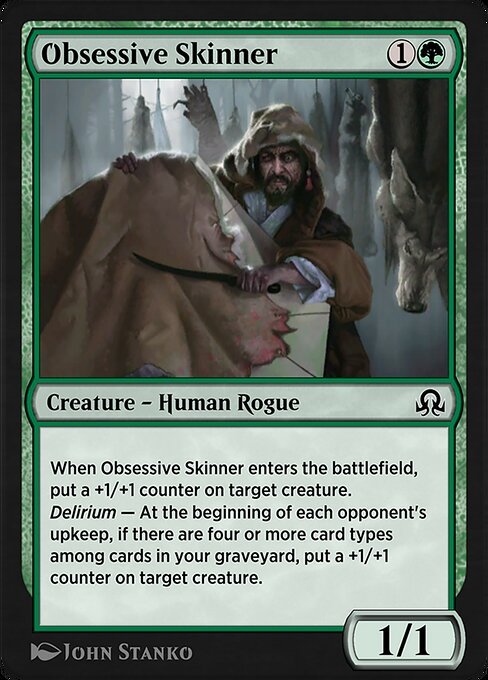
Obsessive Skinner
AI Rating: 3.3Pro Rating: 3.5
Without Delirium, this is a two drop that usually makes the cut. When you get Delirium going, it becomes an impressive value engine, giving you a +1/+1 counter every turn.
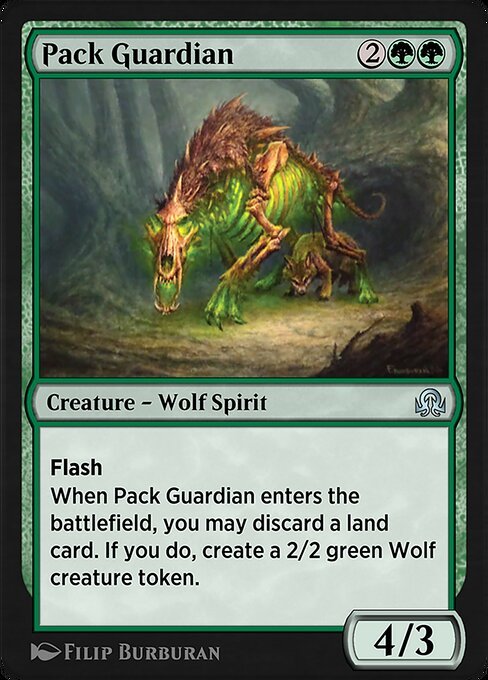
Pack Guardian
AI Rating: 4Pro Rating: 4.0
A 4-mana 4/3 with Flash would usually make the cut, so the fact you can discard a land to end up also getting a 2/2 is amazing, especially because getting a land in your graveyard might help you get Delirium.
Permeating Mass
AI Rating: 3.1Pro Rating: 1.0
This card is fun, but not particularly good. Turning everything into permeating masses does really alter the game, but not usually in a super meaningful way.
Rabid Bite
AI Rating: 3.1Pro Rating: 3.5
This is premium removal. You have to be careful about when you use it, because your opponent can interact in response and blow you out. But when you get the chance to use it, it ends up dealing with most creatures very efficiently.
Sage of Ancient Lore
AI Rating: 4.9Pro Rating: 3.0
It is hard for this to ever be that large in Limited, as one doesn’t usually hold on to a bunch of cards by the time it comes down. Still, it does replace itself, and when it transforms it gets significantly scarier.
Seasons Past
AI Rating: 5Pro Rating: 3.5
This is clunky as heck – but actually usable in this format. Graveyard decks are real, and getting back 4+ cards with this is eminently doable. Tapping out to cast it in the first place can be sketchy sometimes, but if you get to untap, it is hard for you to lose.
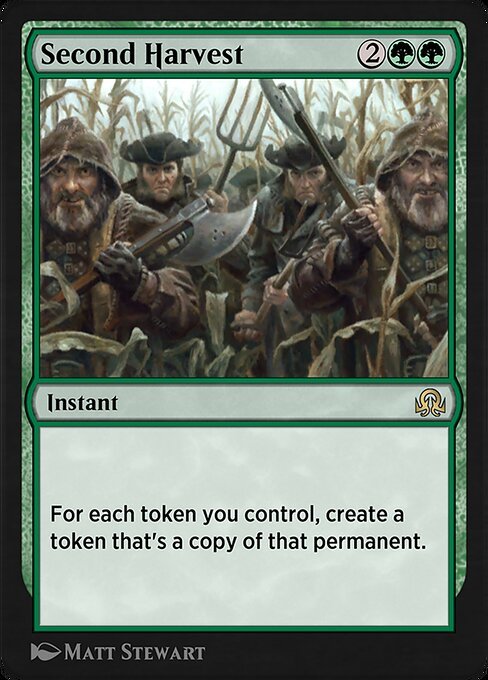
Second Harvest
AI Rating: 2.9Pro Rating: 0.0
You just don’t end up with enough tokens for this to actually be worth playing. Sure, doubling clues and some random creatures can be nice, but this card is entirely blank far too often.
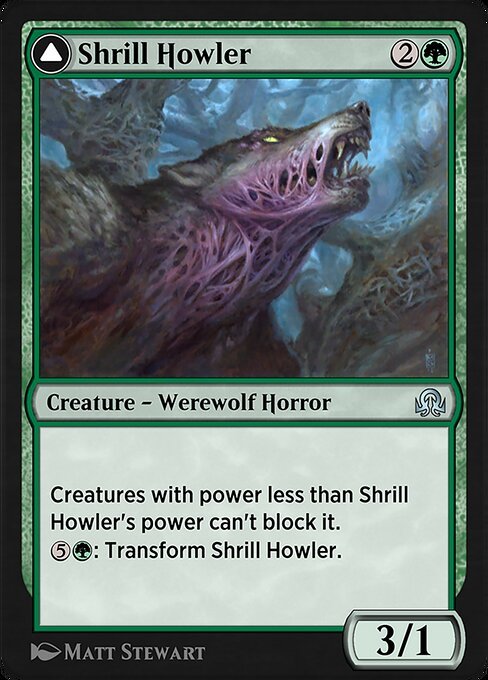
Shrill Howler
AI Rating: 2.7Pro Rating: 3.5
This might only have one toughness, but because it can’t be blocked by creatures with lower power, you don’t need to worry too much about your opponent trading up. Once transformed it becomes an absolute monster, drastically increasing its toughness and generating a body when it hits your opponent.
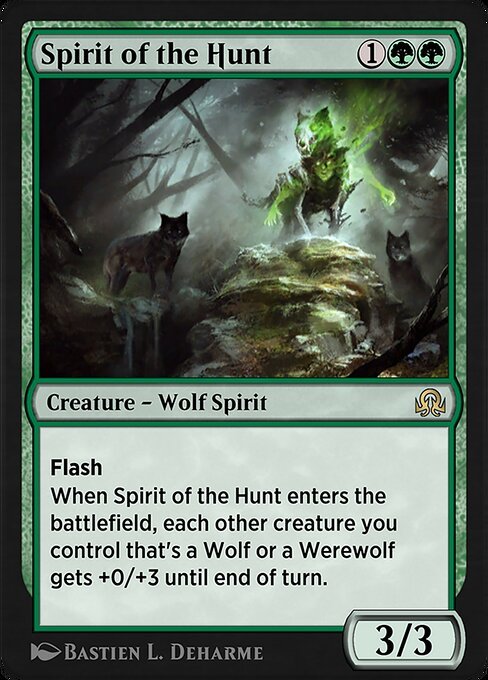
Spirit of the Hunt
AI Rating: 4.2Pro Rating: 3.5
A three mana 3/3 with Flash is pretty nice, and while you may not always be able to take full advantage of its ETB ability, there are times when it really matters. It can save your creatures from some removal spells, or turn a trade into a much more beneficial situation.
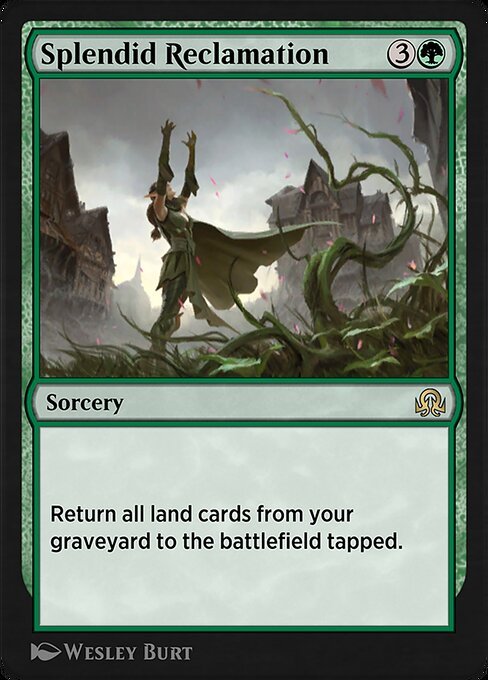
Splendid Reclamation
AI Rating: 1Pro Rating: 0.0
You do mill lands into your graveyard in this format, but this still isn’t worth it.

Swift Spinner
AI Rating: 1.1Pro Rating: 1.5
This is a passable creature that can ambush block some stuff, but it doesn’t always make the cut.

Thornhide Wolves
AI Rating: 1.4Pro Rating: 2.0
Last time around, this vanilla 4-mana ⅘ played surprisingly well. It is quite large for the format, and has a useful creature type.
Tireless Tracker
AI Rating: 4.9Pro Rating: 5.0
This is a powerhouse. It is both a source of card advantage and a potential win condition as it continually grows and lets you draw a ton of cards. It can easily take over games, and that’s not something you can say about most three drops!
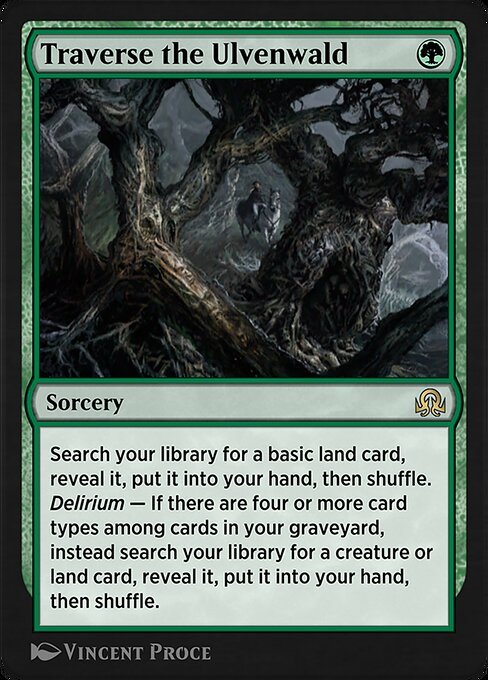
Traverse the Ulvenwald
AI Rating: 4Pro Rating: 3.0
I’m not usually very high on tutors in Limited, but this one costs a single Green mana, and the fail case is that you can throw it away to grab a basic land. This helps fix your mana, and can make lots of hands with low land-counts more keepable. Once you get delirium, it can tutor up creatures too, which is nice upside.
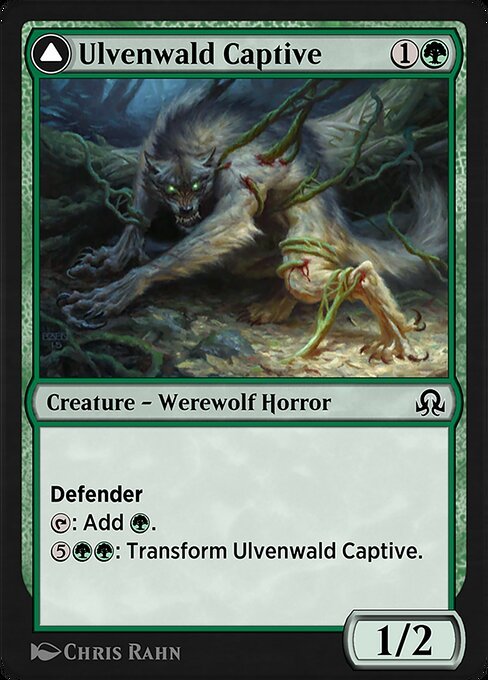
Ulvenwald Captive
AI Rating: 3.3Pro Rating: 3.0
As is true in most formats, ramping your mana is pretty good! Even when it is attached to a two mana ½ with Defender. Its transformation isn’t the most impressive, but it does let you ramp mana even more, it gets bigger, and it loses defender.
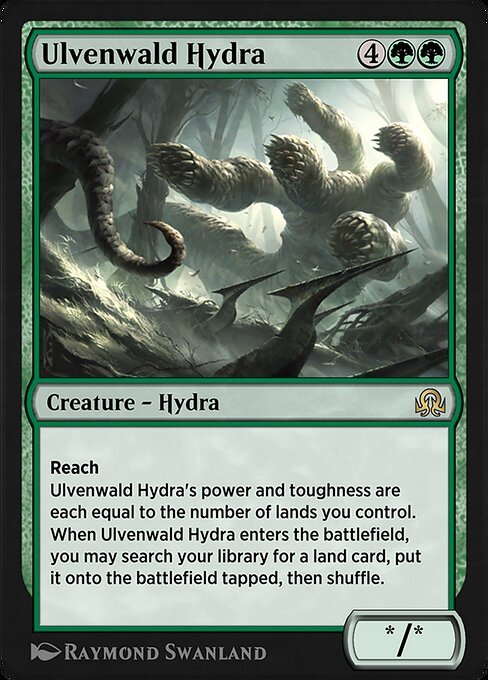
Ulvenwald Hydra
AI Rating: 4.7Pro Rating: 4.0
The fact this can search up non basics doesn’t matter a whole lot in this format. But you know what does? Having an absolutely massive creature, and that’s what this will be! Usually it is a 6-mana 7/7 with Reach, and it continually grows as the game continues.
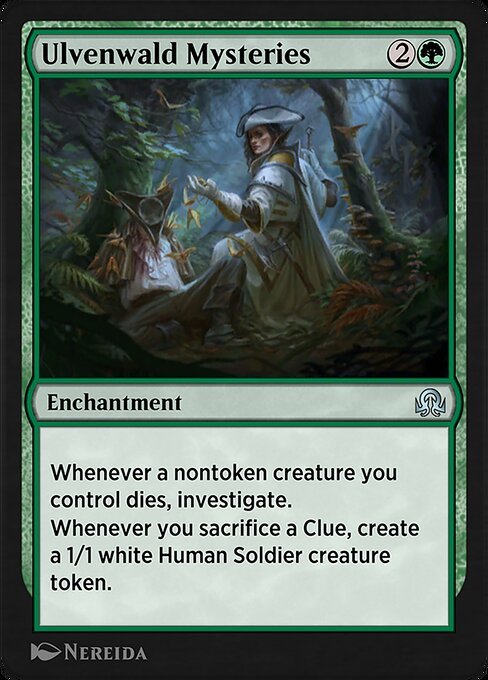
Ulvenwald Mysteries
AI Rating: 3.8Pro Rating: 4.0
This is a very powerful value engine, especially in Blue-Green, where you have lots of Clues anyway. Making it so sacrificing a clue generates a 1/1 is a huge upgrade, as it allows you to add to the board while digging deeper into your deck. This is less good if you’re entirely reliant on it to generate your Clues, but even then it can be pretty good.
Vessel of Nascency
AI Rating: 2.8Pro Rating: 0.0 // 3.0
This is actually a very important card for Delirium decks. It can often get you delirium all on its own, as it puts itself and 4 cards from the top of your library into your graveyard. Getting an Enchantment in there can be particularly difficult, but this makes sure it happens for you! It is certainly a buildaround, as it isn’t really a card you want outside of Black/Green, but it is one of the most important Commons for that deck.
Veteran Cathar
AI Rating: 3.4Pro Rating: 3.5
This has good base stats, and the ability to give double strike to your humans can be quite formidable. It is quite expensive to do it, though.
Weirding Wood
AI Rating: 2Pro Rating: 2.0
This fixes your mana and generates a Clue, and some decks are definitely in the market for that.
Wolfkin Bond
AI Rating: 1.8Pro Rating: 3.0
This is a surprisingly good Aura, and one you’re usually going to want one of in your Green decks. 5 mana is a lot, but the fact this gives you a 2/2 means that you do a good job of mitigating against the risk of getting 2-for-1’d.
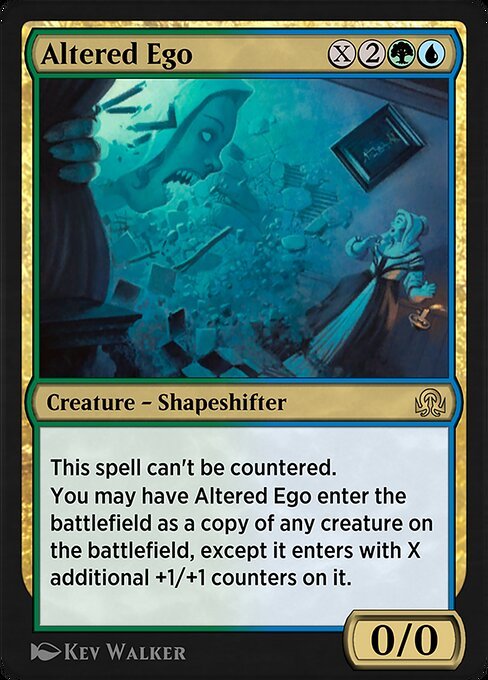
Altered Ego
AI Rating: 4.1Pro Rating: 4.0
You can pay 0 for X, so at worst this is an uncounterable 4-mana Clone, which is perfectly fine! It is awesome that it scales as the game continues too, since it can come into play with better, and better stats. If you can pay at least 1 for X, t you’re always going to have the best creature on the battlefield when you cast it.
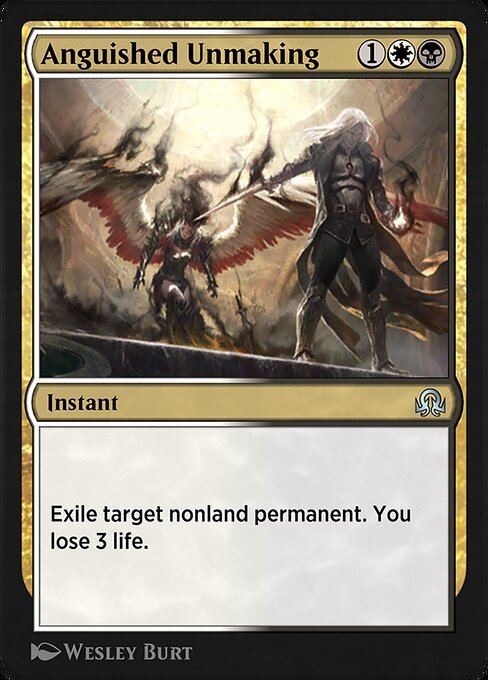
Anguished Unmaking
AI Rating: 2.3Pro Rating: 3.5
Hitting any type of permanent is great, and well worth paying 3 life for. That said, playing more than 1 or 2 of this can get a little sketchy because of the life payment. You can offset it by gaining some life, of course.
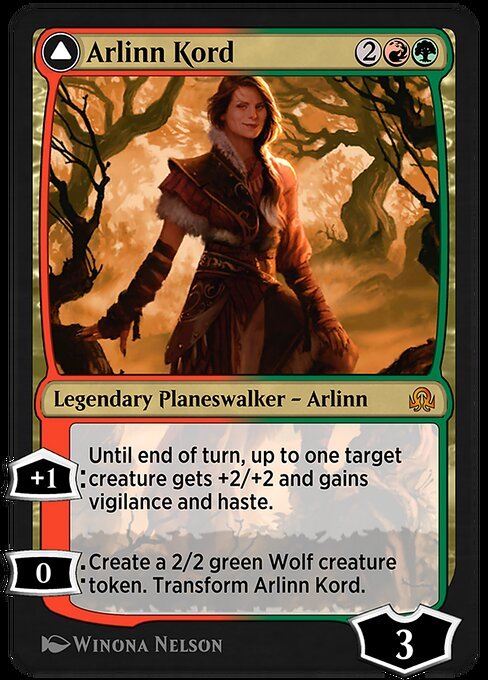
Arlinn Kord
AI Rating: 5Pro Rating: 5.0
Arlinn is a fairly cheap planeswalker, and all of her abilities are great. Her +1 and 0 on the frontside do a good job of protecting her, and when she transforms she can give you a massive board buff or Bolt opposing creatures. You won’t always get to her ultimate, but alternate between her two sides is incredibly powerful, and hard for anyone to overcome.
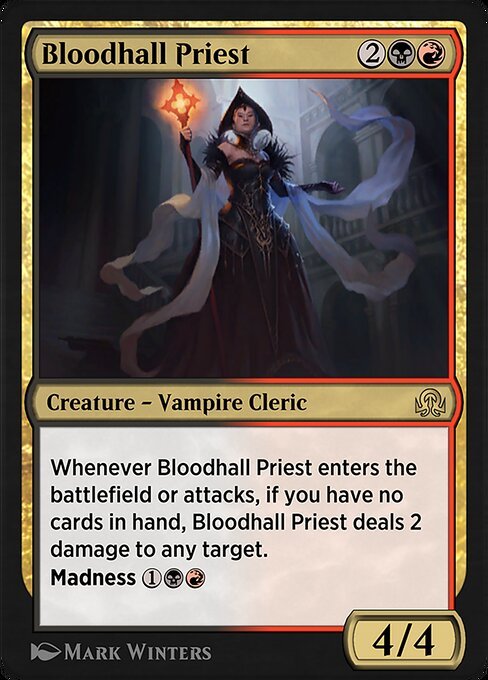
Bloodhall Priest
AI Rating: 4.2Pro Rating: 4.0
When your hand is empty, the priest is pretty insane. But even when it isn’t, you have a 4-mana 4/4 with amazing Madness upside and a useful creature type.
Fevered Visions
AI Rating: 2.1Pro Rating: 1.5
This is basically howling mine, but it does come with a bit of a downside for your opponent, as they will get Shocked by it sometimes. Still, it isn’t that easy to start burning your opponent with this in Limited, and like most symmetrical card-draw, the fact your opponent gets the first card out of this is definitely rough.
Gisa and Geralf
AI Rating: 4.4Pro Rating: 4.5
Gisa and Geralf have nice stats, help you load your graveyard, and if you have enough Zombies in your deck they are a very powerful value engine, as casting a Zombie from the graveyard every turn is a really big deal. If you’re in Blue-Black, your deck is just going to have a bunch of Zombies too.
Grim Flayer
AI Rating: 4.2Pro Rating: 4.0
Before it gets Delirium, the Flayer can help you get there with its combat damage trigger, and once you have Delirium, he becomes a much bigger threat that continues to load your graveyard and improve your draws.
Heron's Grace Champion
AI Rating: 4.7Pro Rating: 4.5
If you’re in Green-White, you’re going to have a lot of Humans. Even on its own, as a 4-mana 3/3 with lifelink and flash, it is kind of passable — but on most board states it will at least buff 1-2 other things, and do it at instant speed!
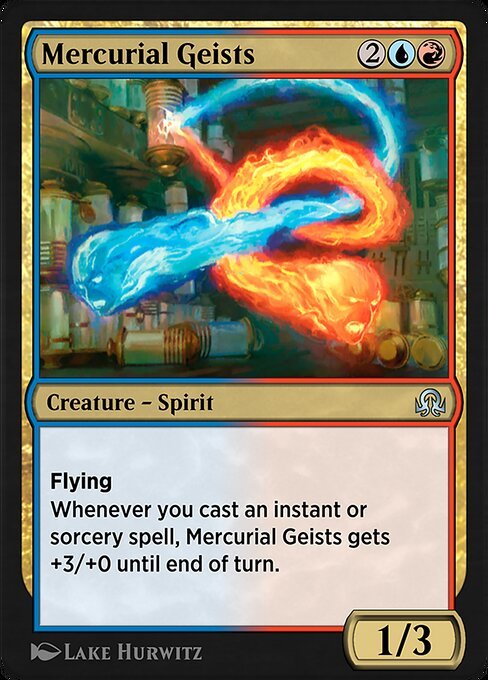
Mercurial Geists
AI Rating: 2.3Pro Rating: 3.5
If you have enough cheap spells, the Geists hit incredibly hard. If you’re playing Blue-Red, your deck will have enough spells in it without even trying.
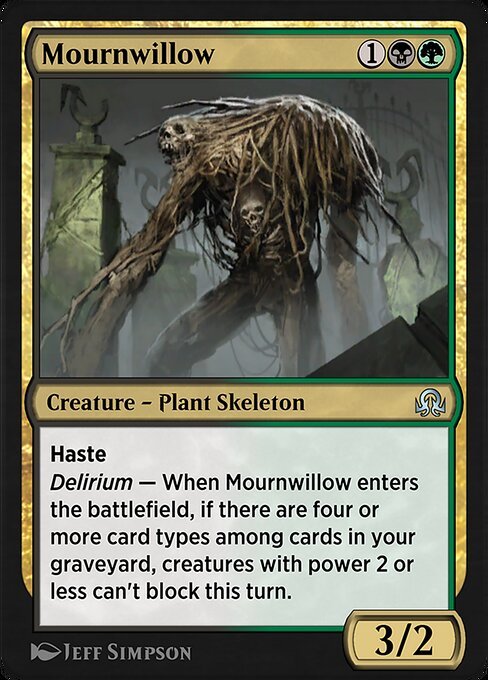
Mournwillow
AI Rating: 2.1Pro Rating: 3.0
This is not the most exciting signpost Uncommon ever, its Delirium ETB ability isn’t always relevant, so it is kind of a pain that you have to jump through hoops to even get it to do its thing. Still, hard to go wrong when the card’s baseline is a three mana 3/2 with Haste.
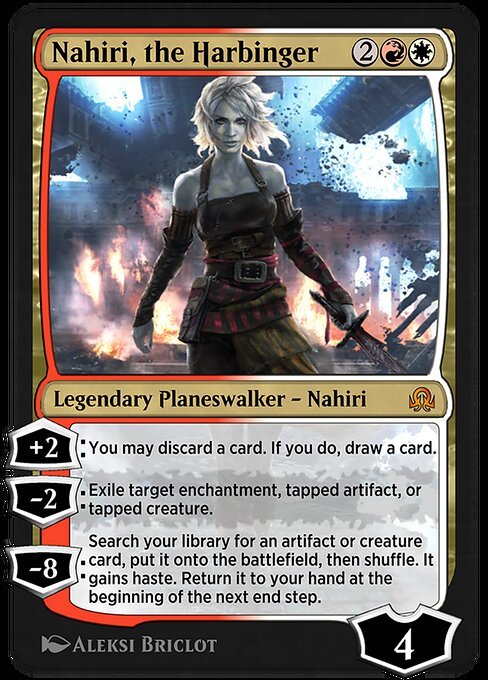
Nahiri, the Harbinger
AI Rating: 4.8Pro Rating: 4.0
Nahiri can rapidly raise her loyalty and rip through yoru deck with her +2, and her -2 is reasonably effective at killing things. It isn’t awesome that she can only take down tapped creatures, but the turn you play her she’ll often have a nice target, and once she is in play your opponent really has to weigh whether it is worth attacking. In a roundabout way, that ability can protect her, since your opponent obviously has to tap a creature to go after her. Her ultimate is rarely very impressive in Limited, so the fact you can get there quickly doesn’t matter that much. Most of her value comes from her +2 and -2, and that’s perfectly fine.

Olivia, Mobilized for War
AI Rating: 4.8Pro Rating: 4.5
A three mana 3/3 flyer is a great place to start, so the additional upside she offers is great! Rummaging while upgrading every creature you play is very powerful.
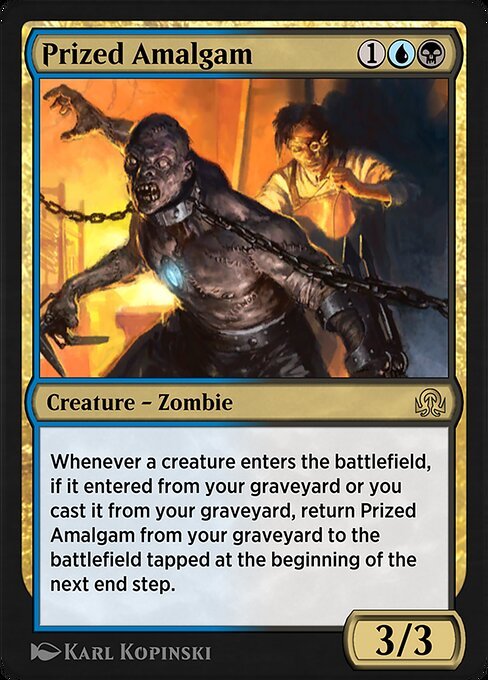
Prized Amalgam
AI Rating: 3.1Pro Rating: 3.0
If you can bring this back once, you’re going to be thrilled, and that’s fairly doable in Blue-Black. It also has a perfectly solid baseline as a three mana 3/3, so there’s really no reason not to play it in every Blue-Black deck.
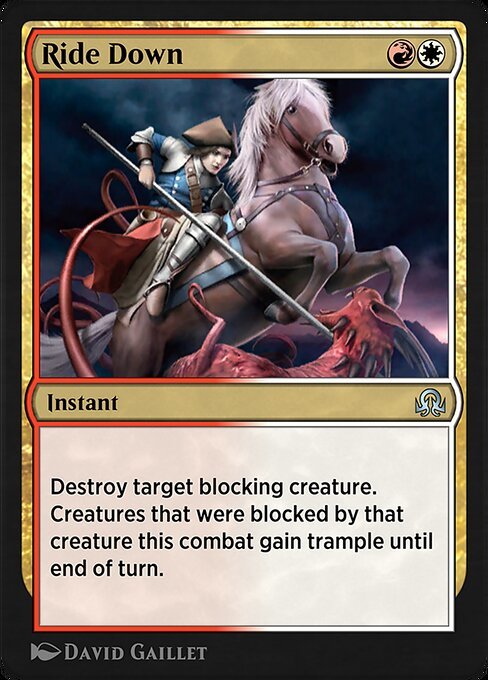
Ride Down
AI Rating: 2.5Pro Rating: 3.0
Red-White is all about aggro, and Ride Down fits really well into a deck that is all about attacking. It is basically impossible for your opponent to set up a good block when you have this in your hand, and that’s exactly what you want.
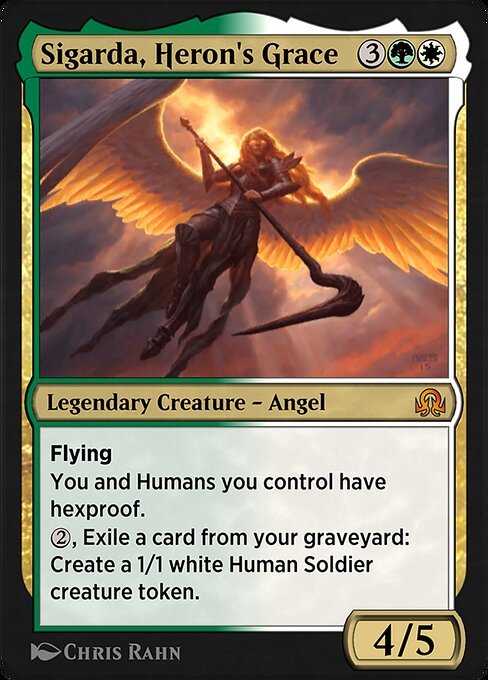
Sigarda, Heron's Grace
AI Rating: 4.9Pro Rating: 5.0
This has great base stats, and offering hexproof to you and some of your creatures are great – especially when combined with her impressive mana sink ability that can generate a bunch of 1/1s.
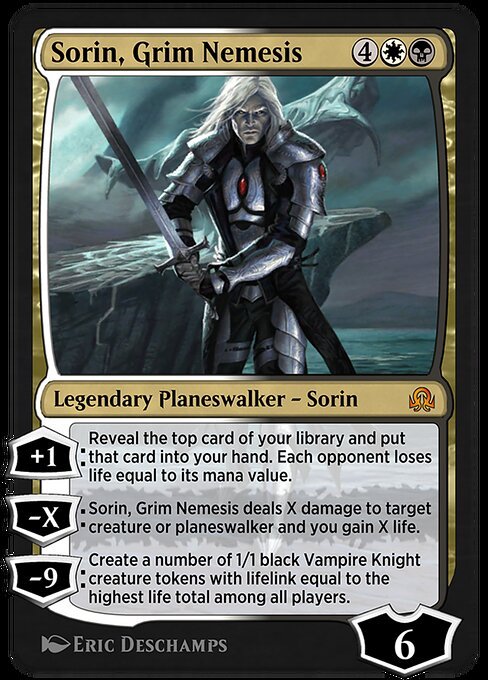
Sorin, Grim Nemesis
AI Rating: 4.8Pro Rating: 5.0
Sorin can use his +1 to grant serious card advantage when you’re ahead, and when you’re behind, his -X is quite good at helping you stabilize, between removing a large creature and gaining you a bunch of life. His ultimate is fairly attainable too!
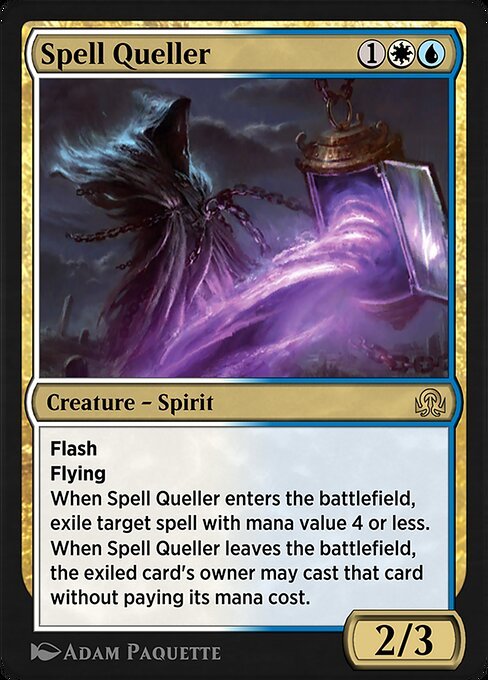
Spell Queller
AI Rating: 4.4Pro Rating: 4.0
Even if you don’t have a target for this, we’re talking about a a three mana ⅔ with Flying and Flash – a card that is already very good! When you do have a target for this, it gets way better, as getting rid of a spell off of the stack is a powerful thing. Your opponent does eventually get the spell back sometimes, but they will no longer have the ideal situation they had when they cast the spell originally, and a lot of the time they never get it back!

Tamiyo, Field Researcher
AI Rating: 5Pro Rating: 4.0
Her +1 is pretty good at drawing you cards, whether you use it on your opponent’s creatures or your own – and her -2 is great at really shaking up the board state right away. She isn’t quite a bomb, but she can certainly shift games in your favor.
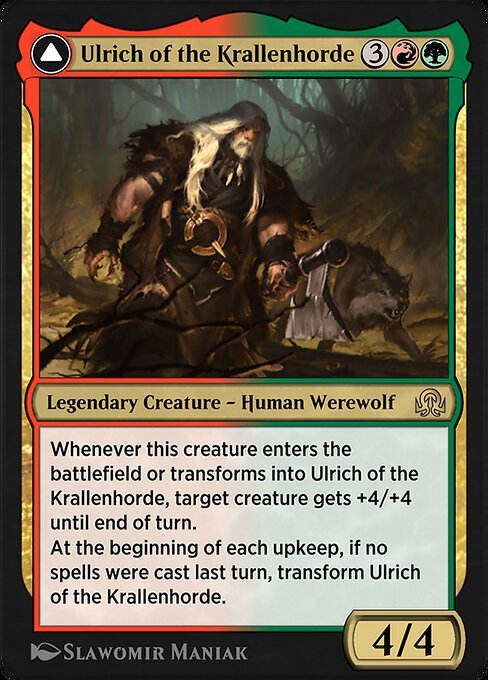
Ulrich of the Krallenhorde
AI Rating: 4.8Pro Rating: 4.5
A 5-mana 4/4 that gives +4/+4 to one of your creatures when it ETBs is something you would always play – that’s a boost that drastically improves your attacks on a given turn, and Ulrich has way more upside than tha! When it transformers, its fight effect turns it into removal, and if it flips back to Ulrich you get that +4/+4 again. Both sides are bad news for your opponent.
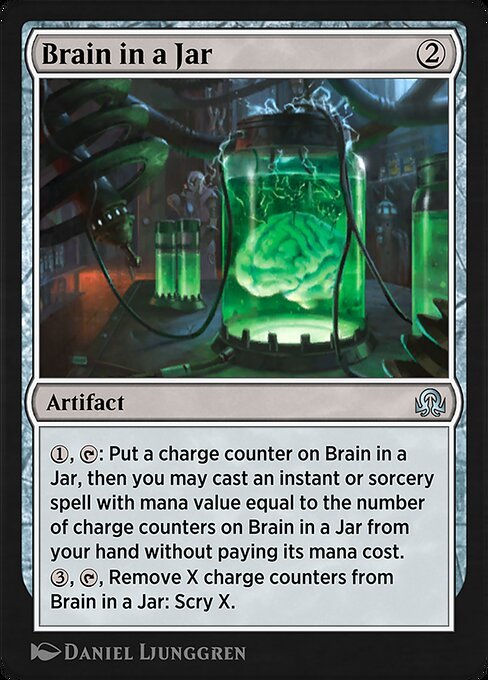
Brain in a Jar
AI Rating: 1.4Pro Rating: 0.0
Not worth it in Limited, even with a spell deck around. It is too slow and doesn’t really do anything to impact the game most of the time.
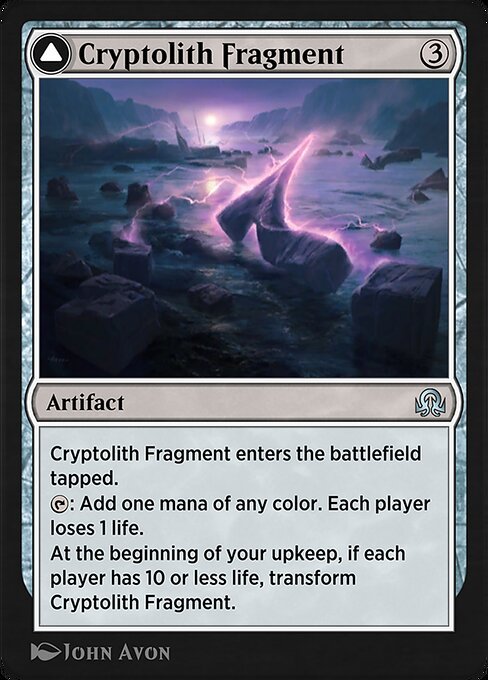
Cryptolith Fragment
AI Rating: 2.9Pro Rating: 2.5
This is a source of fixing that can become a very real threat. The situation won’t always allow you to transform it, but if your opponent has 10 or less life and you’ve got the Aurora of Emrakul attacking them, they are going to be in some serious trouble.
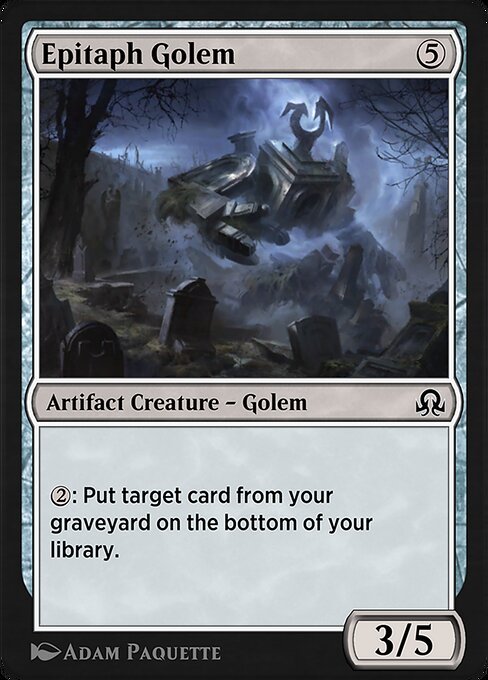
Epitaph Golem
AI Rating: 1.1Pro Rating: 0.0 // 2.5
This is better than it looks! This is a format where you can actually end up milling yourself out, especially in Black-Green. Once your library is out of cards, the Golem not only helps you avoid losing because you’re out of cards – it also effectively lets you draw whatever card you want every single turn. It takes a fairly particular deck for this to make the cut, though.
Explosive Apparatus
AI Rating: 1.3Pro Rating: 1.5
This is by no means efficient, but if you’re hurting for Artifacts to get Delirium going more consistently, it can do the job.
Field Creeper
AI Rating: 0.8Pro Rating: 1.5
This is a little better than it looks. It is both an Artifact and a Creature, which means it gets you halfway to Delirium all on its own.
Harvest Hand
AI Rating: 2.6Pro Rating: 4.0
A three mana 2/2 isn’t a great starting point, but trading this off or sacrificing it to something with Emerge is pretty amazing, because it comes back as a very real Equipment that has some Human upside. You end up getting a pretty amazing deal for only three mana.
Lupine Prototype
AI Rating: 1.5Pro Rating: 0.0
A 2-mana 5/5 is great, but this is effectively a blank card for most of the game, and by the time it can attack and block, a 5/5 is no longer the most impressive thing.
Magnifying Glass
AI Rating: 1Pro Rating: 1.0
This is a very clunky mana rock. It is nice that it can produce Clues, but it doesn’t exactly do that efficiently either.
Murderer's Axe
AI Rating: 0.8Pro Rating: 1.0
This mostly isn’t worth it. Sure, you want to be discarding in this format to set up Delirium and cast things for their Madness cost, but there are lots of better ways to do that. The fact there isn’t any other Equip cost on this at all is rough, because even in this format there are situations where you just can’t move this.
Neglected Heirloom
AI Rating: 2.7Pro Rating: 3.5
The base form of the Heirloom is a solid piece of Equipment, and once it transforms it can make any creature into a major threat. Transforming it isn’t always easy of course, and works best in Red-Green, but because it has such a good baseline, it is worth valuing fairly highly.
Slayer's Plate
AI Rating: 4.6Pro Rating: 4.5
+4/+2 is quite the boost, enough to make any creature into an impressive attacker, and the fact that this still gives you value when an Equipped Human dies is great. In those situations, it is virtually impossible for you to not have something to equip this to.
Soul Separator
AI Rating: 1Pro Rating: 1.0
You need a nicely stocked graveyard and lots of spare mana to fully utilize this. So, basically, this is a little bit too clunky, and asks too much of you at the same time.
Stitcher's Graft
AI Rating: 2Pro Rating: 0.0
This might be cheap to play and equip and offers a significant boost, but the downside here is far too much. You don’t want go have to give up permanents just to untap creatures.
Tamiyo's Journal
AI Rating: 4.4Pro Rating: 3.5
This is an impressive value engine. Getting all of those Clues is a great way to win the game. The downside is that you have to pay 5 mana and not impact the board when you play it, but that’s something you can get away with more in this format than in more recent ones.
Terrarion
AI Rating: 1.9Pro Rating: 1.5
This does a solid job of fixing your mana, and it helps you get delirium early by putting an Artifact in the graveyard.
True-Faith Censer
AI Rating: 2Pro Rating: 3.0
This is a very efficient Equipment, especially if you’re in Green-White and have lots of humans. +2/+1 and Vigilance is enough to make just about any creature into a problem.
Wild-Field Scarecrow
AI Rating: 2.1Pro Rating: 3.0
This is a passable defensive creature that is great at fixing your mana and helping you get Delirium.
Choked Estuary
AI Rating: 2.2Pro Rating: 2.5
Playing these untapped is fairly easy, and they do a good job of fixing your mana.
Foreboding Ruins
AI Rating: 2.7Pro Rating: 2.5
Playing these untapped is fairly easy, and they do a good job of fixing your mana.
Forsaken Sanctuary
AI Rating: 2.3Pro Rating: 2.5
Playing these untapped is fairly easy, and they do a good job of fixing your mana.
Fortified Village
AI Rating: 2.4Pro Rating: 2.5
Playing these untapped is fairly easy, and they do a good job of fixing your mana.
Foul Orchard
AI Rating: 1.7Pro Rating: 2.5
Playing these untapped is fairly easy, and they do a good job of fixing your mana.
Game Trail
AI Rating: 2.3Pro Rating: 2.5
Playing these untapped is fairly easy, and they do a good job of fixing your mana.
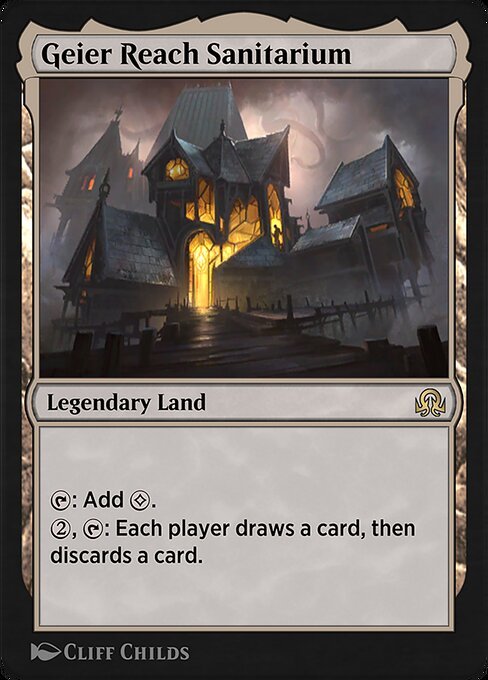
Geier Reach Sanitarium
AI Rating: 3.2Pro Rating: 2.5
This is a nice mana sink ability to have in any format, but in a format with a heavy graveyard angle it is even better. The downside is you also risk helping your opponent.
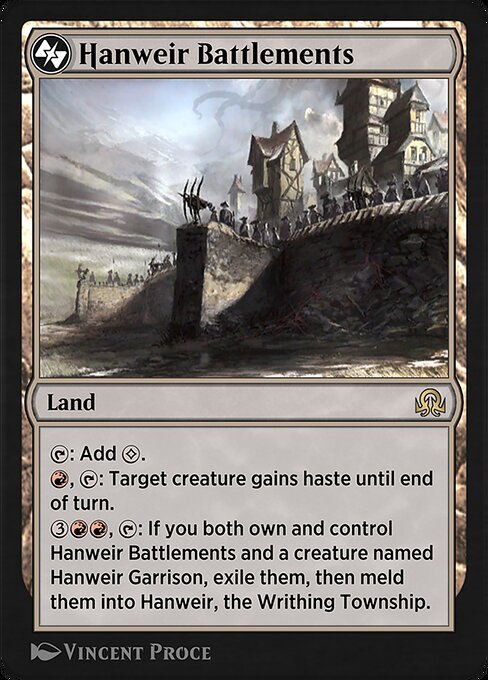
Hanweir Battlements
AI Rating: 3.5Pro Rating: 1.5
A land that grants haste for a single Red mana isn’t especially good, especially when it can only produce colorless mana. It isn’t terrible, mind you – and that’s especially true if you have the Hanweir Garrison – but it also isn’t a land that always makes the cut.
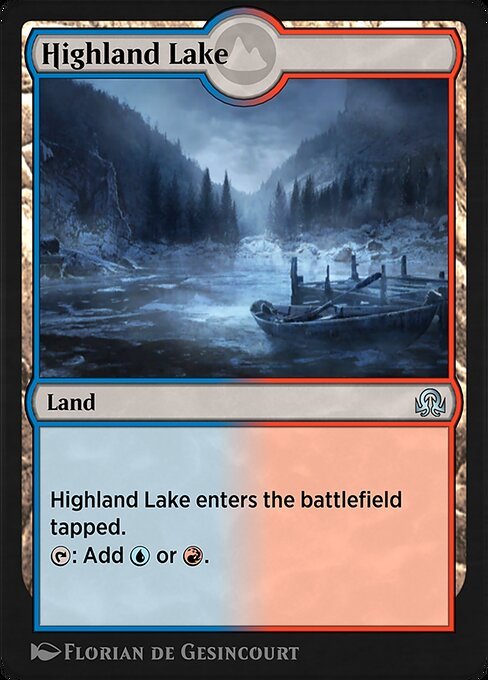
Highland Lake
AI Rating: 2.1Pro Rating: 2.5
These always enter tapped, which is a little bit of a bummer, but they still provide some quality fixing.
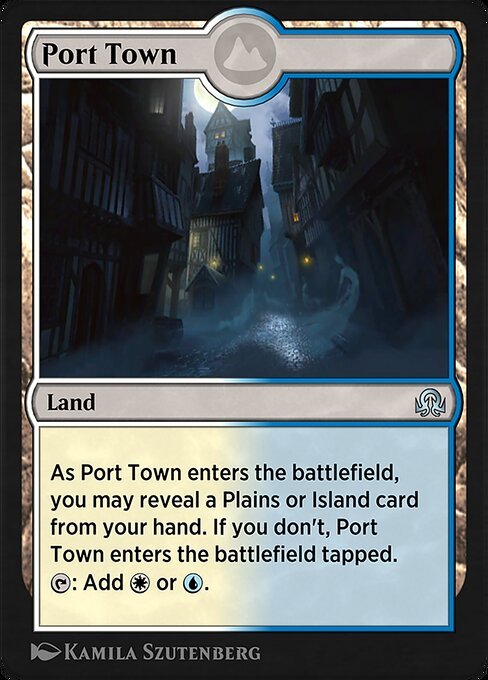
Port Town
AI Rating: 2.2Pro Rating: 2.5
Playing these untapped is fairly easy, and they do a good job of fixing your mana.
Stone Quarry
AI Rating: 1.5Pro Rating: 2.5
These always enter tapped, which is a little bit of a bummer, but they still provide some quality fixing.
Westvale Abbey
AI Rating: 4.3Pro Rating: 4.5
A land that can crank out creature tokens in the late game is a nice utility land to have, and this can transform into an almost unbeatable Demon, who often wins the game in a single swing.
Woodland Stream
AI Rating: 1.9Pro Rating: 2.5
These always enter tapped, which is a little bit of a bummer, but they still provide some quality fixing.
Angel of Flight Alabaster
AI Rating: 4.5Pro Rating: 4.5
This has great base stats, and if you’re in White you probably have some Spirits to bring back from the graveyard too, which makes her absurdly powerful.
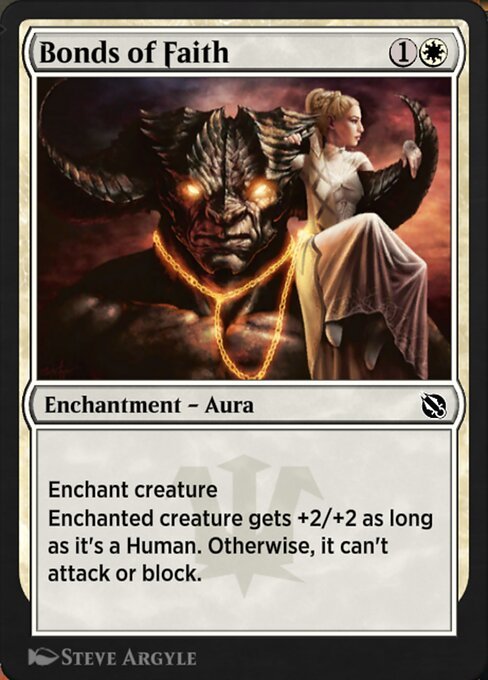
Bonds of Faith
AI Rating: 3.3Pro Rating: 3.0
The modality here can be pretty nice, though most of the time you’re going to use it as removal. And sometimes, the creature you really want to use it on is a Human, and in those cases this can be pretty bad.
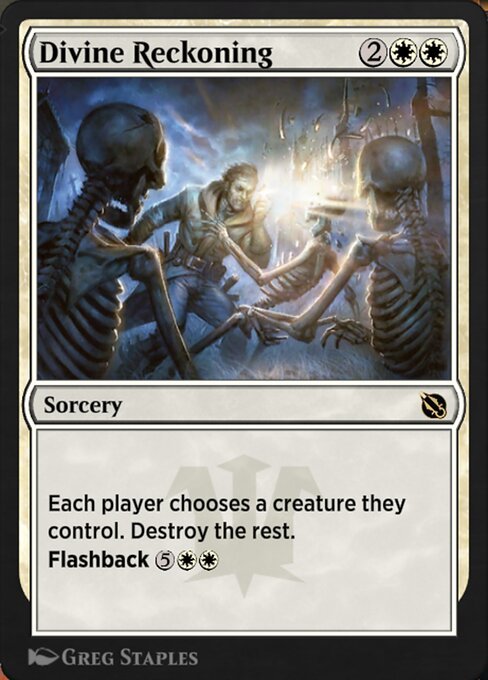
Divine Reckoning
AI Rating: 3.6Pro Rating: 3.0
This type of effect always underperforms. Since both players get to make their choice, your opponent will always be able to hold on to their best creature. So will you, but if your best creature isn’t already the best one on the battlefield, casting this doesn’t actually accomplish much, and that’s frustrating. This feels great when your opponent is overwhelming you with quantity more than quality, but if they have the best creature on the battlefield, you’re in trouble.
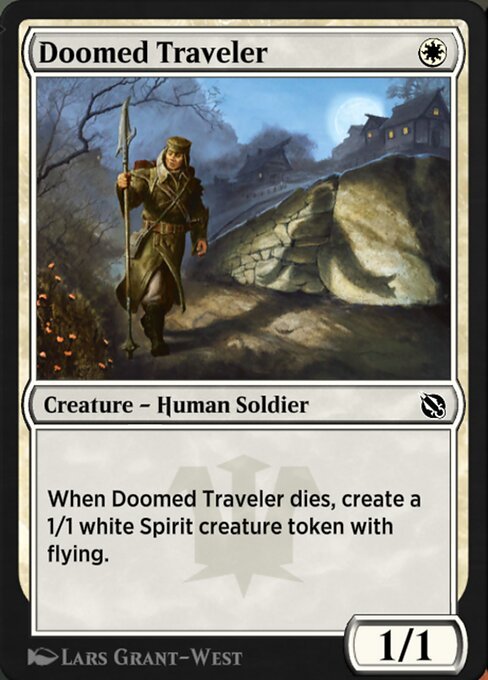
Doomed Traveler
AI Rating: 2.6Pro Rating: 3.0
For one mana, you end up with a 1/1 and a 1/1 Flyer. That’s a great deal, and also makes this great sacrifice fodder.
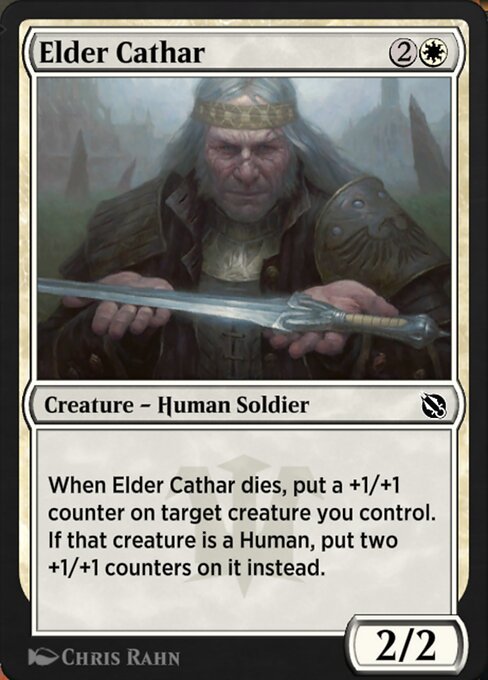
Elder Cathar
AI Rating: 2.1Pro Rating: 3.0
This is a pretty nice payoff for Humans. Paying 3 mana for 4/4 worth of stats feels pretty good, and also makes the Cathar good sacrifice fodder.
Feeling of Dread
AI Rating: 1.5Pro Rating: 3.0
Casting this once in hand and once from your graveyard over two turns can often really turn a game around, as it allows you to attack far more effectively while severely hampering your opponent’s ability to attack effectively. You can of course also cast it from your hand and flash it back all in the same turn, which wins the game on a lot of board states.

Fiend Hunter
AI Rating: -0Pro Rating: 4.0
Adding to the board while taking away from your opponent is a great feeling, and that’s exactly what the Hunter does! It may not permanently remove something, but at a minimum it tends to greatly disrupt your opponent’s game play, and in the situations where they can’t kill it, it often wins you the game.
Lingering Souls
AI Rating: 3.9Pro Rating: 4.0
This is a power house. For a total of five mana you can get 4 1/1 flying tokens. That’s enough to quickly the end the game or help you stabilize if you were behind.
Rally the Peasants
AI Rating: 2.3Pro Rating: 2.5
Being able to buff your whole board on two separate attacks with only one card is pretty powerful! If you have the mana, you can also do it all at once!
Requiem Angel
AI Rating: 5Pro Rating: 4.5
A 6-mana 5/5 flyer can close out a game on its own, and that’s certainly true here, since it also gives you a flying token every time one of your non-Spirits dies.
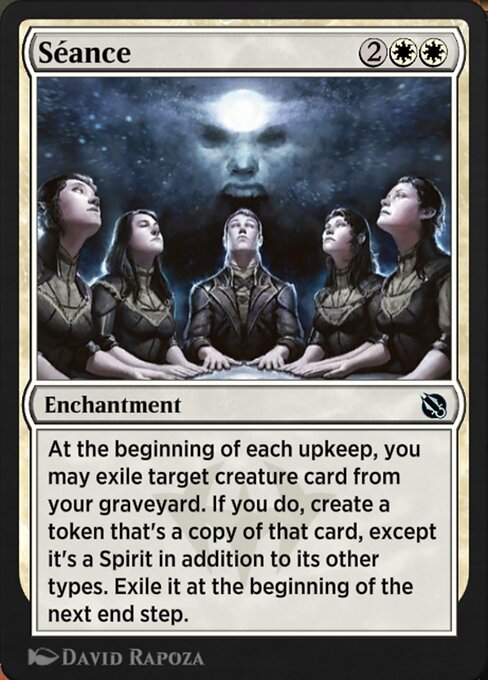
Séance
AI Rating: 0.7Pro Rating: 0.0 // 3.0
If your graveyard is well-stocked, this can produce some impressive value. Problem is, White isn’t amazing at getting things in the graveyard in this format, so it isn’t something that will just come together every time you draft it.
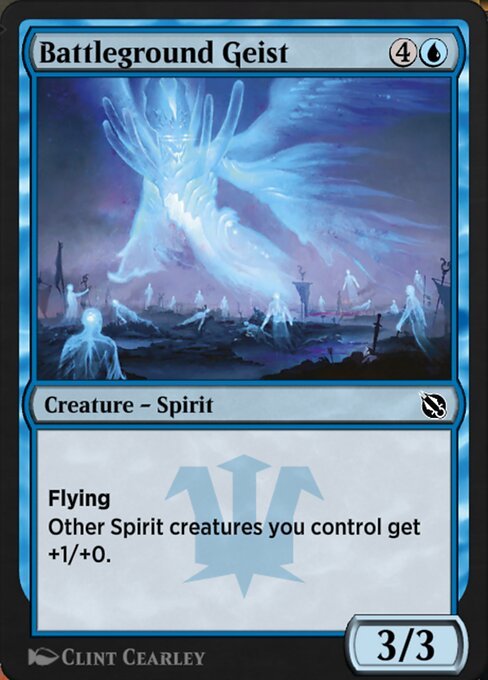
Battleground Geist
AI Rating: 2Pro Rating: 2.5
There are lots of Spirits in this set, and this will be doubly true while Battleground Geist is in the format. It has passable stats and impacts the board right away.
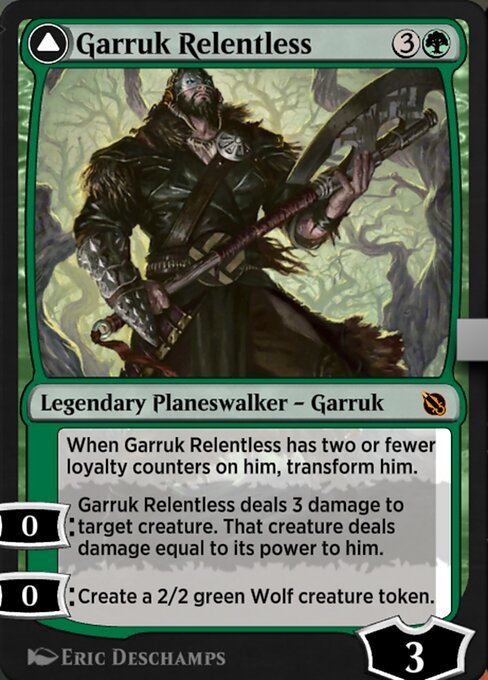
Garruk Relentless
AI Rating: 5Pro Rating: 5.0
This is an incredibly powerful planeswalker. At worst, he cranks out a 2/2 wolf every single turn – which is more than enough to allow you to protect him and eventually overwhelm your opponent. Using his removal effect is great too, especially in situations where Garruk can survive and transform! Once transformed, he is even better in most ways. He creates death touch wolves and has an easily accessible ultimate that is a graveyard based Overrun – which often wins the game the turn you use it.
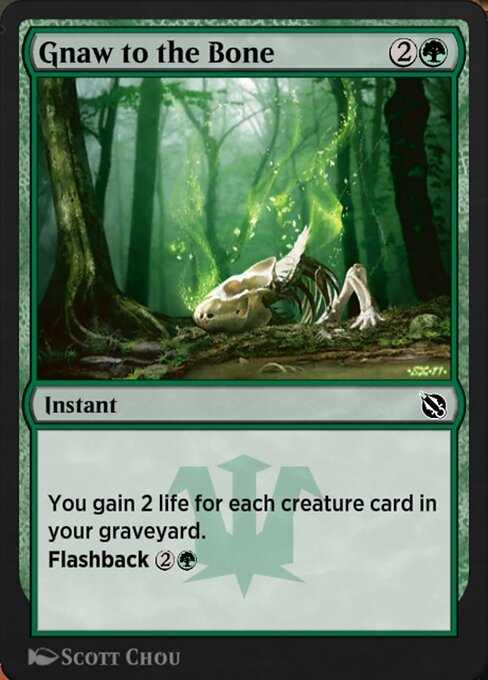
Gnaw to the Bone
AI Rating: 1.5Pro Rating: 0.0 // 2.5
If you manage to get a really good self-mill deck going – preferably one that has a win condition like Spider Spawning – Gnaw to the Bone becomes a really good card at helping you survive long enough to outvalue your opponent with the graveyard. There are lots of decks where it is unplayable, though.
Young Wolf
AI Rating: 3.2Pro Rating: 3.0
In the end, you get a 1/1 and a 2/2 for one mana. Sure, you don’t have them both at the same time, but you’re still getting an amazing rate – and the wolf is great for sacrificing too!
Diregraf Captain
AI Rating: 3.6Pro Rating: 3.5
This is a better Zombie payoff than the one in the main set. Lords are always quite powerful, and the additions of deathtouch and damaging your opponent when a Zombie dies is great.
Drogskol Captain
AI Rating: 3.8Pro Rating: 3.5
This is an amazing spirit payoff that has solid base stats as a Wind Drake. While it doesn’t grant hexproof to itself, granting to all of your spirits is no joke.
Falkenrath Aristocrat
AI Rating: 4.6Pro Rating: 5.0
A 4-mana 4/1 with Haste is a good card, and this one can grant itself indestructibility with a free sacrifice effect! When you can sacrifice Humans, it even gets bigger. This is a monstrous threat to deal with on virtually any board state, as you just can’t ignore a 4-power evasive creature – and even if you want to do something about it, there’s a good chance you won’t be able to.
Geist of Saint Traft
AI Rating: 5Pro Rating: 4.0
This is a great place to put Auras or Equipment, as Hexproof makes it very difficult for your opponent to interact. And that’s good, because there are lots of board states where the Geist isn’t that good on his own. After all, he’s only a 2/2. The best you can hope for is that you’ll trade him off and get in for 4 with the Angel. But if you can support Geist with combat tricks and other things to enhance it, it can get truly absurd.
Havengul Lich
AI Rating: -0Pro Rating: 4.5
This gives you some insane value, since it makes sure you have something to cast on virtually every turn. Keep in mind you can cast cards from either graveyard, although you do have to have the right colored mana to cast them.
Huntmaster of the Fells
AI Rating: 5Pro Rating: 5.0
A 4-mana 2/2 that makes a 2/2 and gains you 2 life is a great Limited card. Huntmaster of the Fells is far better than that! Partly because it can transform into the larger Ravager of the Fells while damaging stuff, and partly because when it flips back to the Huntmaster, you get that original trigger all over again!
Immerwolf
AI Rating: 3Pro Rating: 3.5
Obviously, this buffs most creatures in Red/Green, and making all of your werewolves stay stuck in their more powerful form is awesome.
Sigarda, Host of Herons
AI Rating: 5Pro Rating: 5.0
Sigarda is virtually unkillable, and represents a 4-turn clock. If that’s not a bomb, I’m not sure what is.
Stromkirk Captain
AI Rating: 3.8Pro Rating: 3.5
This offers an impressive boost to your Vampires, which will be the bulk of your creatures in Black/Red.
Avacyn's Collar
AI Rating: 2.4Pro Rating: 2.5
The boost this offers isn’t really worth it, unless you have a lot of Humans, because then you can turn trades into an advantage.
Blazing Torch
AI Rating: 2.1Pro Rating: 2.0
This is really good against Vampires and Zombies, but it is even solid when your opponent has 0 of them. After all, it is basically a colorless two mana Shock – and it adds itself to the graveyard, helping you with delirium.
Butcher's Cleaver
AI Rating: 2.5Pro Rating: 1.5
In original Innistrad, this was a nasty combo with Invisible Stalker. Sadly, the Stalker and the Cleaver won’t be in the format at the same time, and that definitely hurts this card’s stock. It costs a lot to cast and to Equip. While lifelink is nice, this is often just too clunky.
Demonmail Hauberk
AI Rating: 1.4Pro Rating: 1.5
This gives a decent enough boost for its casting cost, but sacrificing a creature is a steep price to pay for many decks.
Galvanic Juggernaut
AI Rating: 2.1Pro Rating: 1.0
A 4-mana 5/5 is nice. One that has a text box entirely filled with downside is not.
Traveler's Amulet
AI Rating: 2.1Pro Rating: 2.5
This nicely fixes your mana, while also giving you an Artifact in the graveyard for Delirium.
Vessel of Endless Rest
AI Rating: -0Pro Rating: 1.0
Most three mana mana rocks aren’t worth using in Limited, and that’s mostly true here. It can be used to break up Delirium, or take away some other graveyard value, which has its uses, but more often than not the ETB ability has little to no effect on the game.
Evolving Wilds
AI Rating: 4.2Pro Rating: 2.5
Wilds is always a nice way to fix your mana, and in this format getting a land into your graveyard has extra value.
Haunted Fengraf
AI Rating: 2.1Pro Rating: 1.0
This is bad for your mana base, and the fact it is random is a pretty big problem.
Emrakul, the Promised End
AI Rating: 4.7Pro Rating: 4.5
Casting Emrakul for 7 is fairly doable in this format, as the graveyard decks are very real! You already have lots of incentive to get Delirium going, and Emrakul is like the ultimate payoff. Getting her down to 7 mana is very doable if your deck has the right composition. 7 mana is definitely a ton, but you’re going to win almost every time you cast her. Taking over your opponent’s turn and making all kinds of bad decisions – like attacking into Emrakul and pointing their removal at their own stuff – is absolutely backbreaking, especially when stapled to a creature this massive.

Eternal Scourge
AI Rating: 4.1Pro Rating: 3.5
This is a three mana 3/3 that just won’t stay away. Sure, any spell at all exiles the Scourge, but you can just keep casting it over and over again, so your opponent isn’t going to be that keen on using spells on it anyway.
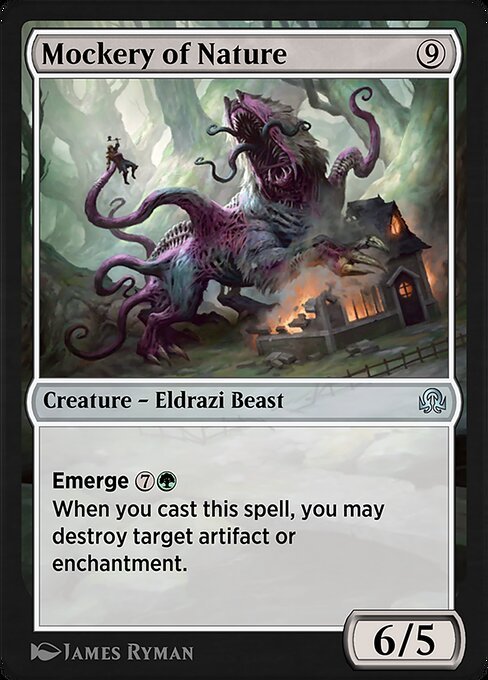
Mockery of Nature
AI Rating: 1.9Pro Rating: 2.5
This format has a decent number of Artifacts and Enchantments, and if you have a target, the Mockery will feel amazing. However, there aren’t so many of them in the set that this will consistently give you that sweet 2-for-1.
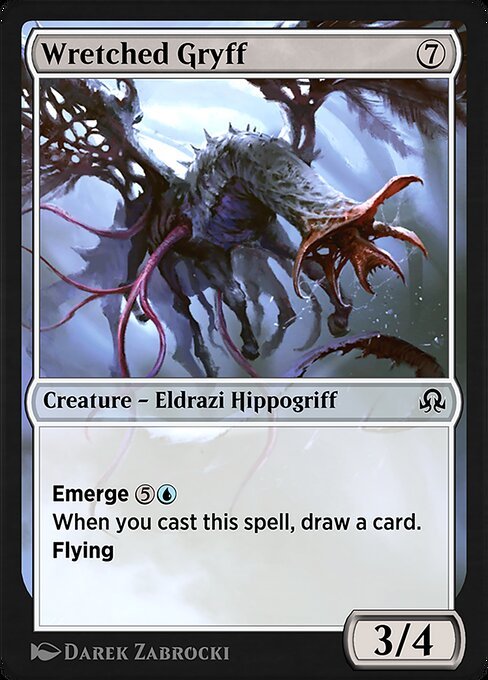
Wretched Gryff
AI Rating: 2.2Pro Rating: 4.0
This is one of the best Commons in the set. Casting it for the full 7 mana is totally passable, and if you can sacrifice something that gives you value and cast the Gryff for three or four mana – which happens all the time – it feels particularly amazing.
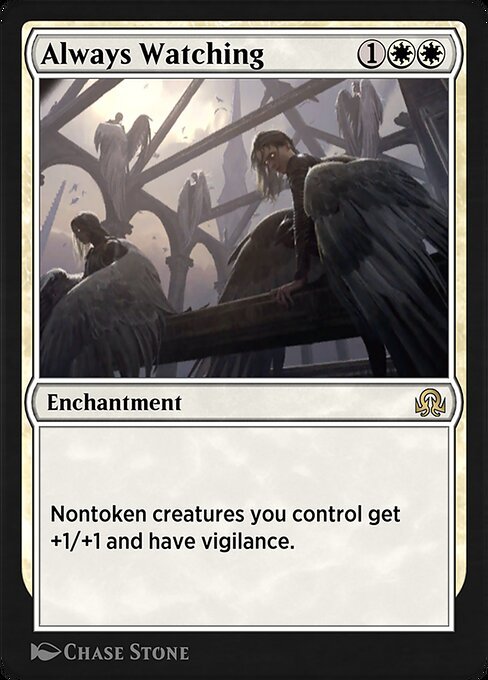
Always Watching
AI Rating: 4.6Pro Rating: 4.0
An anthem that also gives creatures Vigilance is great. Not buffing tokens is definitely a downside, but this offers such a massive upgrade to most of your creatures that it doesn’t matter.
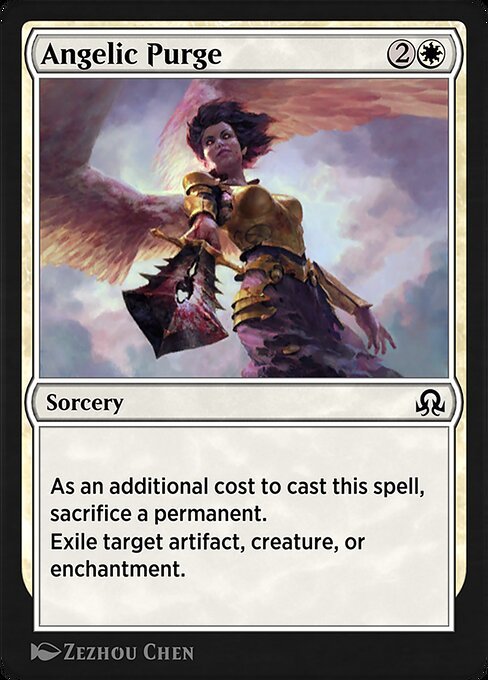
Angelic Purge
AI Rating: 3.1Pro Rating: 2.5
2-for-1ing yourself to destroy something isn’t great, but there is enough sacrifice fodder in this format that the first copy of Angelic Purge usually makes the cut.
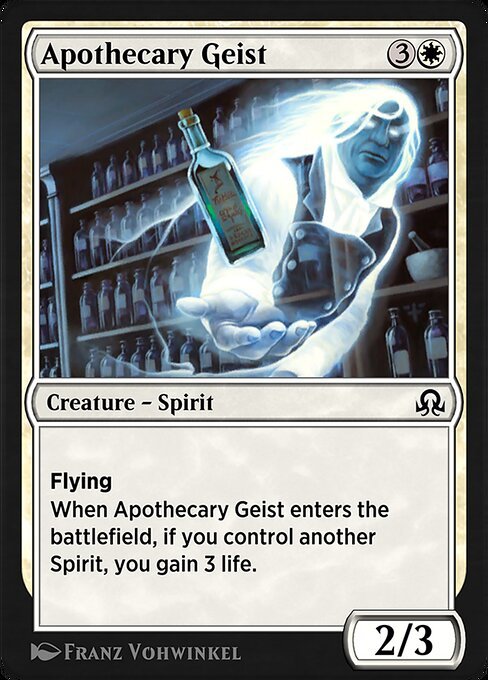
Apothecary Geist
AI Rating: 2.2Pro Rating: 3.0
This was a big overperformer last time around. Its stats line up reasonably well in the format, and it gains you that 3 life pretty often.

Archangel Avacyn
AI Rating: 4.8Pro Rating: 5.0
This card is absolutely absurd in Limited. A 5-mana 4/4 with Flying, Vigilance, and Flash is already great – and she is significantly better than that! Making your whole board indestructible allows you to set up all kinds of advantageous blocks, and you can even flash her in to block something! Her transformation is pretty potent too, though there are occasionally times where it isn’t super advantageous.

Blessed Alliance
AI Rating: 3.1Pro Rating: 3.5
The most useful mode on this is usually making your opponent sacrifice an opposing creature. Paying 2 mana for that isn’t amazing, especially when your opponent attacks with multiple creatures. However, the fact you can pump some extra mana into this for some extra effects is great.
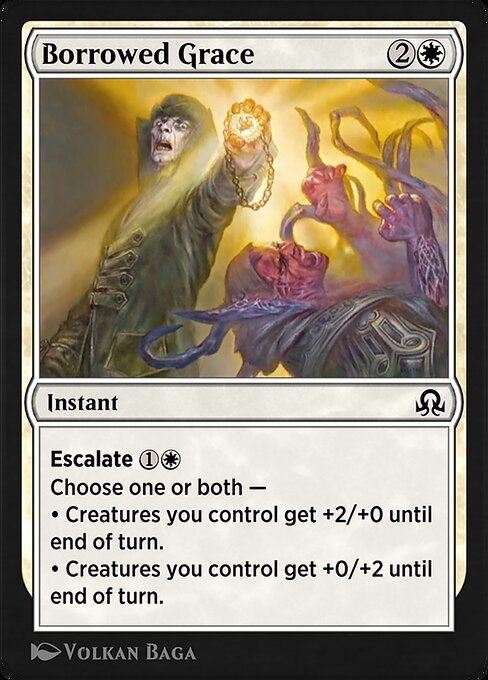
Borrowed Grace
AI Rating: 1.1Pro Rating: 1.5
So you can pay for +2/+2 to the whole board, or three mana for just one of these effects. Neither is very exciting.
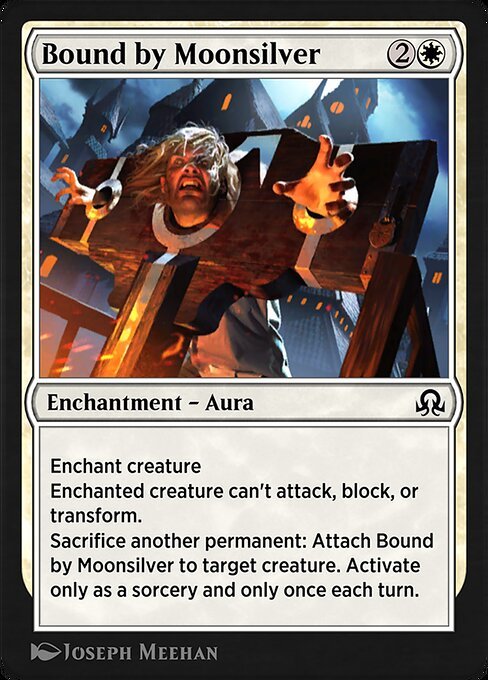
Bound by Moonsilver
AI Rating: 3.9Pro Rating: 4.0
This is amazing removal, and it was at Uncommon last time around. Downshifting it is pretty surprising, because it deals with most things in the format quite effectively! Its great you can move it around when you need to, too.
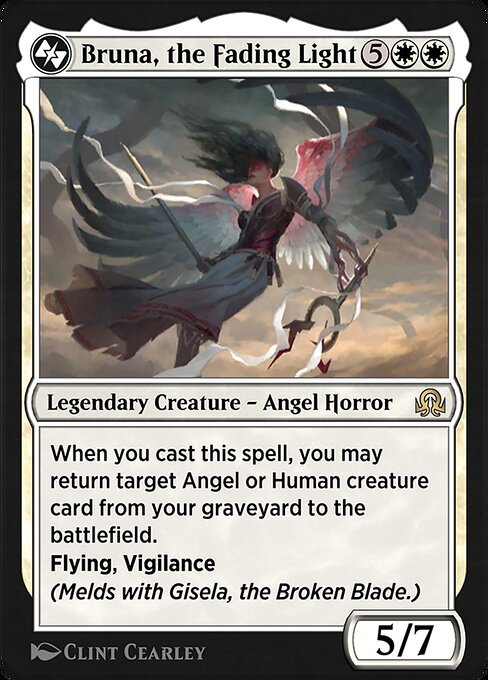
Bruna, the Fading Light
AI Rating: 4.6Pro Rating: 4.0
By the time you cast her, Bruna will usually have something to reanimate, and she brings some pretty nice stats to the board too. Her stat-line isn’t too shabby either.

Bygone Bishop
AI Rating: 4.9Pro Rating: 4.0
This has great stats to start, and generating Clues makes it a very powerful value engine.
Collective Effort
AI Rating: 4.7Pro Rating: 4.5
If you can only get one of these modes, it isn’t great – but the fact you can get all three without spending any other mana is amazing! Three mana to destroy a big creature, permanently buff your whole board, and maybe even destroy an Enchantment is nuts! It IS a sorcery, so it can be a little clunky to tap your guys down, but it is well worth the risk
Courageous Outrider
AI Rating: 2.8Pro Rating: 3.5
This can draw you a Human pretty frequently, especially in Green-White, and a 2-for-1 is a powerful thing.

Dauntless Cathar
AI Rating: 3Pro Rating: 3.5
Trading this off for something and then getting a flying token out of your graveyard feels great. Also works well if you want to sacrifice it or you end up milling it.
Dawn Gryff
AI Rating: 1.7Pro Rating: 2.0
A three mana 2/2 Flyer was a lot better back in 2016, and I think this format is similar enough for this to be solid.
Declaration in Stone
AI Rating: 4.9Pro Rating: 3.5
This removes things very efficiently. The downside is real, as you eventually get 2-for-1’d, but the flexibility and efficiency is enough for this to feel pretty great. It gets better in aggro decks, where you can put your opponent on the back foot and not really allow them to cash in the clue, since if they don’t add to the board, they die.
Cackling Counterpart
AI Rating: 4.6Pro Rating: 4.0
Three mana to make a copy of your best creature is usually a good deal, and so is the fact that in the later stages of the game you can do it again – and usually on a more powerful creature!
Forbidden Alchemy
AI Rating: 2.8Pro Rating: 2.5
Once you’ve cast this and flashed it back, this gives you a 2-for-1 with really good card selection, and it loads up the graveyard too, which is likely to give you even more value than that.
Havengul Runebinder
AI Rating: 3.3Pro Rating: 4.0
This is very powerful when you have a well-stocked graveyard, something that is eminently doable in this format. Cranking out tokens and buffing all of your Zombies makes this a pretty amazing engine.
Invisible Stalker
AI Rating: 1.1Pro Rating: 3.5
An unblockable hexproof creature represents some pretty serious inevitability, especially if you can put Equipment or Auras on it.
Mist Raven
AI Rating: 4.1Pro Rating: 4.0
This leds you add a pretty real body to the board while also subtracting from your opponent’s board. This gives you a huge leg up in most games, whether you’re ahead or behind.
Murder of Crows
AI Rating: 2Pro Rating: 3.0
A 5-mana 4/4 Flyer is some serious business, and its nice that this one lets you loot – something that is extra good in a format with Madness, Flashback, and Delirium.

Mystic Retrieval
AI Rating: 2.2Pro Rating: 1.5
This is very slow and clunky. You do eventually get a 2-for-1 out of it, but there are better ways to recur instants and sorceries in this format.
Selhoff Occultist
AI Rating: 1Pro Rating: 1.5
Milling yourself with this is more often what you want to be doing in this format, as milling your opponent might just end up helping them. Overall, this has mediocre stats and an effect that isn’t all that impressive.
Silent Departure
AI Rating: 2.7Pro Rating: 2.5
Bouncing stuff doesn’t generally let you trade for a card – instead it just gives you tempo. But this is cheap enough that you can get a pretty good deal, especially because you can bounce something again later in the game.
Stitcher's Apprentice
AI Rating: 1.2Pro Rating: 1.5
Generating a 2/2 every turn for only two mana is great! Having to sacrifice a creature every time is less so, even in a format with sacrifice fodder.
Barter in Blood
AI Rating: -0Pro Rating: 2.0
This card is pretty awkward. The format is littered with cards that do good stuff when they die, or that do things from the graveyard. The idea here is that you’d sacrifice some of those expendable things, but the problem is your opponent is just as likely to have them.
Bloodflow Connoisseur
AI Rating: 1.2Pro Rating: 3.0
Free sacrifice effects that aren’t limited to once per turn always play incredibly well. Your opponent can’t ever rule out that you’re going to use this ability, and they always have to respect it. There is plenty of sacrifice fodder in the format, too.
Bloodline Keeper
AI Rating: 5Pro Rating: 5.0
A 4-mana 3/3 flyer that can crank out 2/2 Flyers is already a bomb, so the fact that the Keeper can transform into a Vampire lord that pumps all of those bats is absolutely insane!
Bump in the Night
AI Rating: 0.7Pro Rating: 1.0
Cards that damage your opponent and don’t do anything else are rarely worth it in Limited. This does have the capacity to do up to six for only one card, but you have to pay 7 mana to get there. It is kind of a funny card, because it has kind of an ugly baseline, but it actually gets better in multiples, since you are more likely to find a critical mass that lets you burn out your opponent. Problem is, since this is part of a bonus sheet, actually getting multiples of it won’t happen very often.
Falkenrath Noble
AI Rating: 4.3Pro Rating: 2.5
A 4-mana 2/2 flyer isn’t the best rate, but the ETB effect here does enough for this to be solid.
Ghoulraiser
AI Rating: 2.5Pro Rating: 3.0
Gravedigger for three mana is a nice card, even if you can only get back Zombies and it is entirely random! This delivers a nice 2-for-1 in most Black decks.
Increasing Ambition
AI Rating: 4.6Pro Rating: 0.0
A tutor for five is really bad. This does add Flashback, which means in the long run you can get a 4-for-1 out of it, but it is so clunky and expensive that you’re probably going to lose if you’re wasting your time casting it.
Sever the Bloodline
AI Rating: 4.5Pro Rating: 4.0
This is a nice removal spell that can be particularly good against multiples or tokens. It is also two removal spells in one if the game goes long enough!
Skirsdag High Priest
AI Rating: 4.6Pro Rating: 4.0
If you can get even one Demon out of this, it is completely insane. You won’t always be able to do that, though. You need to have creatures around worth tapping and something has to have died that turn. This is a situation you can certainly create in this format, but it won’t always line up perfectly.
Tragic Slip
AI Rating: -0Pro Rating: 3.5
This is not a very good removal spell without Morbid, though it is just barely passable. With morbid, though, it can kill virtually everything for only one mana. That upside is accessible, and enough for this to be premium.
Unburial Rites
AI Rating: 3.2Pro Rating: 1.5 // 3.5
This is powerful because it reanimates efficiently and does it twice, but this format isn’t loaded up with amazing things to reanimate, limiting its effectiveness. If you’re good at milling yourself and you have a few big scary things around it can do some serious work.
Balefire Dragon
AI Rating: 4.6Pro Rating: 4.0
If this hits your opponent, it is pretty much game over for them. However, making that happen isn’t always easy! 7 mana is a lot, and for that big of an investment I kind of expect this to do something immediately to give me some real value, but instead, if your opponent has removal, you end up with nothing but a massive tempo hit. It is still incredibly strong, don’t get me wrong – but the cost of the card and the lack of permanent value keep it out of bomb territory.
Brimstone Volley
AI Rating: -0Pro Rating: 4.0
Three mana for a three damage instant is already a high pick – so the Morbid upside here turns this into an absolutely incredible burn spell.
Devil's Play
AI Rating: 4.8Pro Rating: 4.0
Blaze is always a nice card in Limited, and this one can even be flashed back! Obviously, it does a lot less damage when you flash it back since you have to invest three Red into it, but you can usually get a 2-for-1 out of this, or just use it to finish off your opponent.
Faithless Looting
AI Rating: 2.7Pro Rating: 3.5
One mana to loot twice is a good deal, and this has flashback. This is an amazing discard outlet for Madness, and can help with delirium too.
Forge Devil
AI Rating: 1.8Pro Rating: 1.0
Keep in mind that this card does not say “up to” nor is it optional. In other words, if you want to play this with nothing else on the board, it will ping itself. This isn’t too bad when it can pick off an opposing creature, but there are lots of board states where it just can’t do that.
Kruin Outlaw
AI Rating: -0Pro Rating: 4.0
A three mana 2/2 with First Strike is a great starting point, and once this transforms it becomes a massive problem, especially if you have some other werewolves around.
Past in Flames
AI Rating: 3.9Pro Rating: 0.0
This is cool, but it is very difficult to cast this and actually be able to cast some things from your graveyard. You need an enormous amount of mana to make it happen, and that just isn’t something you can do in Limited.
Skirsdag Cultist
AI Rating: 1.7Pro Rating: 3.0
This is a very inefficient creature, but cashing in expendable creatures to Shock your opponent or their creatures is pretty nice.
Traitorous Blood
AI Rating: 1.7Pro Rating: 1.0 // 3.5
If you have free or cheap sacrifice outlets to pair with this (and this format has them!), it is insanely powerful. If you don’t, it is almost unplayable. You know, the usual for Threaten effects.
Vampiric Fury
AI Rating: 1.5Pro Rating: 1.0 // 2.5
This is cheaper than most Trumpet-Blast type effects, but only buffing Vampires is enough of a restriction that I’m not that thrilled about it. If you really got their on vampires, it isn’t a bad inclusion, but there are lots of Red decks that won’t play this.
Zealous Conscripts
AI Rating: 4.4Pro Rating: 4.0
The Conscripts can allow you to attack effectively on almost any board state, between adding a Hasty body to the board and stealing your opponent’s best permanent – which is usually a creature It gets even nastier if you have some free sacrifice outlets, so that you can get rid of their creature permanently – but even if you don’t, the Conscripts are going to have an extremely positive effect on the outcome of the game.
Avacyn's Pilgrim
AI Rating: 1.4Pro Rating: 3.5
Mana dorks are amazing in the early game, as playing your three drops on turn two is very powerful. They get worse in the late game, when they have small irrelevant bodies and you don’t need the mana anymore. Still, the early game upside is enough to make the Pilgrim something you take highly.
Gutter Grime
AI Rating: 5Pro Rating: 3.5
Five mana is a lot for card that doesn’t impact the board immediately – but Gutter Grime kind of does. It suddenly makes it so all of your creatures give you value when they die, and that value can quickly snowball.
Hollowhenge Scavenger
AI Rating: 1.1Pro Rating: 3.0
This is passable without Morbid, and the times where you can add this very real body to the board and gain 5 life are incredible.
Mayor of Avabruck
AI Rating: 4.6Pro Rating: 4.5
A human lord is welcome in Green in this format – and so is a Werewolf lord! So its great that the Mayor can do both. It is especially powerful as a werewolf, because it effectively cranks out a 3/3 every turn.

Moonmist
AI Rating: 1Pro Rating: 0.5
Even with all this additional upside, this is still a fog, and those are rarely worth it in Limited.
Somberwald Sage
AI Rating: -0Pro Rating: 2.5
A three mana 0/1 is pretty awful, and dies to pretty much everything but this does seriously ramp your mana if you get to untap. The problem is, you both need the Sage to survive and something to spend the mana on, and neither are a guarantee.
Spider Spawning
AI Rating: 3.9Pro Rating: 1.0 // 4.5
This card is insane, and was one of the defining cards of original Innistrad draft. Just like that format, this one is loaded up with ways to mill yourself, so Spider Spawning is incredibly effective both times you cast it, and makes many game-states unwinnable for your opponent. This really only works in a deck that is built around it, but it will usually be the most powerful card in your deck when you pull that off.
Travel Preparations
AI Rating: 2.8Pro Rating: 3.5
This gives out a lot of +1/+1 counters for only four mana total, and can drastically improve your board state.
| Card | Pro Rating | AI Rating | APA | Picked | ALSA | Seen |
|---|---|---|---|---|---|---|
|
ss-mythic|Blue|Legendary Planeswalker — Jace
|
4.0 | 5 | 1.00 | 1 | 1.00 | 2 |
|
ss-mythic|Blue|Sorcery
|
3.0 | 5 | 1.00 | 2 | 3.20 | 16 |
|
ss-rare|Black|Sorcery
|
3.0 | 5 | 1.00 | 3 | 1.25 | 4 |
|
ss-mythic|Black|Legendary Planeswalker — Liliana
|
4.0 | 5 | 1.00 | 2 | 1.00 | 4 |
|
ss-mythic|Black|Creature — Demon
|
4.5 | 5 | 1.00 | 1 | 1.00 | 1 |
|
ss-rare|Black|Creature — Vampire Horror
|
3.5 | 5 | 1.00 | 1 | 1.83 | 6 |
|
ss-mythic|Red|Creature — Dragon
|
5.0 | 5 | 1.00 | 3 | 1.00 | 4 |
|
ss-rare|Red|Creature — Devil
|
3.5 | 5 | 1.00 | 1 | 2.20 | 5 |
|
ss-mythic|Green|Sorcery
|
3.5 | 5 | 1.00 | 1 | 1.25 | 4 |
|
ss-mythic|Red|Green|Legendary Planeswalker — Arlinn
|
5.0 | 5 | 1.00 | 5 | 1.40 | 6 |
|
ss-mythic|White|Blue|Green|Legendary Planeswalker — Tamiyo
|
4.0 | 5 | 1.00 | 2 | 1.25 | 4 |
|
ss-rare|White|Creature — Angel
|
4.5 | 5 | 1.00 | 1 | 2.50 | 2 |
|
ss-mythic|Green|Legendary Planeswalker — Garruk
|
5.0 | 5 | 1.00 | 1 | 1.00 | 1 |
|
ss-mythic|White|Blue|Legendary Creature — Spirit Cleric
|
4.0 | 5 | 1.00 | 1 | 1.00 | 1 |
|
ss-mythic|Red|Green|Creature — Human Werewolf
|
5.0 | 5 | 1.00 | 1 | 1.00 | 1 |
|
ss-mythic|White|Green|Legendary Creature — Angel
|
5.0 | 5 | 1.00 | 1 | 1.00 | 1 |
|
ss-mythic|Black|Creature — Vampire
|
5.0 | 5 | 1.00 | 1 | 1.33 | 3 |
|
ss-rare|Green|Enchantment
|
3.5 | 5 | 1.00 | 1 | 4.00 | 2 |
|
ss-mythic||Creature — Eldrazi Boar
|
4.5 | 4.9 | 1.33 | 3 | 1.33 | 3 |
|
ss-rare|White|Legendary Creature — Human Soldier
|
4.0 | 4.9 | 1.20 | 5 | 1.14 | 7 |
|
ss-rare|Green|Creature — Human Shaman Werewolf
|
3.0 | 4.9 | 1.25 | 4 | 1.73 | 18 |
|
ss-rare|Green|Creature — Human Scout
|
5.0 | 4.9 | 1.20 | 5 | 1.17 | 6 |
|
ss-mythic|White|Green|Legendary Creature — Angel
|
5.0 | 4.9 | 1.33 | 3 | 1.33 | 3 |
|
ss-rare|White|Creature — Spirit Cleric
|
4.0 | 4.9 | 1.40 | 10 | 1.31 | 13 |
|
ss-rare|White|Sorcery
|
3.5 | 4.9 | 1.25 | 8 | 1.82 | 13 |
|
ss-mythic|White|Legendary Creature — Angel Horror
|
4.0 | 4.8 | 1.67 | 3 | 1.67 | 3 |
|
ss-rare|White|Creature — Spirit Cleric
|
4.0 | 4.8 | 1.60 | 10 | 1.69 | 14 |
|
ss-rare|White|Creature — Human Knight
|
3.5 | 4.8 | 1.43 | 7 | 2.20 | 12 |
|
ss-rare|Blue|Creature — Insect Horror
|
5.0 | 4.8 | 1.50 | 10 | 1.75 | 13 |
|
ss-rare|Black|Creature — Zombie
|
4.0 | 4.8 | 1.50 | 2 | 3.25 | 9 |
|
ss-rare|Black|Creature — Vampire Horror
|
4.0 | 4.8 | 1.50 | 2 | 1.92 | 13 |
|
ss-rare|Red|Creature — Angel
|
3.0 | 4.8 | 1.50 | 2 | 2.85 | 14 |
|
ss-mythic|Green|Legendary Creature — Spider
|
5.0 | 4.8 | 1.50 | 2 | 1.75 | 4 |
|
ss-mythic|White|Red|Legendary Planeswalker — Nahiri
|
4.0 | 4.8 | 1.67 | 3 | 1.60 | 5 |
|
ss-mythic|Black|Red|Legendary Creature — Vampire Knight
|
4.5 | 4.8 | 1.50 | 2 | 1.50 | 2 |
|
ss-mythic|White|Black|Legendary Planeswalker — Sorin
|
5.0 | 4.8 | 1.50 | 4 | 1.40 | 5 |
|
ss-rare|Red|Green|Legendary Creature — Human Werewolf
|
4.5 | 4.8 | 1.55 | 11 | 1.87 | 18 |
|
ss-mythic|White|Legendary Creature — Angel
|
5.0 | 4.8 | 1.50 | 4 | 1.50 | 4 |
|
ss-rare|Red|Sorcery
|
4.0 | 4.8 | 1.50 | 2 | 1.33 | 3 |
|
ss-mythic|White|Sorcery
|
4.5 | 4.7 | 1.75 | 4 | 1.60 | 5 |
|
ss-rare|Blue|Creature — Horror
|
4.0 | 4.7 | 1.80 | 5 | 2.36 | 15 |
|
ss-rare|Black|Sorcery
|
3.5 | 4.7 | 1.75 | 4 | 2.00 | 13 |
|
ss-rare|Red|Creature — Human Soldier
|
3.5 | 4.7 | 1.83 | 6 | 2.00 | 8 |
|
ss-rare|Green|Creature — Hydra
|
4.0 | 4.7 | 1.75 | 8 | 2.12 | 9 |
|
ss-rare|White|Green|Creature — Human Knight
|
4.5 | 4.7 | 1.75 | 4 | 2.29 | 7 |
|
ss-mythic||Legendary Creature — Eldrazi
|
4.5 | 4.7 | 1.75 | 4 | 1.75 | 4 |
|
ss-rare|White|Sorcery
|
4.5 | 4.7 | 1.86 | 7 | 2.30 | 11 |
|
ss-rare||Creature — Eldrazi Insect
|
3.0 | 4.6 | 2.00 | 9 | 2.00 | 12 |
|
ss-rare|Black|Sorcery
|
5.0 | 4.6 | 2.25 | 4 | 2.20 | 5 |
|
ss-mythic|Black|Creature — Zombie
|
4.0 | 4.6 | 2.00 | 1 | 2.00 | 3 |
|
ss-rare||Artifact — Equipment
|
4.5 | 4.6 | 2.00 | 2 | 2.00 | 5 |
|
ss-mythic|Black|Red|Creature — Vampire Noble
|
5.0 | 4.6 | 2.00 | 1 | 2.00 | 1 |
|
ss-rare|White|Enchantment
|
4.0 | 4.6 | 2.20 | 5 | 2.20 | 11 |
|
ss-rare|White|Legendary Creature — Angel Horror
|
4.0 | 4.6 | 2.20 | 5 | 2.11 | 9 |
|
ss-rare|Blue|Instant
|
4.0 | 4.6 | 2.00 | 1 | 2.00 | 5 |
|
ss-rare|Black|Sorcery
|
0.0 | 4.6 | 2.00 | 1 | 4.25 | 5 |
|
ss-rare|Black|Creature — Human Cleric
|
4.0 | 4.6 | 2.00 | 1 | 2.00 | 1 |
|
ss-mythic|Red|Creature — Dragon
|
4.0 | 4.6 | 2.00 | 1 | 2.00 | 1 |
|
ss-rare|Green|Creature — Human Advisor Werewolf
|
4.5 | 4.6 | 2.00 | 4 | 1.75 | 5 |
|
ss-uncommon|White|Enchantment — Aura
|
2.5 | 4.5 | 2.50 | 12 | 2.71 | 39 |
|
ss-rare|Red|Creature — Wolf
|
3.0 | 4.5 | 2.33 | 6 | 2.33 | 9 |
|
ss-rare|Red|Sorcery
|
4.0 | 4.5 | 2.33 | 3 | 2.00 | 6 |
|
ss-rare|White|Creature — Angel
|
4.5 | 4.5 | 2.50 | 2 | 2.60 | 5 |
|
ss-uncommon|Black|Sorcery
|
4.0 | 4.5 | 2.40 | 5 | 3.00 | 7 |
|
ss-rare||Creature — Eldrazi Octopus
|
4.5 | 4.4 | 2.57 | 7 | 2.60 | 10 |
|
ss-mythic|Blue|Enchantment
|
0.0 | 4.4 | 2.67 | 3 | 4.50 | 9 |
|
ss-mythic|Blue|Black|Legendary Creature — Human Wizard
|
4.5 | 4.4 | 2.67 | 3 | 2.57 | 7 |
|
ss-rare|White|Blue|Creature — Spirit
|
4.0 | 4.4 | 2.80 | 5 | 2.60 | 6 |
|
ss-rare||Legendary Artifact
|
3.5 | 4.4 | 2.67 | 6 | 2.83 | 19 |
|
ss-rare|Red|Creature — Human Warrior
|
4.0 | 4.4 | 2.67 | 3 | 2.25 | 4 |
|
ss-rare|Blue|Creature — Zombie Horror
|
4.5 | 4.3 | 3.00 | 4 | 2.57 | 7 |
|
ss-rare|Black|Creature — Zombie Giant
|
4.0 | 4.3 | 3.00 | 5 | 2.33 | 9 |
|
ss-rare|Red|Creature — Devil Horror
|
3.5 | 4.3 | 3.00 | 7 | 3.22 | 10 |
|
ss-rare|Red|Sorcery
|
4.0 | 4.3 | 3.00 | 2 | 2.60 | 5 |
|
ss-rare|Red|Creature — Vampire Berserker
|
2.5 | 4.3 | 3.00 | 2 | 3.14 | 17 |
|
ss-rare||Land
|
4.5 | 4.3 | 3.00 | 4 | 2.36 | 11 |
|
ss-uncommon|Black|Creature — Vampire Noble
|
2.5 | 4.3 | 3.00 | 2 | 2.00 | 7 |
|
ss-rare|Blue|Creature — Human Horror
|
3.5 | 4.2 | 3.29 | 7 | 3.00 | 11 |
|
ss-mythic|Red|Creature — Angel
|
2.0 | 4.2 | 3.33 | 3 | 4.00 | 4 |
|
ss-rare|Green|Creature — Wolf Spirit
|
3.5 | 4.2 | 3.33 | 6 | 2.73 | 12 |
|
ss-rare|Black|Red|Creature — Vampire Cleric
|
4.0 | 4.2 | 3.33 | 6 | 3.38 | 8 |
|
ss-rare|Black|Green|Creature — Human Warrior
|
4.0 | 4.2 | 3.20 | 5 | 3.08 | 14 |
|
ss-common||Land
|
2.5 | 4.2 | 3.33 | 3 | 4.50 | 6 |
|
ss-uncommon|White|Creature — Human Cleric
|
4.0 | 4.1 | 3.53 | 15 | 2.94 | 41 |
|
ss-uncommon|Red|Instant
|
4.0 | 4.1 | 3.50 | 20 | 3.58 | 40 |
|
ss-common|Red|Sorcery
|
4.0 | 4.1 | 3.40 | 45 | 3.61 | 108 |
|
ss-uncommon|Green|Creature — Human Warrior Werewolf
|
4.5 | 4.1 | 3.44 | 16 | 3.04 | 27 |
|
ss-rare|Blue|Green|Creature — Shapeshifter
|
4.0 | 4.1 | 3.50 | 4 | 3.00 | 9 |
|
ss-rare||Creature — Eldrazi Horror
|
3.5 | 4.1 | 3.40 | 5 | 3.46 | 13 |
|
ss-common|Blue|Creature — Bird
|
4.0 | 4.1 | 3.50 | 4 | 4.00 | 8 |
|
ss-uncommon|Green|Instant
|
4.0 | 4 | 3.75 | 20 | 3.29 | 45 |
|
ss-uncommon|Green|Creature — Human Druid
|
4.0 | 4 | 3.89 | 18 | 3.64 | 44 |
|
ss-uncommon|Green|Creature — Wolf Spirit
|
4.0 | 4 | 3.85 | 13 | 3.38 | 46 |
|
ss-rare|Green|Sorcery
|
3.0 | 4 | 3.75 | 4 | 2.44 | 9 |
|
ss-rare|Blue|Creature — Spirit
|
4.0 | 3.9 | 4.00 | 3 | 3.44 | 9 |
|
ss-uncommon|Black|Creature — Human Shaman
|
3.5 | 3.9 | 4.10 | 10 | 3.97 | 48 |
|
ss-uncommon|Black|Creature — Zombie
|
3.5 | 3.9 | 4.20 | 10 | 3.39 | 41 |
|
ss-rare|Red|Sorcery
|
3.5 | 3.9 | 4.00 | 6 | 3.30 | 11 |
|
ss-uncommon|Red|Instant
|
3.5 | 3.9 | 4.00 | 16 | 3.17 | 45 |
|
ss-mythic|Red|Sorcery
|
2.0 | 3.9 | 4.00 | 3 | 3.43 | 8 |
|
ss-uncommon|White|Sorcery
|
4.0 | 3.9 | 4.00 | 1 | 3.00 | 3 |
|
ss-common|White|Enchantment — Aura
|
4.0 | 3.9 | 4.15 | 41 | 4.65 | 144 |
|
ss-mythic|Red|Sorcery
|
0.0 | 3.9 | 4.00 | 1 | 3.00 | 4 |
|
ss-uncommon|Green|Sorcery
|
1.0 // 4.5 | 3.9 | 4.00 | 1 | 5.00 | 10 |
|
ss-rare|White|Legendary Creature — Human Soldier
|
3.0 | 3.8 | 4.50 | 4 | 3.80 | 5 |
|
ss-uncommon|White|Creature — Spirit
|
3.5 | 3.8 | 4.33 | 12 | 3.94 | 51 |
|
ss-uncommon|White|Creature — Human
|
3.5 | 3.8 | 4.42 | 12 | 4.14 | 52 |
|
ss-rare|Blue|Instant
|
1.5 | 3.8 | 4.50 | 2 | 3.07 | 15 |
|
ss-uncommon|Blue|Creature — Spirit
|
3.5 | 3.8 | 4.50 | 12 | 4.24 | 55 |
|
ss-rare|Blue|Creature — Spirit
|
3.0 | 3.8 | 4.33 | 3 | 3.40 | 11 |
|
ss-uncommon|Red|Creature — Human Rogue Werewolf
|
4.0 | 3.8 | 4.50 | 14 | 4.18 | 46 |
|
ss-uncommon|Red|Creature — Human Shaman
|
3.5 | 3.8 | 4.50 | 14 | 4.27 | 53 |
|
ss-uncommon|Green|Enchantment
|
4.0 | 3.8 | 4.30 | 20 | 4.36 | 69 |
|
ss-uncommon|White|Blue|Creature — Spirit Soldier
|
3.5 | 3.8 | 4.33 | 3 | 3.68 | 25 |
|
ss-uncommon|Black|Red|Creature — Vampire Soldier
|
3.5 | 3.8 | 4.40 | 10 | 5.04 | 38 |
|
ss-common|White|Creature — Human Soldier
|
3.0 | 3.7 | 4.69 | 39 | 4.53 | 142 |
|
ss-rare|Blue|Instant
|
3.0 | 3.7 | 4.67 | 6 | 4.62 | 24 |
|
ss-rare|Red|Sorcery
|
4.0 | 3.7 | 4.75 | 4 | 3.14 | 8 |
|
ss-rare|Blue|Creature — Zombie Horror
|
3.0 | 3.6 | 5.00 | 1 | 3.36 | 16 |
|
ss-uncommon|Blue|Creature — Spirit
|
3.5 | 3.6 | 4.79 | 19 | 4.40 | 56 |
|
ss-uncommon|Black|Creature — Human
|
4.0 | 3.6 | 4.86 | 7 | 4.20 | 52 |
|
ss-uncommon|Red|Creature — Vampire Berserker
|
2.5 | 3.6 | 4.83 | 12 | 4.77 | 60 |
|
ss-common|Red|Instant
|
2.5 // 4.0 | 3.6 | 4.83 | 48 | 4.75 | 138 |
|
ss-uncommon|Green|Creature — Human Warrior
|
3.5 | 3.6 | 4.81 | 16 | 4.35 | 64 |
|
ss-rare|White|Sorcery
|
3.0 | 3.6 | 5.00 | 1 | 4.50 | 2 |
|
ss-uncommon|Blue|Black|Creature — Zombie Soldier
|
3.5 | 3.6 | 4.80 | 5 | 4.86 | 43 |
|
ss-uncommon|White|Creature — Human Knight
|
3.0 | 3.5 | 5.20 | 10 | 3.41 | 39 |
|
ss-uncommon|White|Creature — Angel
|
2.5 | 3.5 | 5.25 | 8 | 5.41 | 73 |
|
ss-uncommon|Blue|Enchantment
|
4.0 | 3.5 | 5.25 | 12 | 5.63 | 66 |
|
ss-common|Black|Enchantment — Aura
|
3.5 | 3.5 | 5.23 | 31 | 5.68 | 175 |
|
ss-uncommon|Red|Creature — Wolf Horror
|
4.0 | 3.5 | 5.19 | 16 | 5.37 | 59 |
|
ss-rare|Green|Sorcery
|
1.0 | 3.5 | 5.20 | 15 | 4.20 | 69 |
|
ss-rare||Land
|
1.5 | 3.5 | 5.18 | 11 | 4.90 | 37 |
|
ss-uncommon|White|Creature — Spirit
|
3.0 | 3.4 | 5.50 | 18 | 5.73 | 83 |
|
ss-uncommon|Black|Creature — Vampire Soldier
|
3.5 | 3.4 | 5.44 | 9 | 5.34 | 54 |
|
ss-common|Red|Sorcery
|
3.0 | 3.4 | 5.36 | 36 | 5.10 | 162 |
|
ss-uncommon|Red|Instant
|
2.5 | 3.4 | 5.38 | 16 | 5.41 | 71 |
|
ss-uncommon|Green|Creature — Snake
|
3.5 | 3.4 | 5.47 | 15 | 4.36 | 52 |
|
ss-uncommon|Green|Creature — Human Soldier
|
3.5 | 3.4 | 5.38 | 21 | 5.40 | 86 |
|
ss-rare|White|Enchantment
|
0.0 | 3.3 | 5.80 | 5 | 4.95 | 21 |
|
ss-uncommon|Blue|Sorcery
|
0.0 // 3.5 | 3.3 | 5.86 | 14 | 5.45 | 66 |
|
ss-uncommon|Black|Creature — Vampire Noble
|
3.5 | 3.3 | 5.83 | 12 | 5.91 | 81 |
|
ss-uncommon|Black|Creature — Human Rogue
|
2.5 | 3.3 | 5.87 | 15 | 4.86 | 49 |
|
ss-uncommon|Red|Creature — Vampire Horror
|
4.0 | 3.3 | 5.73 | 11 | 3.60 | 39 |
|
ss-common|Green|Creature — Human Rogue
|
3.5 | 3.3 | 5.68 | 38 | 5.64 | 172 |
|
ss-common|Green|Creature — Werewolf Horror
|
3.0 | 3.3 | 5.87 | 23 | 4.68 | 122 |
|
ss-common|White|Enchantment — Aura
|
3.0 | 3.3 | 5.75 | 4 | 7.50 | 7 |
|
ss-rare|Blue|Creature — Human Wizard
|
4.0 | 3.3 | 5.75 | 4 | 5.09 | 15 |
|
ss-uncommon|White|Enchantment — Aura
|
3.5 | 3.2 | 6.00 | 4 | 3.68 | 43 |
|
ss-uncommon|Blue|Creature — Homunculus
|
3.5 | 3.2 | 5.91 | 11 | 5.00 | 60 |
|
ss-rare|Black|Enchantment
|
2.0 | 3.2 | 5.94 | 16 | 5.08 | 84 |
|
ss-uncommon|Red|Enchantment
|
2.0 | 3.2 | 6.11 | 9 | 5.42 | 82 |
|
ss-common|Green|Creature — Human Scout
|
3.5 | 3.2 | 5.93 | 40 | 5.99 | 189 |
|
ss-rare||Legendary Land
|
2.5 | 3.2 | 6.11 | 18 | 4.61 | 85 |
|
ss-common|Green|Creature — Wolf
|
3.0 | 3.2 | 6.00 | 9 | 7.40 | 50 |
|
ss-uncommon|Black|Sorcery
|
1.5 // 3.5 | 3.2 | 6.00 | 1 | 6.46 | 18 |
|
ss-uncommon|Blue|Creature — Zombie Horror
|
3.5 | 3.1 | 6.22 | 9 | 6.21 | 84 |
|
ss-uncommon|Black|Sorcery
|
2.5 | 3.1 | 6.33 | 3 | 6.41 | 77 |
|
ss-uncommon|Red|Creature — Human Shaman
|
2.0 | 3.1 | 6.45 | 11 | 5.53 | 69 |
|
ss-common|Green|Creature — Human Werewolf
|
3.0 | 3.1 | 6.41 | 34 | 5.54 | 149 |
|
ss-uncommon|Green|Enchantment
|
3.5 | 3.1 | 6.33 | 18 | 6.12 | 93 |
|
ss-rare|Green|Creature — Spirit
|
1.0 | 3.1 | 6.40 | 10 | 5.16 | 75 |
|
ss-common|Green|Sorcery
|
3.5 | 3.1 | 6.19 | 43 | 5.35 | 163 |
|
ss-rare|Blue|Black|Creature — Zombie
|
3.0 | 3.1 | 6.33 | 3 | 4.16 | 21 |
|
ss-common|White|Sorcery
|
2.5 | 3.1 | 6.45 | 29 | 6.70 | 214 |
|
ss-uncommon|White|Instant
|
3.5 | 3.1 | 6.31 | 13 | 5.05 | 61 |
|
ss-uncommon|White|Creature — Angel
|
2.5 | 3 | 6.62 | 8 | 6.38 | 92 |
|
ss-common|Blue|Sorcery
|
2.5 | 3 | 6.68 | 28 | 5.79 | 182 |
|
ss-rare|Blue|Instant
|
1.5 | 3 | 6.67 | 3 | 4.85 | 23 |
|
ss-common|Blue|Sorcery
|
1.0 // 3.5 | 3 | 6.52 | 31 | 6.83 | 219 |
|
ss-uncommon|Red|Creature — Human Werewolf
|
2.5 | 3 | 6.56 | 9 | 4.98 | 70 |
|
ss-uncommon|Red|Green|Creature — Wolf
|
3.5 | 3 | 6.56 | 9 | 4.96 | 33 |
|
ss-common|White|Creature — Human Soldier
|
3.5 | 3 | 6.66 | 32 | 6.59 | 223 |
|
ss-uncommon|Blue|Creature — Human Rogue
|
3.5 | 2.9 | 7.00 | 8 | 5.21 | 71 |
|
ss-common|Black|Sorcery
|
3.5 | 2.9 | 7.00 | 32 | 6.57 | 194 |
|
ss-uncommon|Red|Creature — Wolf
|
3.0 | 2.9 | 6.80 | 15 | 6.31 | 85 |
|
ss-rare|Green|Instant
|
0.0 | 2.9 | 6.75 | 4 | 5.50 | 30 |
|
ss-uncommon||Artifact
|
2.5 | 2.9 | 7.00 | 10 | 5.82 | 64 |
|
ss-uncommon||Creature — Eldrazi Crab
|
2.5 | 2.8 | 7.17 | 6 | 7.44 | 75 |
|
ss-uncommon|Blue|Creature — Human Wizard
|
2.0 | 2.8 | 7.10 | 10 | 6.65 | 89 |
|
ss-uncommon|Black|Enchantment
|
0.0 // 3.0 | 2.8 | 7.30 | 10 | 5.47 | 55 |
|
ss-common|Black|Creature — Vampire Berserker
|
3.0 | 2.8 | 7.07 | 30 | 6.33 | 180 |
|
ss-uncommon|Green|Enchantment
|
0.0 // 3.0 | 2.8 | 7.20 | 15 | 6.10 | 100 |
|
ss-uncommon|White|Creature — Human Scout
|
3.5 | 2.8 | 7.08 | 12 | 4.43 | 58 |
|
ss-common|Blue|Instant
|
2.5 | 2.8 | 7.14 | 7 | 7.33 | 47 |
|
ss-common|Green|Sorcery
|
3.5 | 2.8 | 7.20 | 5 | 7.00 | 43 |
|
ss-uncommon|Blue|Enchantment
|
1.0 | 2.7 | 7.50 | 4 | 6.30 | 82 |
|
ss-common|Red|Creature — Wolf
|
2.5 | 2.7 | 7.51 | 35 | 7.28 | 225 |
|
ss-uncommon|Green|Creature — Mole Beast
|
3.0 | 2.7 | 7.38 | 24 | 6.24 | 92 |
|
ss-uncommon|Green|Creature — Werewolf Horror
|
3.5 | 2.7 | 7.33 | 3 | 3.38 | 41 |
|
ss-uncommon||Artifact — Equipment
|
3.5 | 2.7 | 7.50 | 6 | 5.61 | 74 |
|
ss-uncommon||Land
|
2.5 | 2.7 | 7.41 | 17 | 6.25 | 92 |
|
ss-common|Blue|Sorcery
|
2.5 | 2.7 | 7.50 | 10 | 5.71 | 39 |
|
ss-common|Red|Sorcery
|
3.5 | 2.7 | 7.33 | 6 | 6.35 | 35 |
|
ss-uncommon|Blue|Sorcery
|
2.5 | 2.6 | 7.62 | 13 | 7.04 | 91 |
|
ss-uncommon|Blue|Sorcery
|
3.0 | 2.6 | 7.60 | 10 | 6.16 | 67 |
|
ss-common|Red|Creature — Werewolf Horror
|
3.0 | 2.6 | 7.63 | 19 | 5.61 | 136 |
|
ss-common|Red|Creature — Vampire Berserker
|
2.5 | 2.6 | 7.64 | 28 | 6.88 | 211 |
|
ss-uncommon||Artifact Creature — Scarecrow
|
4.0 | 2.6 | 7.83 | 12 | 5.95 | 90 |
|
ss-common|White|Creature — Human Soldier
|
3.0 | 2.6 | 7.83 | 6 | 6.67 | 46 |
|
ss-common|White|Creature — Human Cleric
|
2.5 | 2.5 | 7.97 | 36 | 7.08 | 234 |
|
ss-uncommon|Red|Sorcery
|
2.0 | 2.5 | 8.00 | 10 | 6.85 | 103 |
|
ss-rare|Green|Enchantment
|
1.0 | 2.5 | 8.00 | 1 | 4.60 | 18 |
|
ss-uncommon|White|Red|Instant
|
3.0 | 2.5 | 8.00 | 14 | 7.16 | 92 |
|
ss-uncommon||Artifact — Equipment
|
1.5 | 2.5 | 8.00 | 5 | 6.07 | 48 |
|
ss-common|Black|Creature — Zombie
|
3.0 | 2.5 | 8.12 | 8 | 8.35 | 153 |
|
ss-uncommon|White|Creature — Human Warrior
|
2.5 | 2.4 | 8.14 | 7 | 6.44 | 79 |
|
ss-uncommon|Blue|Instant
|
2.5 | 2.4 | 8.30 | 10 | 6.30 | 60 |
|
ss-common|Blue|Creature — Zombie Horror
|
3.5 | 2.4 | 8.38 | 39 | 7.98 | 226 |
|
ss-uncommon|Black|Sorcery
|
2.0 | 2.4 | 8.22 | 9 | 7.21 | 90 |
|
ss-uncommon|Green|Enchantment
|
0.0 // 4.0 | 2.4 | 8.27 | 11 | 7.69 | 78 |
|
ss-uncommon||Land
|
2.5 | 2.4 | 8.30 | 10 | 6.37 | 91 |
|
ss-uncommon||Artifact — Equipment
|
2.5 | 2.4 | 8.40 | 5 | 6.59 | 54 |
|
Steadfast Cathar
2.5 This is a solid two drop, as attacking as a ⅔ in the early game is pretty nice.
ss-common|White|Creature — Human Soldier
|
2.5 | 2.3 | 8.42 | 26 | 7.86 | 250 |
|
ss-common|Red|Creature — Elemental Dog
|
1.0 // 3.5 | 2.3 | 8.53 | 32 | 8.36 | 299 |
|
ss-common|Red|Sorcery
|
2.5 | 2.3 | 8.62 | 29 | 7.87 | 262 |
|
ss-common|Green|Creature — Human Warrior
|
3.0 | 2.3 | 8.55 | 31 | 7.36 | 244 |
|
ss-uncommon|White|Black|Instant
|
3.5 | 2.3 | 8.50 | 8 | 5.96 | 71 |
|
ss-uncommon|Blue|Red|Creature — Spirit
|
3.5 | 2.3 | 8.50 | 14 | 6.61 | 94 |
|
ss-uncommon||Land
|
2.5 | 2.3 | 8.58 | 12 | 6.83 | 111 |
|
ss-uncommon||Land
|
2.5 | 2.3 | 8.64 | 22 | 6.44 | 89 |
|
ss-uncommon|White|Instant
|
2.5 | 2.3 | 8.67 | 6 | 6.75 | 83 |
|
ss-common|White|Instant
|
2.5 | 2.2 | 8.73 | 22 | 7.79 | 240 |
|
ss-common|Blue|Creature — Spirit
|
2.0 | 2.2 | 8.95 | 19 | 8.12 | 226 |
|
ss-common|Red|Creature — Vampire Berserker
|
2.5 | 2.2 | 8.71 | 28 | 7.41 | 224 |
|
ss-common|Red|Creature — Vampire
|
2.5 | 2.2 | 8.96 | 26 | 7.49 | 228 |
|
ss-common|Green|Creature — Dryad Horror
|
3.0 | 2.2 | 8.86 | 36 | 7.22 | 233 |
|
ss-uncommon||Land
|
2.5 | 2.2 | 8.86 | 7 | 6.48 | 90 |
|
ss-uncommon||Land
|
2.5 | 2.2 | 8.80 | 5 | 6.02 | 74 |
|
ss-common||Creature — Eldrazi Hippogriff
|
4.0 | 2.2 | 8.82 | 39 | 7.98 | 259 |
|
ss-common|White|Creature — Spirit
|
3.0 | 2.2 | 8.76 | 33 | 8.21 | 237 |
|
ss-uncommon|Blue|Sorcery
|
1.5 | 2.2 | 8.91 | 11 | 6.75 | 91 |
|
ss-uncommon|White|Instant
|
2.5 | 2.1 | 9.11 | 9 | 5.80 | 62 |
|
ss-uncommon|Blue|Creature — Zombie
|
3.5 | 2.1 | 9.00 | 13 | 7.66 | 89 |
|
ss-common|Blue|Enchantment — Aura
|
2.5 | 2.1 | 9.09 | 32 | 8.07 | 276 |
|
ss-uncommon|Black|Creature — Vampire
|
2.5 | 2.1 | 9.00 | 8 | 6.89 | 87 |
|
ss-uncommon|Red|Enchantment
|
0.0 | 2.1 | 9.00 | 9 | 6.33 | 87 |
|
ss-common|Green|Instant
|
2.5 | 2.1 | 9.24 | 34 | 9.25 | 303 |
|
ss-common|Green|Instant
|
2.5 | 2.1 | 9.17 | 24 | 8.36 | 252 |
|
ss-rare|Blue|Red|Enchantment
|
1.5 | 2.1 | 9.00 | 6 | 5.72 | 25 |
|
ss-uncommon|Black|Green|Creature — Plant Skeleton
|
3.0 | 2.1 | 9.17 | 12 | 7.95 | 123 |
|
ss-common||Artifact Creature — Scarecrow
|
3.0 | 2.1 | 9.09 | 23 | 8.50 | 265 |
|
ss-uncommon||Land
|
2.5 | 2.1 | 9.08 | 12 | 7.16 | 94 |
|
ss-common|White|Creature — Human Soldier
|
3.0 | 2.1 | 9.19 | 16 | 8.17 | 136 |
|
ss-common||Artifact — Equipment
|
2.0 | 2.1 | 9.22 | 9 | 8.97 | 107 |
|
ss-uncommon||Artifact Creature — Juggernaut
|
1.0 | 2.1 | 9.00 | 1 | 4.55 | 16 |
|
ss-common||Artifact
|
2.5 | 2.1 | 9.15 | 13 | 7.94 | 142 |
|
ss-common||Land
|
1.0 | 2.1 | 9.00 | 12 | 8.90 | 166 |
|
ss-common|White|Creature — Spirit Cleric
|
2.0 | 2 | 9.38 | 21 | 7.67 | 247 |
|
ss-common|Blue|Creature — Spirit
|
2.5 | 2 | 9.42 | 26 | 8.43 | 244 |
|
ss-common|Black|Sorcery
|
2.5 | 2 | 9.50 | 16 | 8.73 | 271 |
|
ss-common|Red|Creature — Human Werewolf
|
2.5 | 2 | 9.39 | 23 | 7.49 | 218 |
|
ss-common|Green|Instant
|
1.5 | 2 | 9.38 | 39 | 8.69 | 308 |
|
ss-common|Green|Enchantment — Aura
|
2.0 | 2 | 9.28 | 29 | 8.23 | 254 |
|
ss-rare||Artifact — Equipment
|
0.0 | 2 | 9.50 | 2 | 5.17 | 23 |
|
ss-common||Artifact — Equipment
|
3.0 | 2 | 9.47 | 32 | 9.39 | 264 |
|
ss-common|Blue|Creature — Spirit
|
2.5 | 2 | 9.54 | 13 | 8.10 | 146 |
|
ss-uncommon|Blue|Creature — Bird
|
3.0 | 2 | 9.50 | 2 | 5.00 | 9 |
|
ss-common|White|Creature — Spirit Soldier
|
2.0 | 1.9 | 9.77 | 26 | 7.52 | 251 |
|
ss-common|Blue|Instant
|
2.0 | 1.9 | 9.65 | 20 | 8.18 | 289 |
|
ss-rare|Black|Creature — Plant
|
1.5 | 1.9 | 9.67 | 3 | 6.05 | 24 |
|
ss-common|Black|Creature — Vampire Horror
|
1.5 | 1.9 | 9.76 | 25 | 8.52 | 329 |
|
ss-common|Red|Creature — Vampire Berserker
|
2.5 | 1.9 | 9.58 | 26 | 8.35 | 229 |
|
ss-common||Artifact
|
1.5 | 1.9 | 9.58 | 33 | 8.42 | 287 |
|
ss-uncommon||Land
|
2.5 | 1.9 | 9.58 | 19 | 7.84 | 113 |
|
ss-uncommon||Creature — Eldrazi Beast
|
2.5 | 1.9 | 9.72 | 18 | 7.70 | 124 |
|
ss-uncommon||Creature — Eldrazi Leech
|
2.5 | 1.8 | 9.86 | 7 | 7.38 | 108 |
|
ss-common|White|Creature — Human Knight
|
2.0 | 1.8 | 9.84 | 19 | 8.51 | 247 |
|
ss-common|Blue|Enchantment — Aura
|
1.5 | 1.8 | 9.97 | 31 | 9.32 | 299 |
|
ss-common|Black|Creature — Human Rogue
|
3.0 | 1.8 | 9.83 | 35 | 8.11 | 243 |
|
ss-uncommon|Black|Sorcery
|
2.5 | 1.8 | 10.00 | 7 | 6.48 | 96 |
|
ss-common|Green|Enchantment — Aura
|
3.0 | 1.8 | 9.86 | 29 | 10.15 | 316 |
|
ss-common|Red|Creature — Devil
|
1.0 | 1.8 | 10.00 | 5 | 10.31 | 112 |
|
ss-common|Blue|Creature — Human Wizard
|
2.0 | 1.7 | 10.33 | 33 | 9.27 | 364 |
|
ss-common|Red|Creature — Wolf
|
2.5 | 1.7 | 10.12 | 26 | 8.44 | 267 |
|
ss-uncommon||Land
|
2.5 | 1.7 | 10.22 | 9 | 7.32 | 95 |
|
ss-common|White|Creature — Hippogriff
|
2.0 | 1.7 | 10.30 | 23 | 9.28 | 288 |
|
ss-uncommon|Red|Creature — Human Shaman
|
3.0 | 1.7 | 10.33 | 3 | 8.92 | 21 |
|
ss-common|Red|Sorcery
|
1.0 // 3.5 | 1.7 | 10.33 | 6 | 8.05 | 61 |
|
ss-common|Blue|Creature — Spirit
|
3.0 | 1.6 | 10.61 | 28 | 9.01 | 304 |
|
ss-common|Black|Instant
|
2.0 | 1.6 | 10.41 | 17 | 9.10 | 280 |
|
ss-common|Black|Sorcery
|
2.5 | 1.6 | 10.62 | 21 | 8.68 | 273 |
|
ss-common|Black|Creature — Zombie Bird
|
3.0 | 1.6 | 10.47 | 30 | 9.28 | 280 |
|
ss-common|Red|Creature — Wolf
|
2.0 | 1.6 | 10.59 | 29 | 9.14 | 299 |
|
ss-common|Red|Sorcery
|
2.0 | 1.6 | 10.52 | 31 | 9.51 | 322 |
|
ss-common|Green|Creature — Plant Elemental
|
2.5 | 1.6 | 10.48 | 33 | 8.70 | 301 |
|
ss-common|White|Enchantment — Aura
|
1.5 | 1.5 | 10.71 | 24 | 9.06 | 294 |
|
ss-common|White|Instant
|
2.5 | 1.5 | 10.79 | 28 | 9.27 | 291 |
|
ss-common|Blue|Instant
|
1.5 | 1.5 | 10.76 | 21 | 9.24 | 294 |
|
ss-common|Blue|Instant
|
0.0 // 2.5 | 1.5 | 10.85 | 27 | 9.11 | 309 |
|
ss-common|Blue|Creature — Human Wizard
|
2.5 | 1.5 | 10.94 | 31 | 9.31 | 283 |
|
ss-uncommon|Black|Enchantment
|
2.0 | 1.5 | 10.71 | 14 | 7.60 | 97 |
|
ss-uncommon|Black|Sorcery
|
0.5 | 1.5 | 10.90 | 10 | 8.35 | 119 |
|
ss-common|Green|Creature — Human Scout
|
3.0 | 1.5 | 10.89 | 35 | 9.46 | 307 |
|
ss-uncommon||Artifact Creature — Wolf Construct
|
0.0 | 1.5 | 10.67 | 6 | 8.31 | 119 |
|
ss-uncommon||Land
|
2.5 | 1.5 | 10.75 | 12 | 7.52 | 112 |
|
ss-common|White|Instant
|
3.0 | 1.5 | 10.80 | 5 | 9.89 | 56 |
|
ss-common|Green|Instant
|
0.0 // 2.5 | 1.5 | 10.71 | 7 | 9.74 | 58 |
|
ss-common|Red|Instant
|
1.0 // 2.5 | 1.5 | 10.93 | 14 | 10.02 | 176 |
|
ss-common|White|Creature — Human Soldier
|
2.5 | 1.4 | 11.11 | 28 | 9.29 | 278 |
|
ss-uncommon|White|Enchantment — Aura
|
1.0 | 1.4 | 11.00 | 9 | 6.65 | 88 |
|
ss-common|Black|Creature — Rat
|
1.0 | 1.4 | 11.06 | 17 | 9.19 | 251 |
|
ss-common|Black|Instant
|
2.0 | 1.4 | 11.14 | 14 | 9.57 | 295 |
|
ss-common|Black|Creature — Zombie Dog
|
2.5 | 1.4 | 11.09 | 23 | 9.91 | 348 |
|
ss-common|Red|Instant
|
2.0 | 1.4 | 11.00 | 30 | 9.85 | 295 |
|
ss-common|Green|Creature — Wolf
|
2.0 | 1.4 | 11.08 | 25 | 10.23 | 285 |
|
ss-uncommon||Artifact
|
0.0 | 1.4 | 11.20 | 5 | 8.82 | 115 |
|
ss-uncommon||Artifact — Equipment
|
1.5 | 1.4 | 11.00 | 3 | 7.38 | 21 |
|
ss-common|Green|Creature — Human Monk
|
3.5 | 1.4 | 11.00 | 1 | 5.00 | 8 |
|
ss-common|Blue|Creature — Spirit
|
2.0 | 1.3 | 11.28 | 25 | 9.61 | 319 |
|
ss-common|Green|Instant
|
1.5 | 1.3 | 11.41 | 22 | 10.09 | 342 |
|
ss-common||Artifact
|
1.5 | 1.3 | 11.38 | 34 | 9.70 | 331 |
|
ss-common|Blue|Instant
|
2.0 | 1.2 | 11.53 | 30 | 9.65 | 321 |
|
ss-common|Black|Creature — Zombie
|
2.0 | 1.2 | 11.53 | 17 | 9.38 | 280 |
|
ss-common|Blue|Creature — Homunculus
|
1.5 | 1.2 | 11.75 | 4 | 8.95 | 60 |
|
ss-common|Black|Creature — Vampire
|
3.0 | 1.2 | 11.70 | 10 | 10.20 | 66 |
|
ss-common|Black|Creature — Zombie
|
1.5 | 1.1 | 12.05 | 19 | 9.20 | 286 |
|
ss-common|Red|Instant
|
0.0 | 1.1 | 11.85 | 27 | 9.17 | 294 |
|
ss-common|Green|Creature — Spider
|
1.5 | 1.1 | 12.00 | 22 | 9.98 | 329 |
|
ss-common||Artifact Creature — Golem
|
0.0 // 2.5 | 1.1 | 12.00 | 29 | 10.09 | 352 |
|
ss-common|White|Instant
|
1.5 | 1.1 | 11.92 | 24 | 10.14 | 341 |
|
ss-uncommon|Blue|Creature — Human Rogue
|
3.5 | 1.1 | 12.00 | 1 | 6.50 | 3 |
|
ss-common|Green|Creature — Elemental
|
3.0 | 1.1 | 12.00 | 9 | 9.35 | 67 |
|
ss-common|White|Creature — Fox
|
1.5 | 1 | 12.14 | 28 | 10.28 | 348 |
|
ss-common|Black|Sorcery
|
1.0 | 1 | 12.13 | 15 | 9.28 | 275 |
|
ss-common|Black|Creature — Skeleton
|
1.0 // 2.5 | 1 | 12.25 | 16 | 8.89 | 297 |
|
ss-rare|Green|Sorcery
|
0.0 | 1 | 12.25 | 4 | 7.10 | 30 |
|
ss-common||Artifact
|
1.0 | 1 | 12.33 | 18 | 10.00 | 326 |
|
ss-uncommon||Artifact
|
1.0 | 1 | 12.33 | 12 | 8.66 | 115 |
|
ss-common|Blue|Creature — Human Rogue
|
1.5 | 1 | 12.25 | 4 | 11.26 | 68 |
|
ss-common|Green|Instant
|
0.5 | 1 | 12.12 | 25 | 11.13 | 212 |
|
ss-common|Blue|Creature — Zombie Horror
|
1.5 | 0.9 | 12.38 | 26 | 10.87 | 369 |
|
ss-uncommon|Green|Creature — Human Druid
|
1.0 | 0.9 | 12.44 | 9 | 8.69 | 109 |
|
ss-common|Black|Instant
|
1.5 | 0.8 | 12.68 | 22 | 9.86 | 340 |
|
ss-common|Red|Sorcery
|
0.0 // 2.0 | 0.8 | 12.85 | 34 | 11.08 | 356 |
|
ss-common||Artifact Creature — Scarecrow
|
1.5 | 0.8 | 12.71 | 24 | 10.80 | 350 |
|
ss-uncommon||Artifact — Equipment
|
1.0 | 0.8 | 12.80 | 5 | 8.28 | 126 |
|
ss-uncommon|Blue|Instant
|
0.0 | 0.7 | 13.14 | 7 | 8.53 | 127 |
|
ss-uncommon|White|Enchantment
|
0.0 // 3.0 | 0.7 | 13.00 | 1 | 7.00 | 17 |
|
ss-common|Black|Sorcery
|
1.0 | 0.7 | 13.00 | 4 | 8.53 | 62 |
|
ss-common|Black|Creature — Slug Horror
|
2.5 | 0.5 | 13.55 | 29 | 11.44 | 396 |
|
ss-uncommon|White|Creature — Human Cleric
|
4.0 | -0 | 15.00 | 0 | 1.00 | 1 |
|
ss-mythic|Blue|Black|Creature — Zombie Wizard
|
4.5 | -0 | 15.00 | 0 | 1.00 | 1 |
|
ss-uncommon||Artifact
|
1.0 | -0 | 15.00 | 0 | 9.33 | 7 |
|
ss-uncommon|Black|Sorcery
|
2.0 | -0 | 15.00 | 0 | 10.50 | 4 |
|
ss-common|Black|Instant
|
3.5 | -0 | 15.00 | 0 | 5.25 | 6 |
|
ss-uncommon|Red|Instant
|
4.0 | -0 | 15.00 | 0 | 4.00 | 1 |
|
ss-rare|Red|Creature — Human Rogue Werewolf
|
4.0 | -0 | 15.00 | 0 | 1.67 | 6 |
|
ss-uncommon|Green|Creature — Human Druid
|
2.5 | -0 | 15.00 | 0 | 4.50 | 3 |

Enter The Battlefield Prepared
With the MTGA Assistant deck tracker|
|
Selesnya | 702 matches | 94 decks |
|
|
Gruul | 551 matches | 73 decks |
|
|
Rakdos | 525 matches | 71 decks |
|
|
Azorius | 395 matches | 54 decks |
|
|
Izzet | 290 matches | 41 decks |
|
|
Golgari | 250 matches | 33 decks |
|
|
Boros | 171 matches | 23 decks |
|
|
Orzhov | 177 matches | 22 decks |
|
|
Simic | 115 matches | 17 decks |
|
|
Dimir | 92 matches | 13 decks |
|
|
Bant | 64 matches | 8 decks |
|
|
Naya | 51 matches | 7 decks |
|
|
Mono White | 32 matches | 5 decks |
|
|
Mono Red | 14 matches | 3 decks |
|
|
Abzan | 20 matches | 3 decks |
|
|
Sultai | 12 matches | 2 decks |
|
|
Grixis | 16 matches | 2 decks |
|
|
Esper | 8 matches | 1 decks |
|
|
Mono Green | 3 matches | 1 decks |
Card name