
Arena Standard - The Deck That Beat You
Midrange Combo
- - - Abzan Adventures - - -
Welcome to what could be one of the most busted shells in the format.
At the time of writing, this deck has gone 11-2 (85% WR) in High Platinum and Low Diamond.
The strategy behind this deck resolves around a midrange game, rushing down your opponent with massive beaters that just do not go away. All while snapping up anything that could potentially get in their way. The deck is packed full of decisions and flexibility that allow you to pivot, but as its pilot you must take great care to identify these lines and know when to use them. A word of advice: Don't ever trust the autotapper.
A list of powerful playlines to watch out for is provided at the bottom of this page.
- - - The Cards - - -
Ardenvale Fealty is an instant-speed 2/2 vigilant knight for 1W. Unless you're trying to put a +1/+1 counter on the knight, you should always aim to play this card as late as possible. Against mono-red, this is used to bait out burn spells and threaten to trade with their creatures. Against control decks, you can go under them by casting it at the end of their second turn (and especially if they tap out to play draw spells) to get a threatening creature under their 'shields'. It's a lose-lose for them; if they don't counter it, they'll get punched by a creature every turn that cannot be exiled with The Wandering Emperor. If they do counter it, then they've opened the door to allow a Trespasser or Sentinel through.
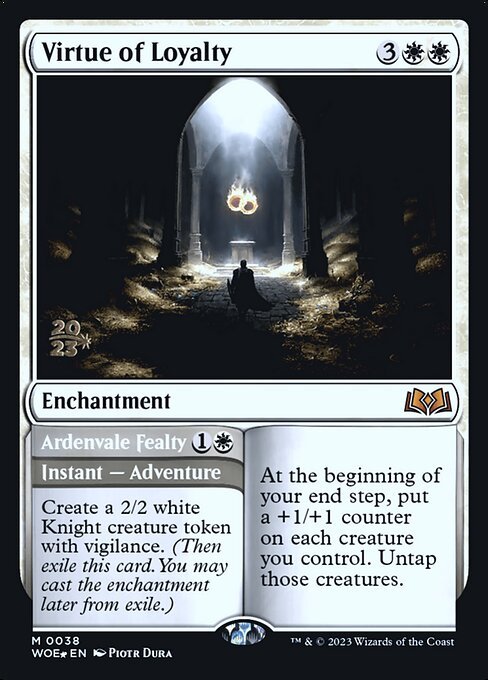
Virtue of Loyalty is a powerhouse. Drop this when you're able, but you can capitalize on this by attacking in with multiple creatures that your opponents are afraid to trade with, After they let massive damage through, drop your Virtue of Loyalty onto the battlefield and watch your creatures untap and get bigger. Often walling off the opponent completely. Finally, you can put full control on at the end of your turn and tap your vigilant manland in response to the trigger to untap it and have a second mana to cast an instant. This can get out of control if multiple copies of Virtue of Loyalty as you can respond to each trigger by tapping all of your active manlands for mana. This mini-reclamation effect is great for squeezing in anything from removal to Wandering Emperors.
Locthwain's Scorn is incredible in aggro matchups. It nearly gets you the value of a 3B March of Wretched Sorrow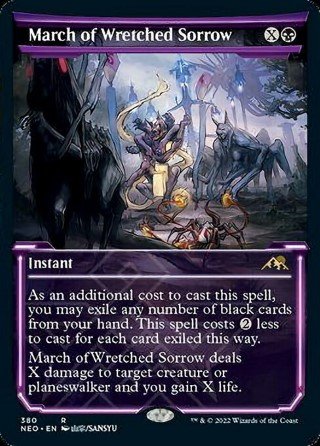 for half the cost. With sorcery speed being the only trade-off. Feels great to pick off a Phyrexian Fleshgorger with one of these. Be aware that you can swing something as weak as a 2/2 creature into a Sheoldred and pick it off by following the block with one of these.
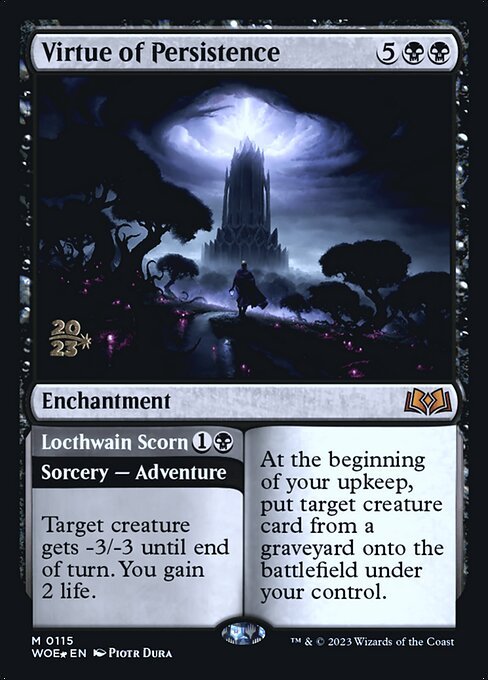
Virtue of Persistence sits in your hand and waits for the game to go long. This is a late-game failsafe that allows you to keep playing threats at full steam when you would otherwise burn out. Take heed that the UI always presents your opponent's graveyard first. Don't forget if you have bigger creatures in your graveyard. This card can also recur Sentinel of Lost Lore and, so long as you hold off playing all of your Fealtys and Scorns, you will be able to punish blocks by re-drawing them every time he comes back. Allowing you to build board presence or kill anything up to a 6 toughness creature every turn.
I have chosen three of these instead of three of the other because building your board presence (especially at instant speed) is marginally more important. Especially if you want to perform the Virtue of Loyalty nut curve. However, Gopher is required as a 4-of against Sheoldred and Virtue of Persistence as an enchantment gets cast much less than Virtue of Loyalty, so you may not always be getting the full value if you're spamming these left and right. You only need one or two in the adventure zone to be there to help secure a late-game win.
2 Mosswood Dreadknight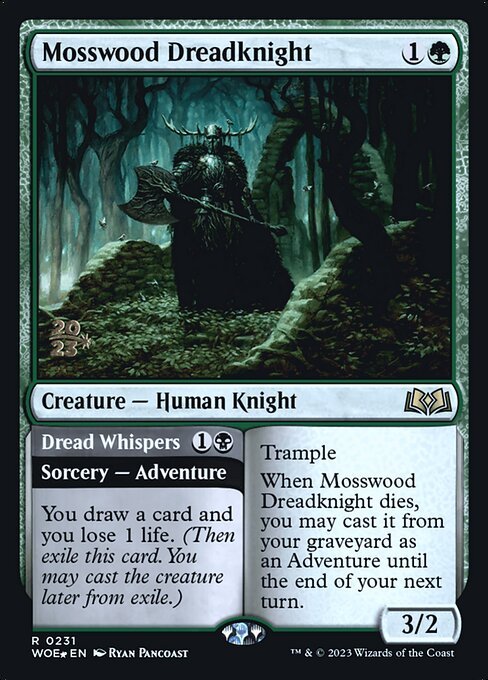 & 2 Tenacious Underdog
Mosswood Dreadknight is the third new card in this deck, sporting a striking similarity to the boxing champ. However, there are some notable strengths and differences worth contrasting. The Dreadknight has the advantage of offering early game card draw (helpful vs control) and when necessary, can be extremely useful for curving into your fourth land on turn three. Otherwise, like the Underdog, you can play him for 2. He has trample, which matters as counters get placed on him, and overall pushes through more damage. Additionally, while you do have to commit to paying 1B the next turn to keep him around, you don't have to commit to 2BB. Allowing flexibility in what you play. Not only that, but the Sentinel can retrieve him from exile. Finally, when you bring him back, he can block. That, along with the cheaper life cost make the Dreadknight very good in aggro and midrange matchups.
The Underdog however, has strengths that make it impossible to pull away from a 50/50 split. The underdog being in here as a two-of is extremely important for the control matchups. Firstly, by giving a solid chance of punishing mill strategies. As you will be able to threaten Jaces and life totals all while accelerating your card draw. Likewise, a countered Mosswood Dreadknight cannot be cast again, but an Underdog can. As the underdogs, like the manlands, tuck themselves into safety at the end of your turn, they end up requiring very narrow answers. And finally, the haste allows you to dump open mana to throw 3 more damage into your final blow

I greatly underestimated the Sentinel when I first saw him. A 3/4 body for three mana allows you to both attack into 3/3s as well as block opposing 3/3s. This alone gives it a sheoldred-like bulk which aggro has a difficult time getting around without burning resources. Making it, in some instances, similar to the Graveyard Trespasser in resource depletion. Past that, you can choose any number of its options. For the most part, you will be returning a Fealty or a Scorn back to your hand and getting to use them again to fill out your curve. This creates insane curves with Virtue of Loyalty like the one at the bottom of this page. This ability alone gives you so much flexibility it's insane. But what's even crazier is that this guy can get your Virtues or your Dreadknights back from the exile zone no matter how it got there. Did your opponent farewell the board? Play this and you'll get back an extra 2 spells to go with it.
The second most used mode is to exile your opponent's graveyard. Goodbye Squee, goodbye kicked Bloodthirsty Adversary, goodbye Tenacious Underdog, goodbye Haughty Jinn's power stat, goodbye Memory Deluge, goodbye Transcendant Kami. This card wrecks your opponent's graveyard value. Of which nearly every deck in the meta carries. Free card advantage and destroys your opponent's late-game on a 3/4 body that can take up to 2 cards to remove. Think about that for a minute. Be aware of the non-bo potential with Trespasser and Virtue of Persistence. If you do not have an Adventure to return, you will be forced to exile a graveyard. But you can plan ahead and play around this. And always remember that more creatures will inevitably end up in the graveyard. Even when you must exile a graveyard, you still are not necessarily affected negatively by it. So use this to grind your opponent to a halt.
The final mode, so far, has seen no use yet in my playtesting. But it is inevitable as more and more people get wildcards for their rare and mythic adventures. So if all that above was not enough, you can potentially get a 4-for-1 if you also happen to snag one of their adventures. Opposing Virtues, among others, will be prime targets for this mode.
4 Graveyard Trespasser // Graveyard Glutton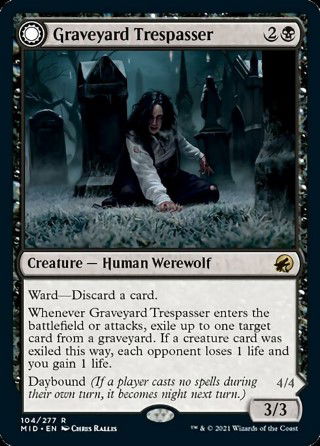
The reliable 3/3 for three that drains extra resources, and swings life total more in certain situations while providing even more graveyard hate.
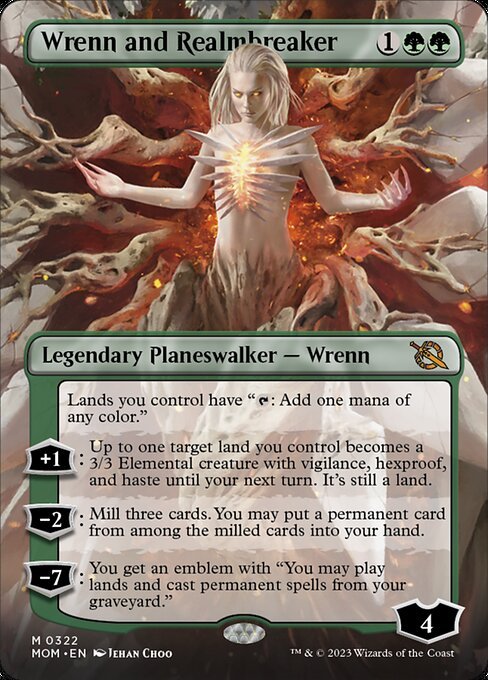
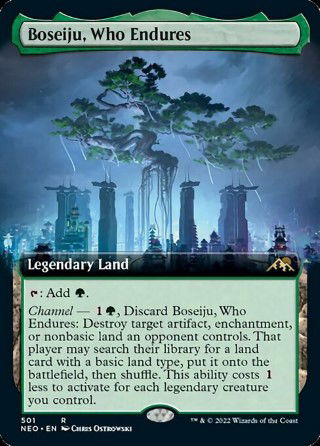
If you haven't been playing with Wrenn and Realmbreaker, you haven't been living. Wrenn is a must-remove powerhouse that allows you to swing with a vigilant 3/3 nearly unremovable wall every turn. And if that wall dies, you get another one for as long as you still have lands. As her +1 is her best move, she quickly gets to 7, where you can tap for GGG, ult her, bring her back, and swing with another vigilant hexproof 3/3 all in the same breath. If that wasn't enough, her minus ability can fetch you many many cards from this deck. If you've got her emblem, make sure to prioritize adventure cards and channel lands as they have modes that cannot be cast from your graveyard.
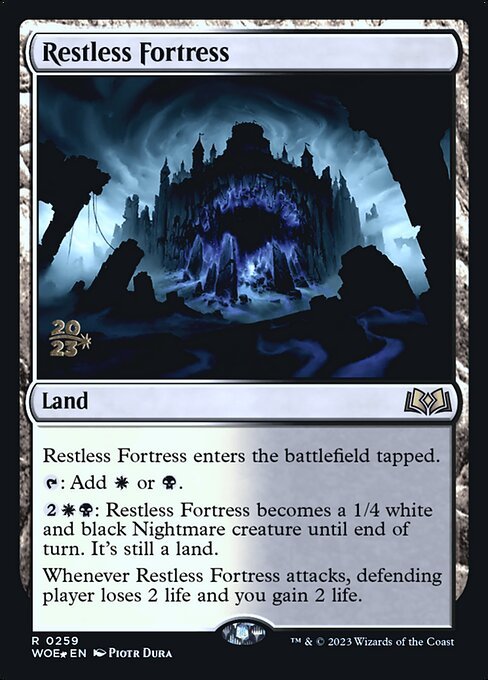
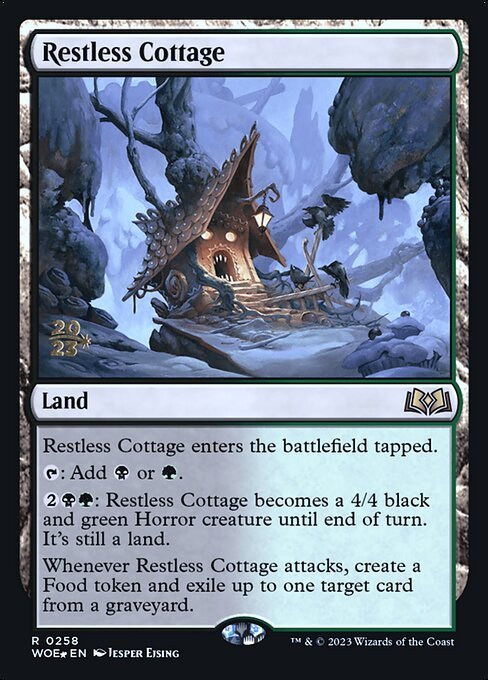
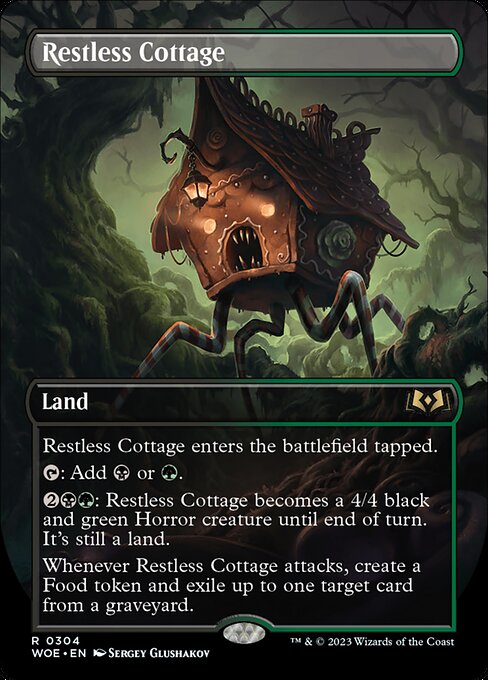
Restless Fortress and Restless Cottage both have their roles. Fortress can push damage through blockers and heals you without having to pay extra, but is at its base a 1/4 land vulnerable to Cut Down. If you animate it with Wrenn, however, this one becomes a monstrous 7-point life swing. 3 for the body, and 2 drain. Meanwhile the cottage starts as a beefy 4/4 which is better to animate through mana, and it exiles cards from graveyards while providing even more health for a similar life swing but without the Wrenn requirement. But the downside is that you must pay in order to gain the life. Think carefully about whether you can afford to risk the delayed life gain or not.
Early game you can animate the Cottage for pressure and then use Wrenn to animate a Fortress while leaving up mana to animate the Cottage instead. Also keep in mind that starting on turn four or five, you can animate either land as a 3/3 with Wrenn, and hold up 4 mana to pay for the animation ability, shifting it from a 3/3 to a 1/4 or 4/4, If you have a Wandering Emperor, then alternatively you can flash her in to give your land +1/+1 and first strike.
With Wrenn's Emblem, you can loop any of your planeswalker spells as long as you have the mana for them. Spamming The Wandering Emperor is backbreaking, and you can create an army of manlands by looping Wrenn. Which, with Virtue of Loyalty, will also give you a mini Wilderness Reclamation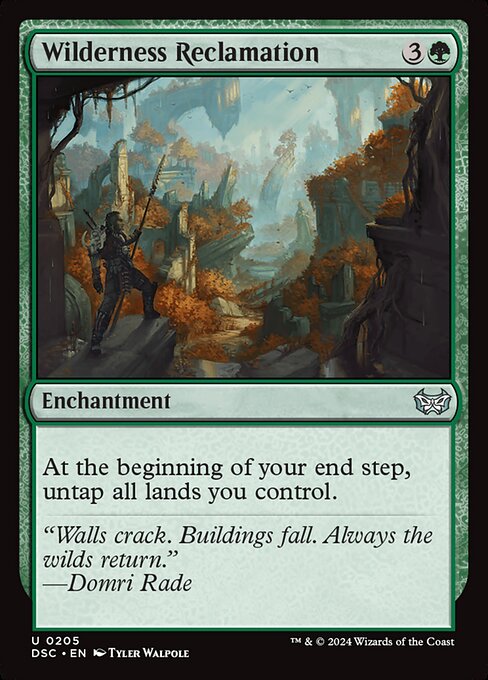 effect.
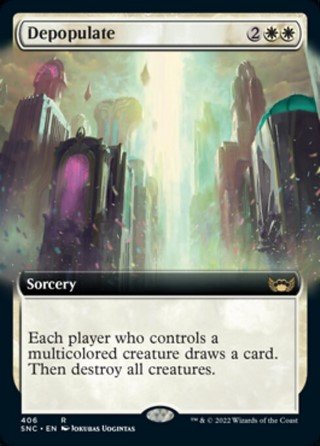
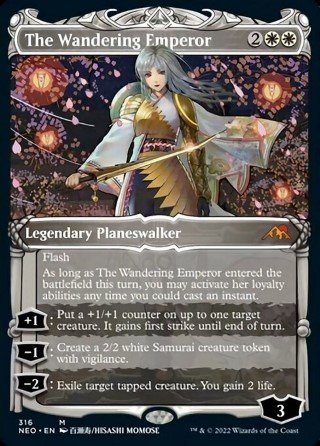
I run 3 depopulate for the go-wide aggro matchup. Their low cost makes them useful in many fast-paced situations while also providing graveyard fodder to either feed to your Trespassers or steal with Virtue of Persistence. The Wandering Emperor fills the remainder slots. Sheoldred has been considered but these two are too necessary to surviving the meta. More importantly, she is yet another flash threat that sneaks under control.
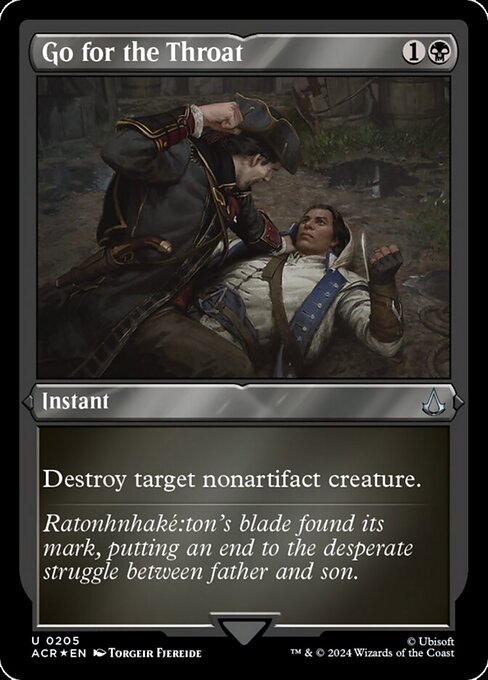
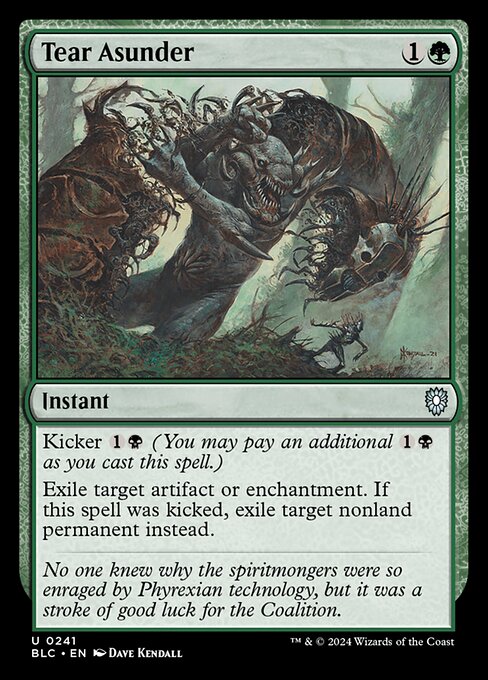
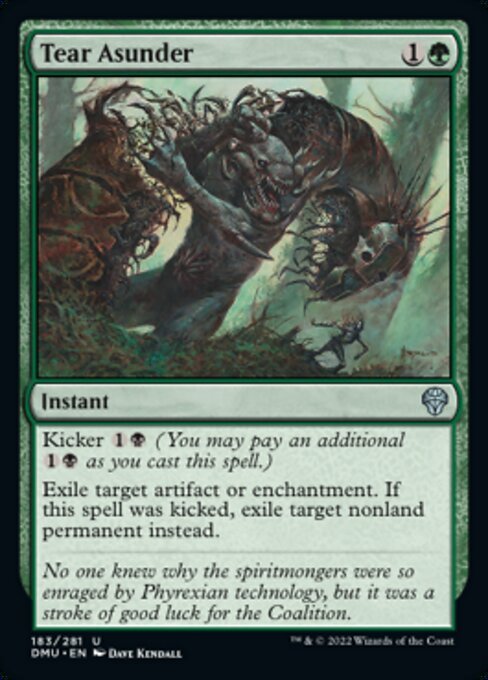
The spot removal that we run. But this is a lie as Fealty and Scorn can also fill these roles. 'Gopher' is too good for taking out Sheoldreds. Just like Locthwain Scorn, Eiganjo is important for making your mid-sized creatures trade with much bigger creatures. Where as a 3/3 with Scorn will kill a toughness 6 creature, a 3/3 with Eiganjo will kill a toughness 7 creature (That's the size of Elesh Norn). Finally, Tear Asunder along with Boseiju will help ensure that you draw at least one way to deal with problematic artifacts or enchantments. Tear Asunder has the bonus of being able to remove any nonland permanent with an extra payment of 1B.
The Lands
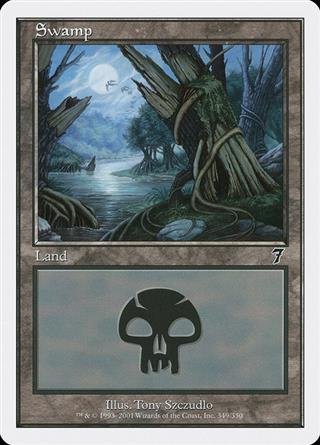
The tap lands and conditional tap lands are carefully counted out such that you don't get stuck with a 2-tapland start. Because this deck runs loads and loads and loads of 2 drops, you can Tetris your tempo out by playing a 2 drop on turn 2 followed by a tap land and another 2 drop on turn 3. Or you can use it on turn 4 with any combination of spells equalling four mana. Take advantage of this when it happens to avoid awkward turns later. Takenuma doesn't see much play in this deck as we're regularly using all of our mana. So we run a Swamp instead so that Field of Ruin doesn't Ruin our day.
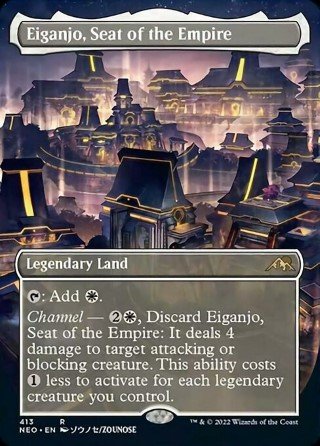
As a footnote, we stuff another free removal spell in here since you won't be likely to draw into both and be hindered by it. Pushing the deck up to a potential 26 removal spells. Not counting Wrenn or Persistence looping Sentinels. I would hesitate to add another Boseiju as statistically, you will be legend-ruling yourself all the time. It's only safe to play one legendary land in doubles and Eiganjo is far and away the best of the three.
- - - Noteworthy Playlines - - -
Turn 1) Restless Cottage
2) Ardenvale Fealty
3) Priest of Lost Lore, swing for 2
4) Ardenvale Fealty, 2MV Removal/Creature, swing for 2+3=5
5) Virtue of Loyalty, swing for 2+2+3+5=12
6) Swing for 3+3+4+4+6=20
Turn 1) Restless Fortress/Cottage
2) Ardenvale Fealty
3) Mosswood Dreadknight, Restless Cottage/Fortress, Swing for 2
4) Wrenn and Realmbreaker, Animate Restless Fortress, Swing for 2+3+5=10
5) Animate Restless Fortress with Wrenn, Animate Restless Cottage with mana, Swing for 2+3+4+5=14
Turn 4) Wrenn and Realmbreaker
5) Depopulate, Swing for 5
Turn 1) Restless Cottage/Fortress
..
5) Virtue of Loyalty
6) Play an untapped land, Animate Restless land and attack, Hold Priority, Untap Restless Cottage
(You now have 2 mana open to cast Go for the Throat, Tear Asunder, or Ardenvale Fealty before or during your opponent's next turn)
**Having Wrenn will allow you to attack with two lands while holding open 2 mana
Created: 10 Sep 2023
701 181 1
Mainboard - 60 cards (22 distinct)
| Creature (12) | |||
|---|---|---|---|
| $0.50€0.892.73 | |||
| $2.28 | |||
| $0.33 | |||
| $0.37 | |||
| Instant, Sorcery, Enchantment, Artifact (16) | |||
| $1.25€0.880.03 | |||
| $12.47 | |||
| $7.88 | |||
| $2.14€1.130.02 | |||
| $0.49 | |||
| Land (26) | |||
| $1.990.15 | |||
| $2.36 | |||
| $11.31 | |||
| $6.76 | |||
| $4.00 | |||
| $34.79 | |||
| $6.99 | |||
| $3.86€3.380.38 | |||
| $0.60 | |||
|
1
Swamp
|
$0.98€0.650.04 | ||
| $4.72 | |||
| Planeswalker (6) | |||
| $6.000.37 | |||


Add deck to your favorites
Please log in to be able to store your favorite decks for easy access under My Decks in the main menu.
Enter The Battlefield Prepared
With the MTGA Assistant deck tracker| 0 | 6 | 40 | 13 | 0 |
|---|---|---|---|---|
| 0 | 0 | 0 | 0 | 0 |
Card name
