Duskmourn: House of Horror Limited Ratings
The AI ratings are gathered with from the MTGA Assistant deck tracker. Pro ratings are provided by Nizzahon Magic. The Pro ratings and comments are made before the set officially releases while the AI ratings are dynamically updated with new data all the time.
- 5.0 The absolute best you can get.
- 4.5 Incredible bomb, but not unbeatable.
- 4.0 Good rare or top-tier uncommon.
- 3.5 Top-tier common or solid uncommon.
- 3.0 Good playable that always make the cut.
- 2.5 A solid playable that rarely gets cut.
- 2.0 A good playable, but is sometimes cut.
- 1.5 Filler card but sometimes gets cut.
- 1.0 Not good filler and often gets gut.
- 0.5 Almost Unplayable and mostly sideboard material.
- 0.0 Not playable at all.

Acrobatic Cheerleader
AI Rating: 2.6Pro Rating: 2.5
If you play this on two when you're on the play, there's a good chance it will get flying. And, there are plenty of ways to get it flying even in the late game. It's a quality two drop.

Cult Healer
AI Rating: 1.8Pro Rating: 3
This is going to have life link a lot, and that can really alter races.

Dazzling Theater
AI Rating: 1.4Pro Rating: 0
Neither of these effects is worth a card in Limited, even in a format with Survival.
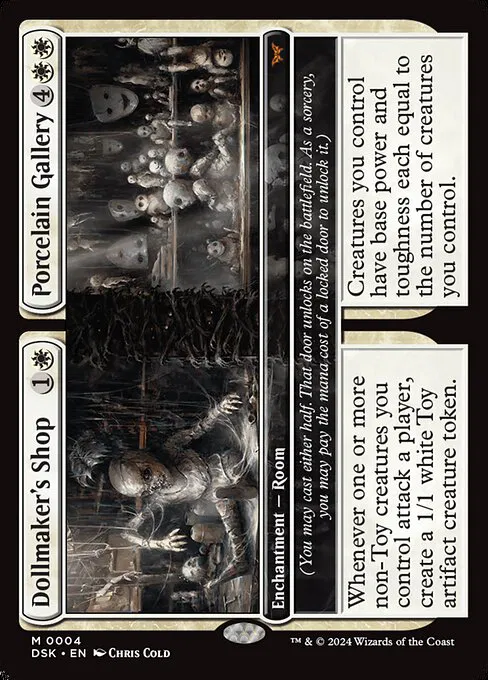
Dollmaker's Shop
AI Rating: 4.9Pro Rating: 4
Just Dollmaker's Shop is a pretty nice card, and in the late game Porcelain Gallery can be game over for your opponent. Only downside is, if you're not in a spot where you can attack, both sides are pretty underwhelming.
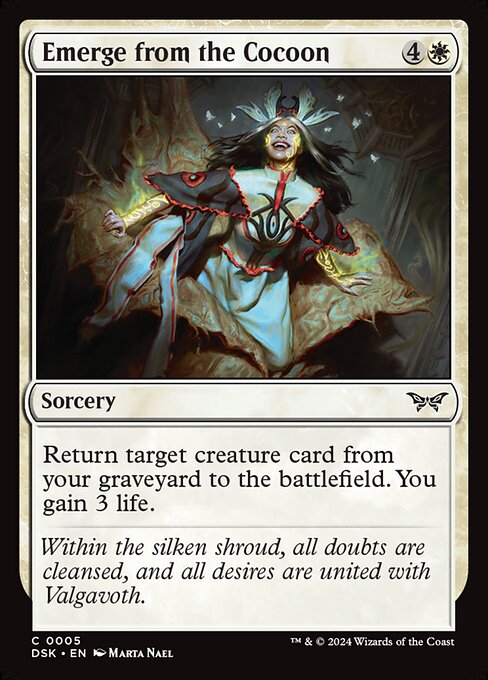
Emerge from the Cocoon
AI Rating: 2Pro Rating: 2
B/W is a reanimator deck in this format, but I think you're hoping you end up with one of the better reanimation spells in the format, and there are at least 4 of them at lower rarities.

Enduring Innocence
AI Rating: 4.8Pro Rating: 4
This is pretty easy to trigger, especially in Red/White, and it's a card that actually adds to the board to -- at least at first.
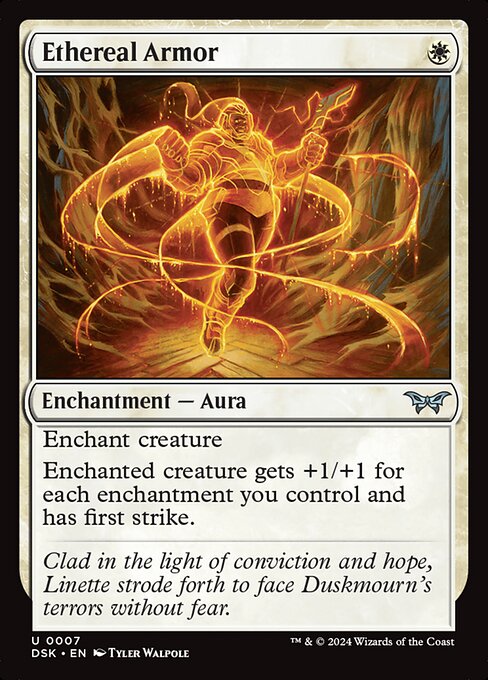
Ethereal Armor
AI Rating: 3.9Pro Rating: 2
If you're in an Enchantment heavy deck this can perform fairly well, although it's still risky like all auras are.

Exorcise
AI Rating: 4.1Pro Rating: 3.5
This'll virtually always have a target, and it will frequently trade up.

Fear of Abduction
AI Rating: 3.2Pro Rating: 4
Even with the alternate cost this is very much worth it since you get a huge flyer and get rid of their best creature, and reanimating it is particularly spicy.

Fear of Immobility
AI Rating: 2Pro Rating: 2.5
You can use this as a nice tempo play, but you can also tap your own survival creature in a pinch!

Fear of Surveillance
AI Rating: 3.4Pro Rating: 2.5
This is a solid two drop, and the Enchantment type gives it an extra bump.

Friendly Ghost
AI Rating: 2.1Pro Rating: 2.5
This ETB is likely to give you an attack you didn't have before, and the French vanilla stat-line isn't too bad either.
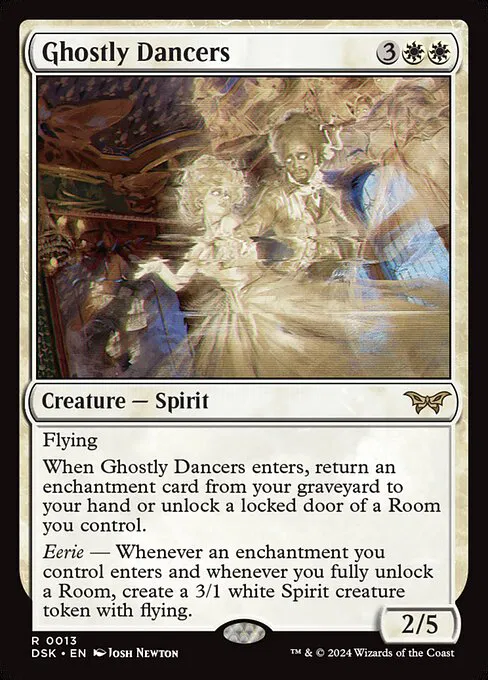
Ghostly Dancers
AI Rating: 4.8Pro Rating: 5
This virtually always generates at least a 2-for-1, and getting 3/1 flying tokens out of it isn't going to be very difficult.

Glimmer Seeker
AI Rating: 4Pro Rating: 3.5
You're happy no matter what you get out of the survival trigger, and the creature's solid stat-line makes it easier for it to survive.

Grand Entryway
AI Rating: 3.1Pro Rating: 3
I think this is sneaky good. On rate alone it doesn't sound great, but it can trigger Eerie three times -- and on the cheap, and both sides of the room impact the board.

Hardened Escort
AI Rating: 1.8Pro Rating: 2.5
This has decent stats and a legit attack trigger that is particularly good with Survival creatures.
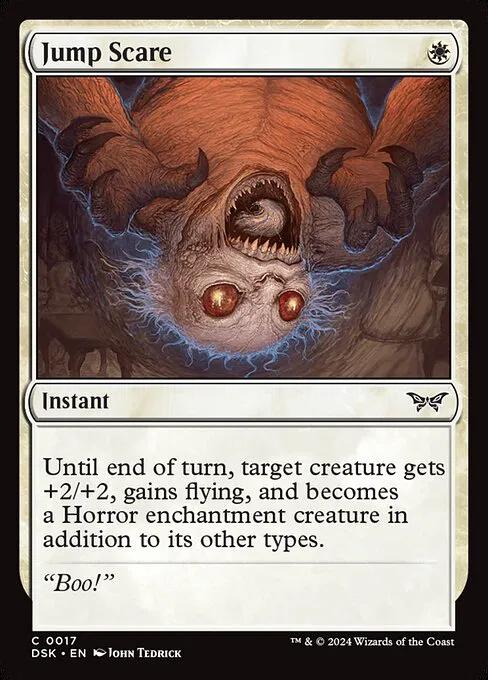
Jump Scare
AI Rating: 1.8Pro Rating: 2.5
This is a solid trick and in a format with Survival, having creatures survive combat and kill the opposing creature will be extra swingy.
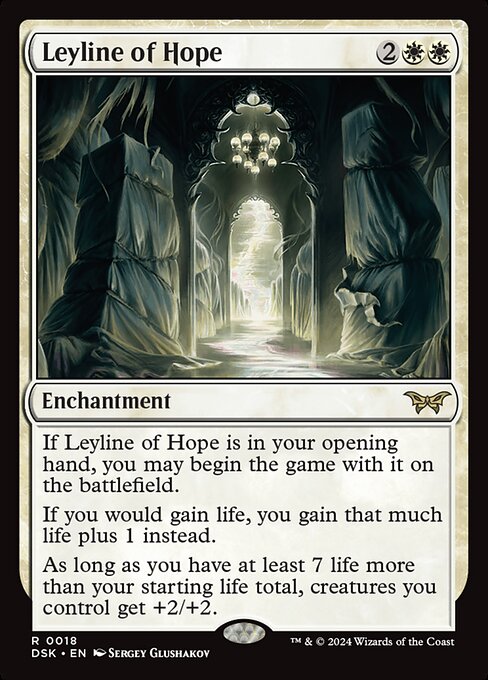
Leyline of Hope
AI Rating: 1.9Pro Rating: 0
Leylines are almost always horrible in Limited because they have ultra narrow effects that aren't worth a card, and that's definitely the case here.
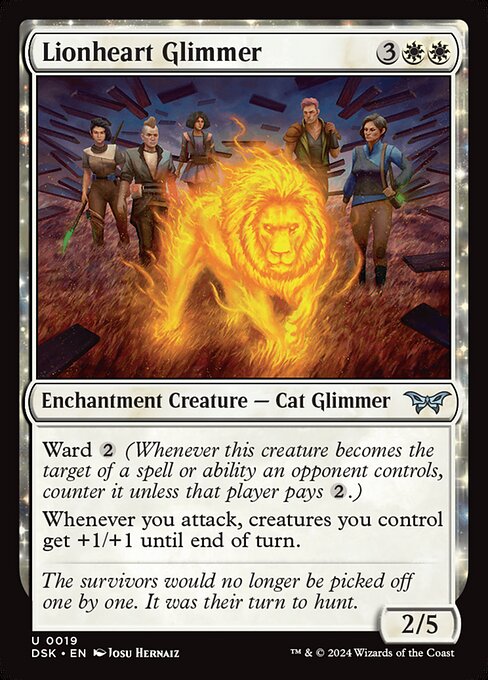
Lionheart Glimmer
AI Rating: 3.9Pro Rating: 3
The stat-line underwhelms, but this attack trigger is a pretty big deal, since it triggers on any attack not just when the Glimmer rumbles.
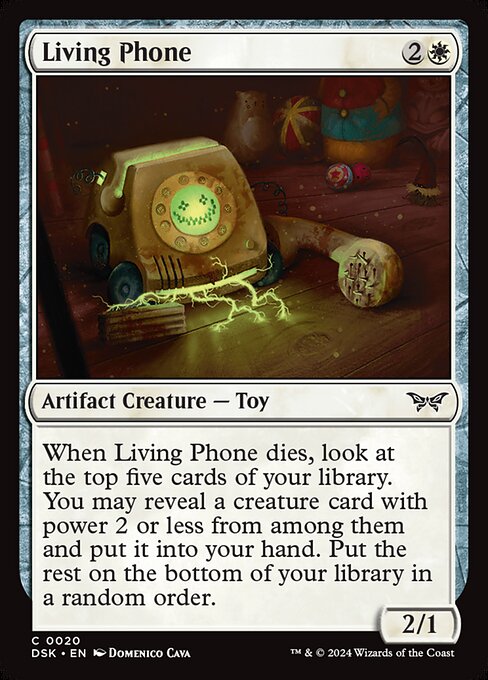
Living Phone
AI Rating: 1.4Pro Rating: 2
The stat-line is bad, but this has a decent shot at drawing you a card when it dies, especially in Red-White.
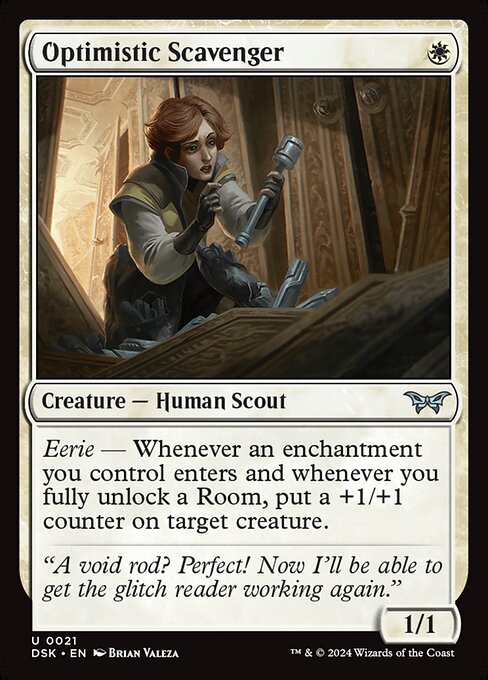
Optimistic Scavenger
AI Rating: 4.3Pro Rating: 4
This gives you a stupid amount of value for only one mana, and it's a must-kill one-drop since it's ability to augment creatures is so easy to get going. It's very easy to run like 10+ Enchantments in this format and go whild.

Orphans of the Wheat
AI Rating: 2.9Pro Rating: 2
I get it, this is supposed to help you with Survival, but the stat-line is bad and even with a buff the Orphans aren't that impressive.

Overlord of the Mistmoors
AI Rating: 4.7Pro Rating: 5
If you could only cast this for 7, it'd be a bomb. If you could only impend it, it'd be a bomb. Either way you get massive amounts of value out of it, and depending on the game you can do one or the other. It's going to be tough to beat.
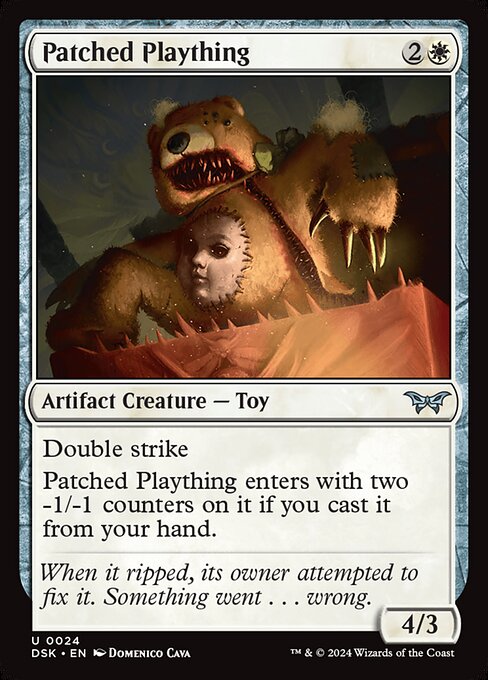
Patched Plaything
AI Rating: 3.6Pro Rating: 3
A 2/1 with double strike for 3 is pretty solid, and it also has synergy with all the "2 power or less" cards in the set and the reanimation in the set, since you can get it back as a 4/3 double striker when you bring it back.

Possessed Goat
AI Rating: 1.8Pro Rating: 2
This ability can make the Goat relevant on any board, and help you load the graveyard.
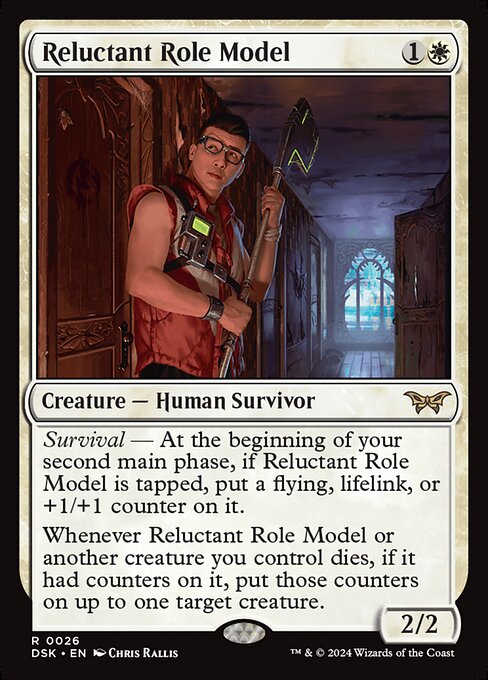
Reluctant Role Model
AI Rating: 4.6Pro Rating: 4
This Survival trigger can really snowball and help to make sure that he can keep on surviving. Throw in all the nonsense with moving counters around and this looks great.

Savior of the Small
AI Rating: 2.7Pro Rating: 2
Not only do you need to trigger survival, you need a small creature in your graveyard for this ability to do something -- and the stats are below-rate. Triggering it once will be good, but I'm skeptical about that being easy.
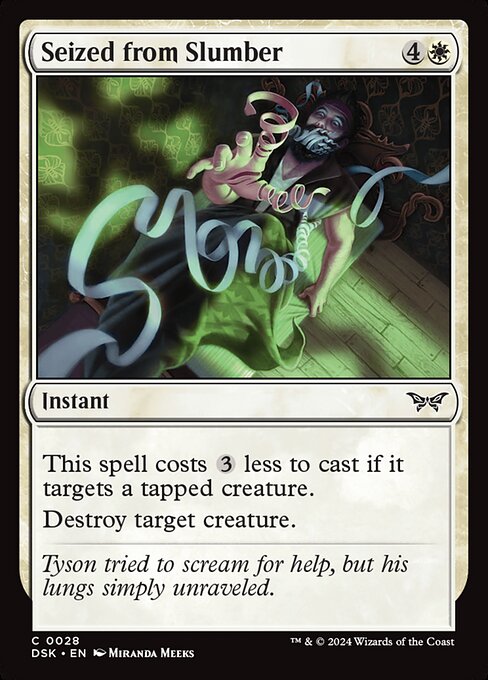
Seized from Slumber
AI Rating: 2.9Pro Rating: 2
This is a passable removal spell if you're not an aggro deck, but if you're the beat down it's pretty bad since it's either inefficient or incapable of killing blockers.
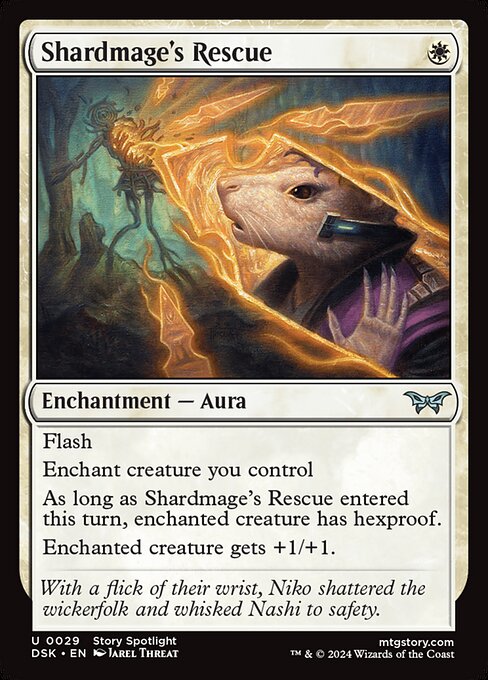
Shardmage's Rescue
AI Rating: 3.7Pro Rating: 3
One mana tricks that give hexproof and a stats boost have performed really well lately because they can win combat and blank removal, and in this format you get extra value out of Enchantments.
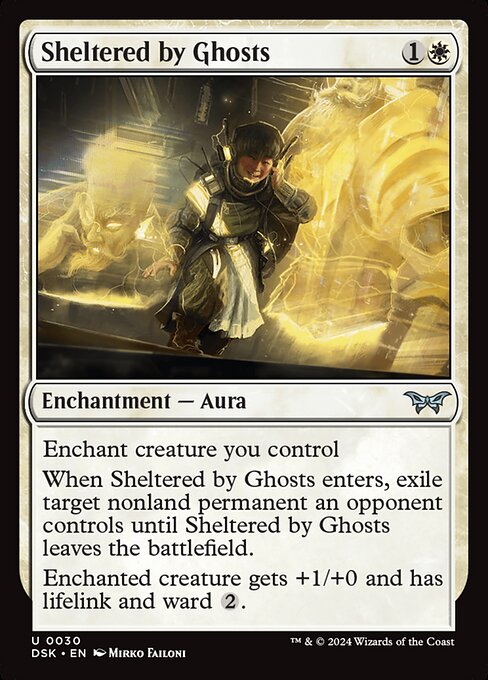
Sheltered by Ghosts
AI Rating: 4.5Pro Rating: 3.5
Removal that buffs your creature is pretty sweet, and the Ward makes it significantly less risky.
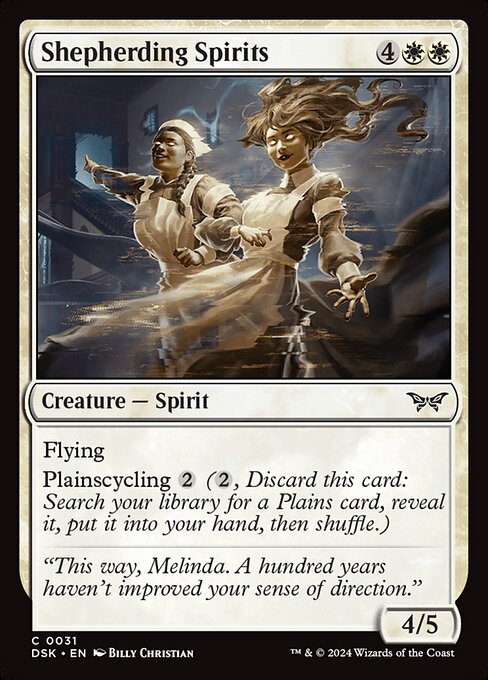
Shepherding Spirits
AI Rating: 2.2Pro Rating: 2
This feels pretty mediocre whether you cycle it away or hard cast it, and it even feels mediocre as a reanimation target. But, it's not terrible in any of those spots either.
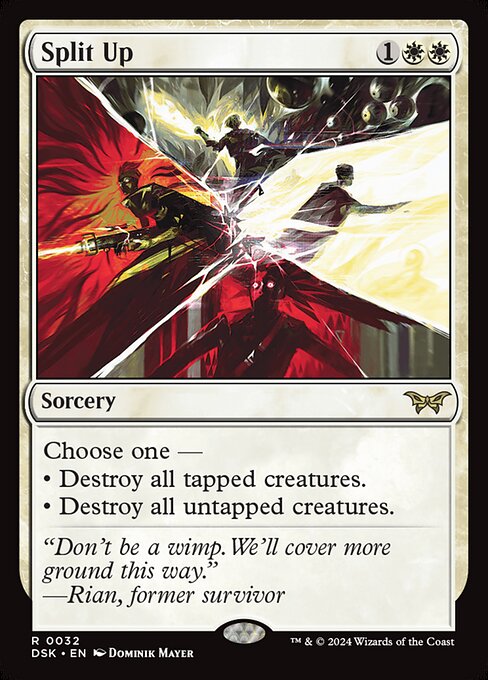
Split Up
AI Rating: 4.5Pro Rating: 4
You have enough control over whether your creatures are tapped and when you cast this, that you're going to be able to manufacture situations where it helps you more than your opponent.

Splitskin Doll
AI Rating: 4Pro Rating: 3.5
On turn two this is likely to only loot, but that means it's loading your graveyard, and in the late game it's going to be a straight up 2-for-1.
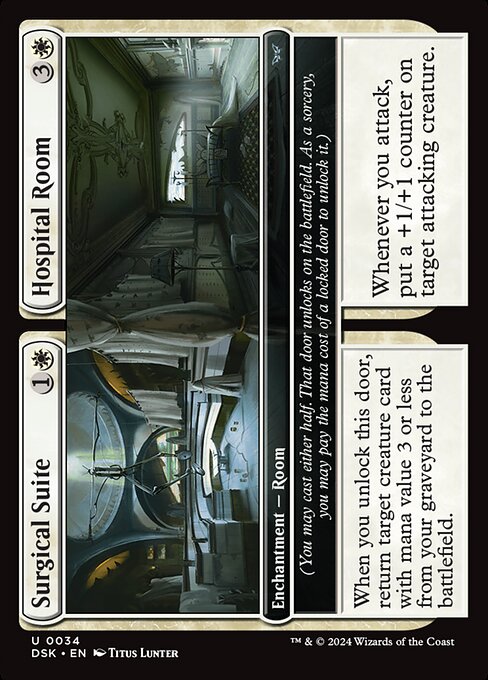
Surgical Suite
AI Rating: 4.3Pro Rating: 2.5
You'll often cast Hospital Room first since it doesn't need as much set up, but that makes this an Enchantment that gives a decent buff and then reanimates something small late.
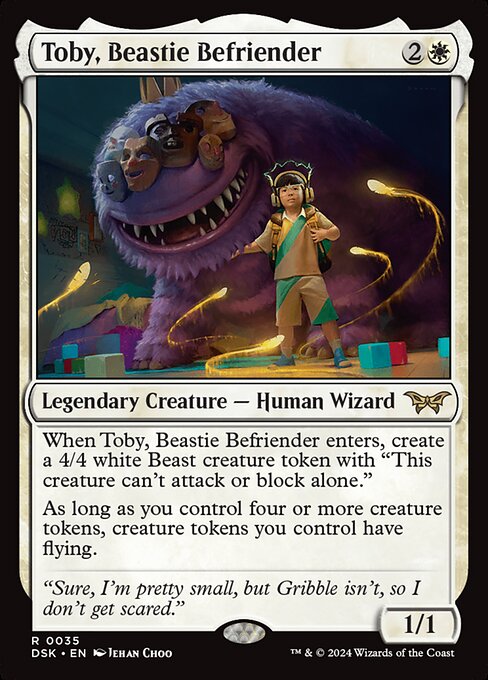
Toby, Beastie Befriender
AI Rating: 4.7Pro Rating: 4
Three mana for a 1/1 and a 4/4 is a big deal, even if the 4/4 has a downside. And you'll even get four or more creature tokens in play in this format from time to time.
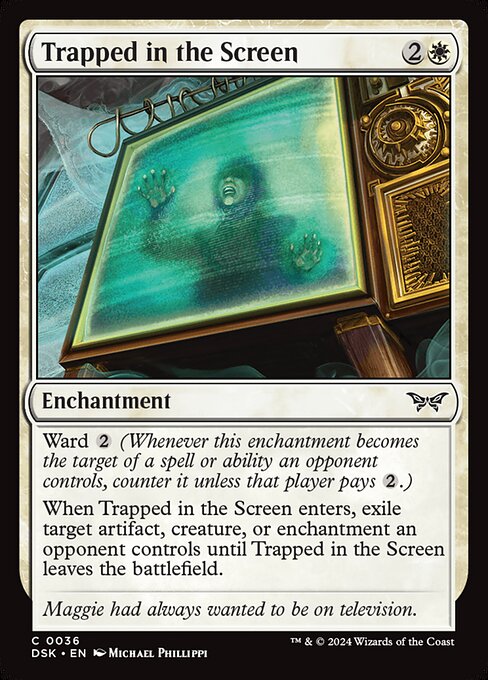
Trapped in the Screen
AI Rating: 4.1Pro Rating: 3.5
This effect hasn't been as good lately, but in a format with Enchantmetn payoffs, I think this'll reclaim some of it's former glory.
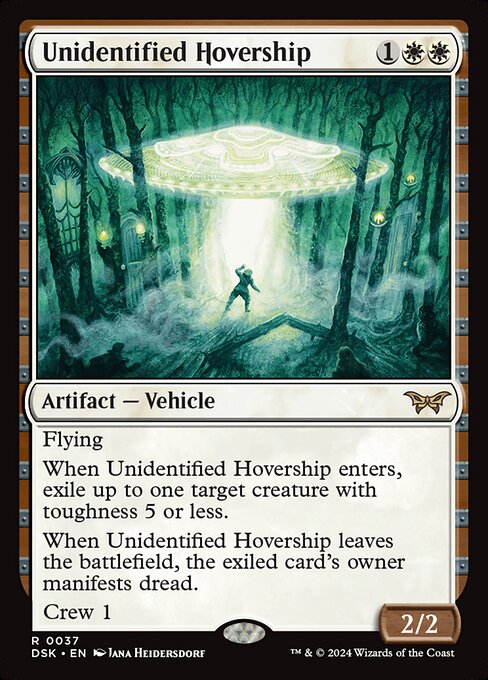
Unidentified Hovership
AI Rating: 4.6Pro Rating: 4.5
This is a good removal spell with absolutely massive upside, since it is an easily crewable evasive vehicle. And crewing this can give you big upside thanks to Survival.
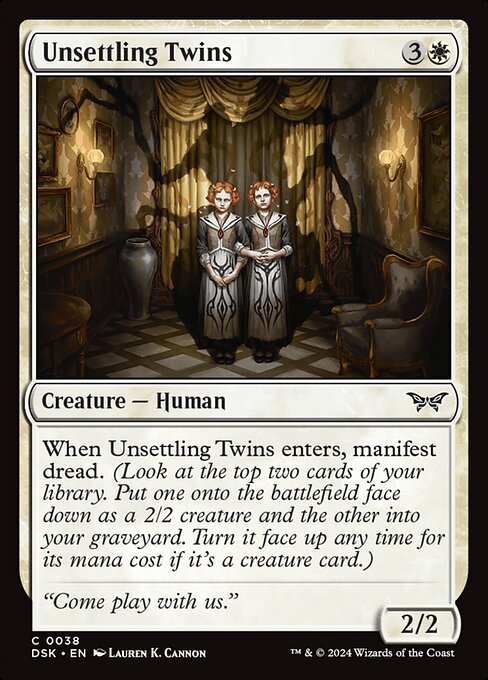
Unsettling Twins
AI Rating: 2.9Pro Rating: 4
This is a great common. You pay 4 mana for two 2/2s, and the second 2/2 has massive upside.
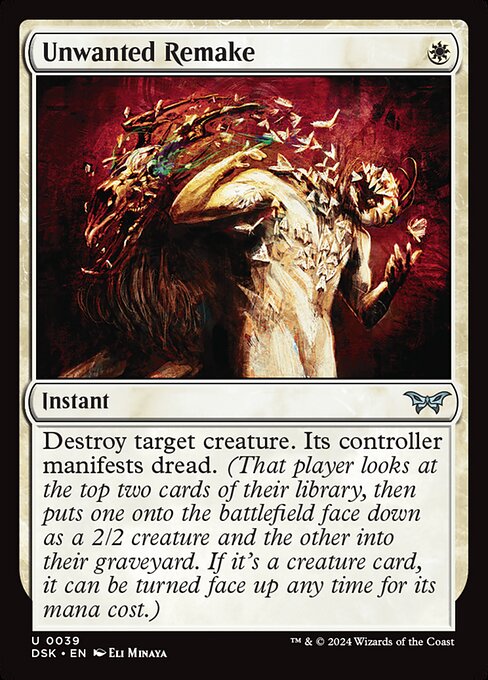
Unwanted Remake
AI Rating: 1.4Pro Rating: 0
Yeah...you don't want this. 2-for-1ing yourself is a bad call.
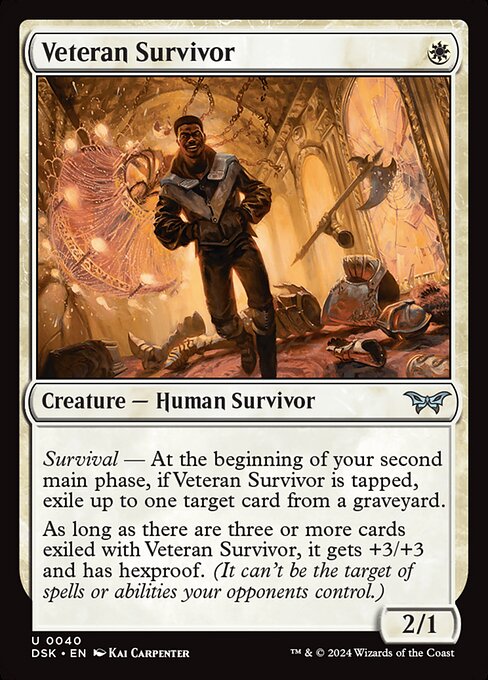
Veteran Survivor
AI Rating: 3.8Pro Rating: 2
This'll feel pretty nice on 1, but it's awkward that it probably can't exile anything when it can actually attack -- and then in the late game when there is stuff to exile, you have to get pretty creative to trigger Survival, since it won't be attacking.
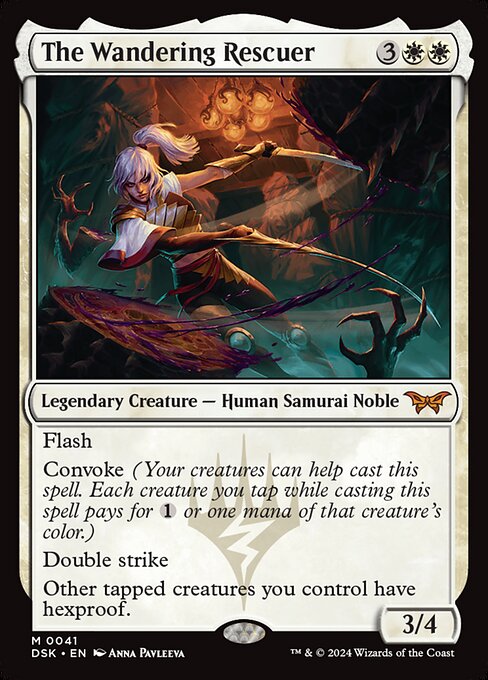
The Wandering Rescuer
AI Rating: 5Pro Rating: 5
She can flash in and ambush block just about anything, generating a 2-for-1 right away -- but thanks to Convoke and her hexproof ability, she can also blank removal spells. That's insane.
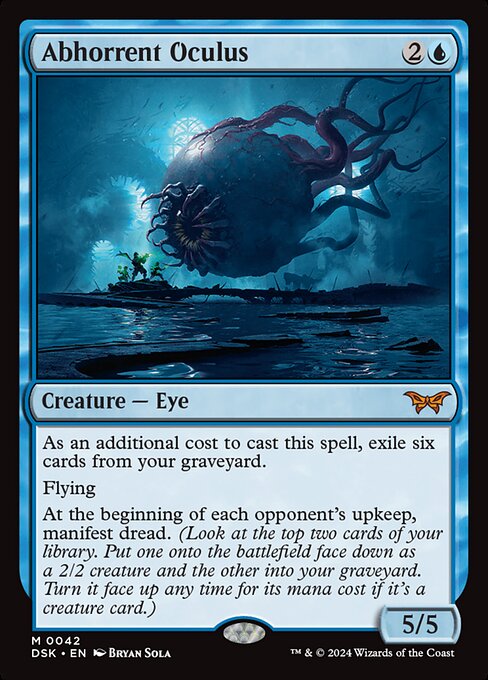
Abhorrent Oculus
AI Rating: 4.9Pro Rating: 4
The additional casting cost can be tough, but this is insanely strong since it's a huge flyer that can spit out 2/2s. It's also great to put into place face down, because then you don't have to worry about the additional cost.

Bottomless Pool
AI Rating: 4Pro Rating: 3.5
A Sorcery-speed bounce for one mana is pretty decent -- and this comes with big Enchantment upside - and this turns into a card advantage engine in the late game.
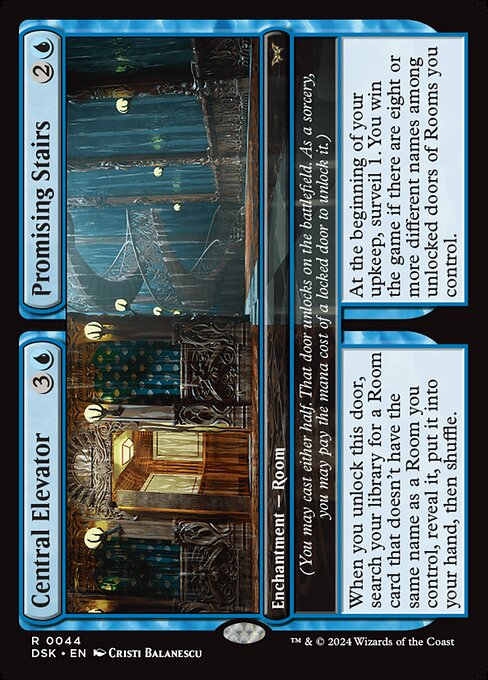
Central Elevator
AI Rating: 3.7Pro Rating: 0
Neither side adds to the board and costs way too much mana, and your chances of winning the game with Promising Stairs is super low, especially since you're not adding to the board.
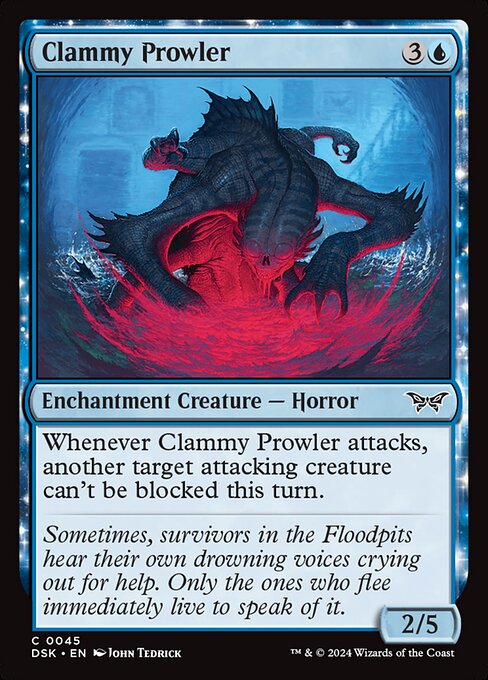
Clammy Prowler
AI Rating: 1.3Pro Rating: 2
The stat-line's not great, but it triggers eerie and has some decent utility.

Creeping Peeper
AI Rating: 1.8Pro Rating: 2.5
This can produce mana for Manifest Dread or all the Enchantments in the format, and that's pretty useful.
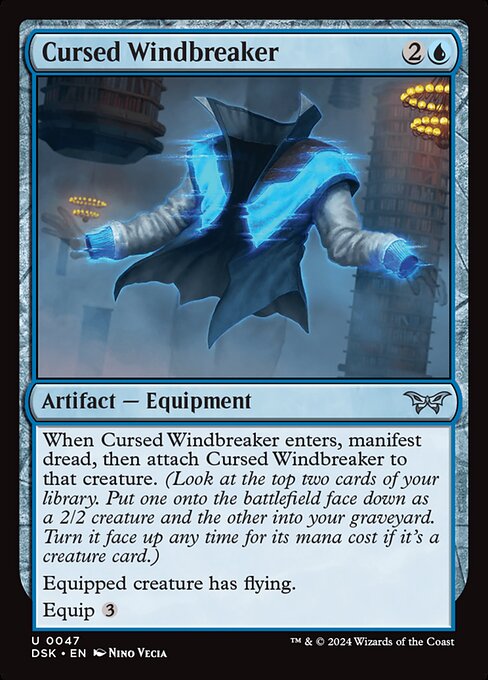
Cursed Windbreaker
AI Rating: 3.8Pro Rating: 3.5
You get a ton for your investment here, between a 2/2 with upside and an Equipment that can offer flying to anything.
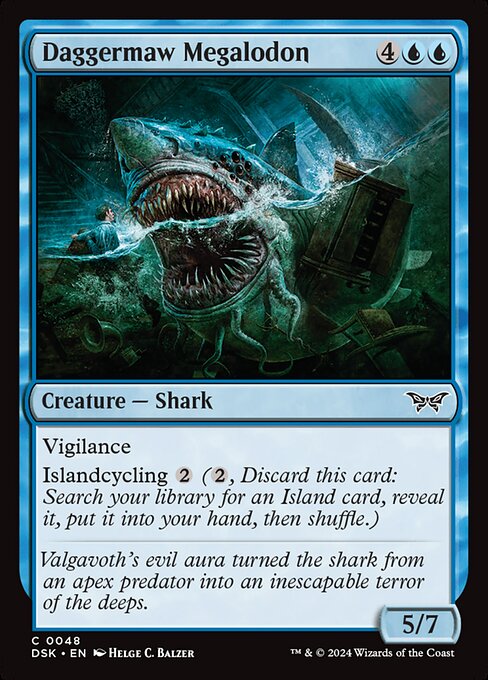
Daggermaw Megalodon
AI Rating: 1.6Pro Rating: 2
This can be imposing in the late game, and cashing it in early for an Island isn't too bad.
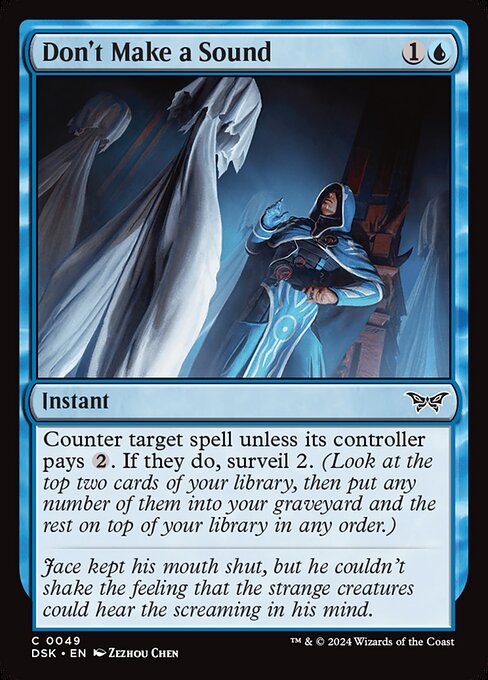
Don't Make a Sound
AI Rating: 1.8Pro Rating: 2
Two mana counterspells have been pretty good lately, although most of them come with more upside than this.

Duskmourn's Domination
AI Rating: 2.1Pro Rating: 2
Mind Controls are usually pretty insane, but they really made sure this one wouldn't be. You can look at this as a 6-mana removal spell that gives you a barely relevant piece of material -- like a 1/4 with no abilities, or something like that.
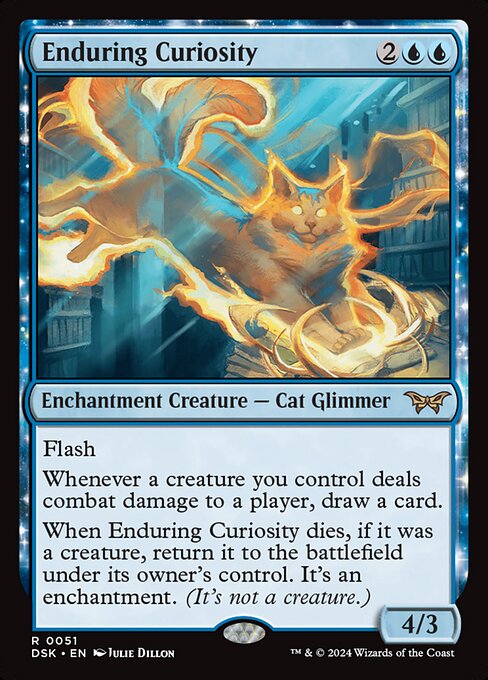
Enduring Curiosity
AI Rating: 4.7Pro Rating: 4.5
Flash makes it really easy to draw cards with this, and it isn't capped at one card per creature! Add in the fact that shutting this effect down entirely is super tough, and we're talking about a bomb.

Enter the Enigma
AI Rating: 1.1Pro Rating: 2
When this effect is good, it's really good -- and when it isn't, you can just throw it away. This format doesn't have a spell deck though, and that hurts it's stock some.
Entity Tracker
AI Rating: 4.7Pro Rating: 4.5
The Eerie trigger here is insanely strong, and because it has Flash, it's easier to find a window where you can get this down and trigger it before your opponent can ever remove it.
Erratic Apparition
AI Rating: 1.4Pro Rating: 2
The base stats here are pretty bad, but it'll often attack as a 2/4.

Fear of Failed Tests
AI Rating: 2.5Pro Rating: 1.5
This is a largely defensive creature that wants you to do damage with it, which just seems...weird. It's not going to get in for a hit very often.

Fear of Falling
AI Rating: 3.6Pro Rating: 2.5
5-mana 4/4 Flyers aren't as good as they used to be, especially when they don't have ETB or death triggers, but this attack trigger is pretty good at giving this an effect even when it isn't your turn.

Fear of Impostors
AI Rating: 2.6Pro Rating: 2
I don't love the idea of giving my opponent a Manifest when I counter their spell, but you do add this to the board in the process, so it's not a 2-for-1, at least. Although it can definitely backfire.

Fear of Isolation
AI Rating: 4.3Pro Rating: 2
This can do some interesting stuff, like rebuy ETBs or eerie triggers, but the alternate cost is pretty significant and makes it a pretty bad card in your opening hand.
Floodpits Drowner
AI Rating: 3.9Pro Rating: 3.5
This is effectively a removal spell with a whole bunch of upside, since if you'd rather not get rid of your opponent's creature, you can hold on to a 2/1 with Vigilance and use it to do some damage while the creature is stunned.
Get Out
AI Rating: 3.1Pro Rating: 2.5
This can counter almost every spell in the format, and the Enchantment mode is useful on occasion. The double Blue holds it back a bit, though.

Ghostly Keybearer
AI Rating: 2.4Pro Rating: 2
4-mana 3/3 Flyers have gotten pretty underwhelming of late, and this card's upside seems a bit too narrow to me.
Glimmerburst
AI Rating: 2.8Pro Rating: 2.5
An instant-speed 4-mana draw 2 that adds to the board -- and triggers eerie, is something that I'd like one copy of in many Blue decks.
Leyline of Transformation
AI Rating: 1.9Pro Rating: 0
This effect is almost entirely meaningless in this format.
Marina Vendrell's Grimoire
AI Rating: 1.9Pro Rating: 0
6-mana to draw 5 is kind of sweet, but turning your life total into you cards in hand? Not so much, especially because you just didn't add to the board when you spent 6 mana. It's going to be tough not to lose the turn after you play this.
Meat Locker
AI Rating: 3Pro Rating: 3
Meat Locker has an effect that impacts the board, and Drowned Diner lets you dig deeper in your deck later in the game. I'm pretty happy with both of those things.
The Mindskinner
AI Rating: 2.4Pro Rating: 1.5
It's temping to look at this and think "I'm going to kill my opponent in three swings and they can't block it!" but there are some significant problems here. The first of these is the mana -- it's going to be very difficult to actually run this out on turn three, and turn four or five is even a challenge in Limited. Triple Blue is tough. It also only has 1 toughness so it dies to literally everything, and then even once you do get it in play it effectively doesn't impact the board for several turns -- and you may even give your opponent delirium or a reanimation target on accident. I think it will defniitely win some games, but it's going to lose you the game pretty often too.
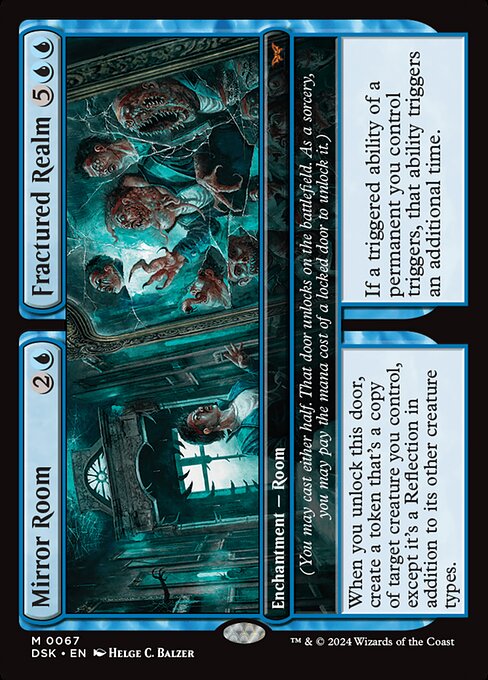
Mirror Room
AI Rating: 4.5Pro Rating: 2.5
You're mostly leaning on Mirror Room here, and three mana for a Clone isn't too bad. Fractured Realm, by the time you unlock it, is likely to be irrelevent, but it is upside on a decent card.

Overlord of the Floodpits
AI Rating: 4.8Pro Rating: 5
Even if this didn't have Impending, it'd be great -- a 5-mana 5/3 flyer that makes sure you get a 2-for-1 and helps you load the graveyard. Add Impending to the mix, and this is obviously a huge bomb.
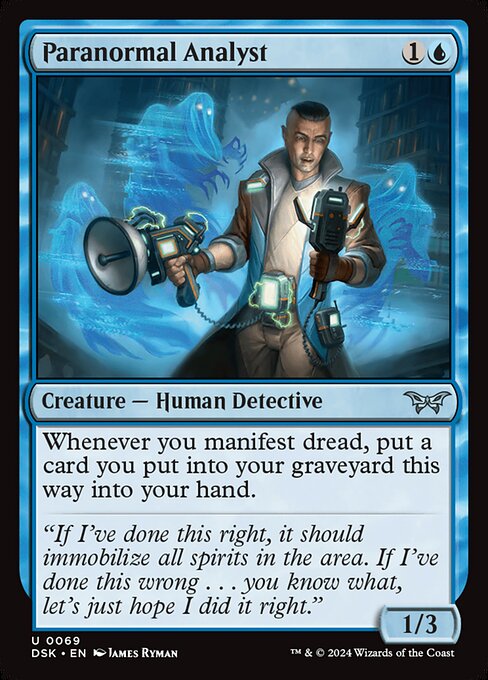
Paranormal Analyst
AI Rating: 4.1Pro Rating: 1.5 // 4.0
This is an insane Manifest Dread build around, as it turns every manifest into a 2/2 that draws you a card - - and there's plenty of manifest.

Piranha Fly
AI Rating: 1.3Pro Rating: 1.5
This isn't so efficient that it should be entering the battlefield tapped. That's just rough in an era where you often need to trade your two drop -- you have to wait a whole turn to do it with this.
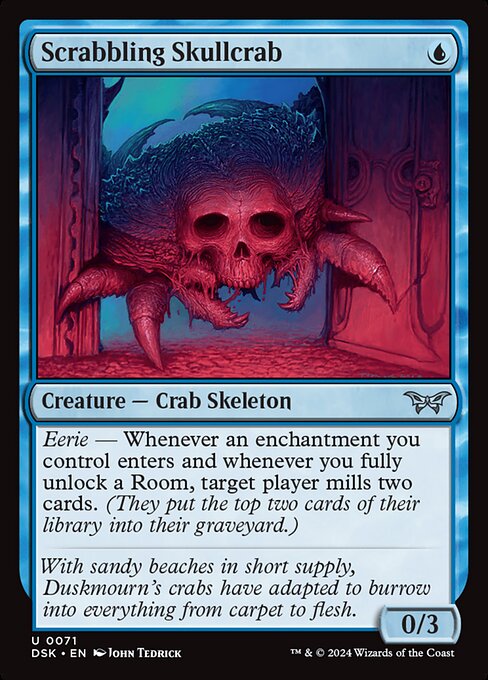
Scrabbling Skullcrab
AI Rating: 2.4Pro Rating: 1.5
I wouldn't count on milling your opponent out with this. You may get more value milling yourself in this format, but it's a super underwhelming body and the Eerie trigger isn't very good overall.
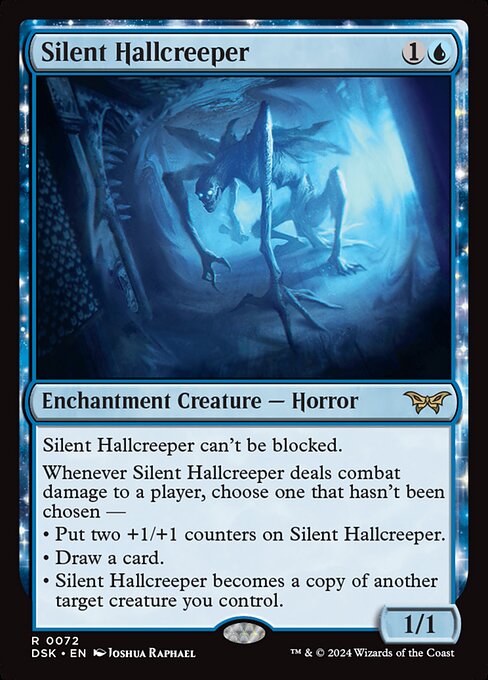
Silent Hallcreeper
AI Rating: 4.7Pro Rating: 4.5
All of these triggers are really good. Generally, you're probably going to go for the card first to make sure you get a 2-for-1, then you'll get the counters, then you'll transform it into your best creature. That's pretty insane for two mana.

Stalked Researcher
AI Rating: 1.9Pro Rating: 1.5
Two-mana 3/3s with defender that lose defender when something happens don't perform well, over all. Combat tricks are too good and creatures are too efficient these days for a defensive creature to be worthwhile.
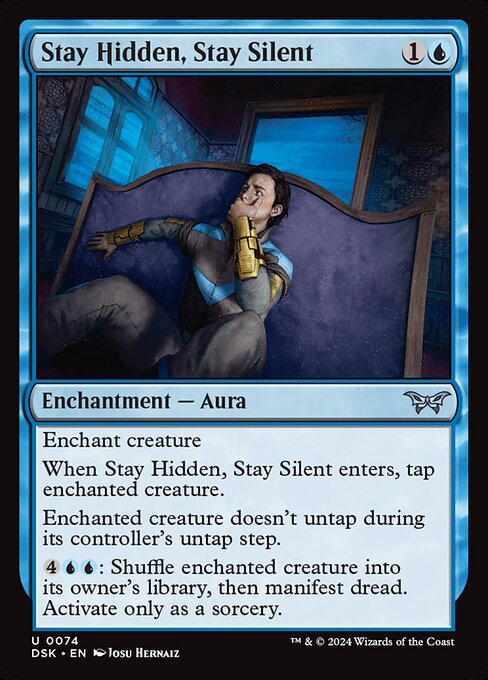
Stay Hidden, Stay Silent
AI Rating: 3.9Pro Rating: 3
This is pretty good removal even without the activated ability, but that ability is great because it gives you a mana sink late that lets you add to the board.

The Tale of Tamiyo
AI Rating: 1.6Pro Rating: 1.5
This set has fewer instants and sorceries than usual, so the last chapter is hard to abuse. The first three aren't easy either -- but if you can take advantage of the mill and draw a few cards, you might be able to play this. Not adding to the board is rough, though.
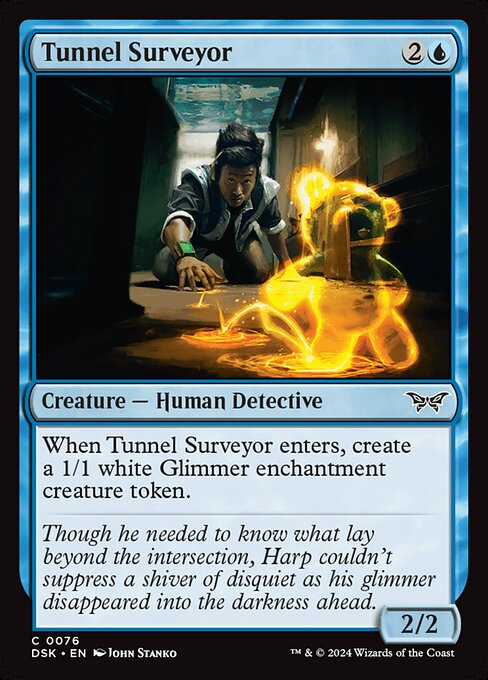
Tunnel Surveyor
AI Rating: 2.3Pro Rating: 3.5
Three mana 2/2s that make a 1/1 always perform well, and this one triggers Eerie.
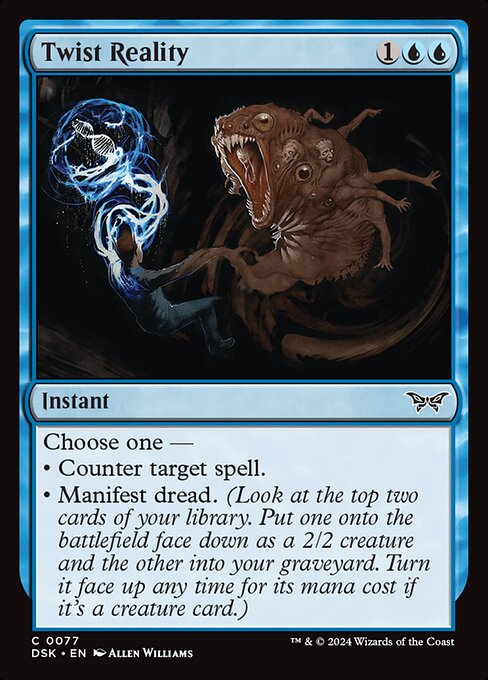
Twist Reality
AI Rating: 1.8Pro Rating: 2
You're overpaying for either of these, but getting the option between them makes this playable.

Unable to Scream
AI Rating: 3.2Pro Rating: 1
This style of removal is always bad, no mattter how efficient it looks. This is because you don't actually trade 1-for-1, since they hold on to their creature and can still do stuff with it -- like block.

Underwater Tunnel
AI Rating: 2.6Pro Rating: 2.5
I don't love that the cheaper side doesn't impact the board, but Slimy Aquarium does -- so it's sort of like you pay 5-mana for a 3/3 with Surveil 2, but you pay in installments. That's not too bad.

Unnerving Grasp
AI Rating: 4.4Pro Rating: 4
This is a Manifest Dread version of Man-O-War, and that seems excellent. Adding to the board while taking away from your opponent's board is great, and this 2/2 has massive upside.

Unwilling Vessel
AI Rating: 4.1Pro Rating: 3.5
I don't love how inefficiently this starts out, but if you get even one counter on him that's no longer a problem.
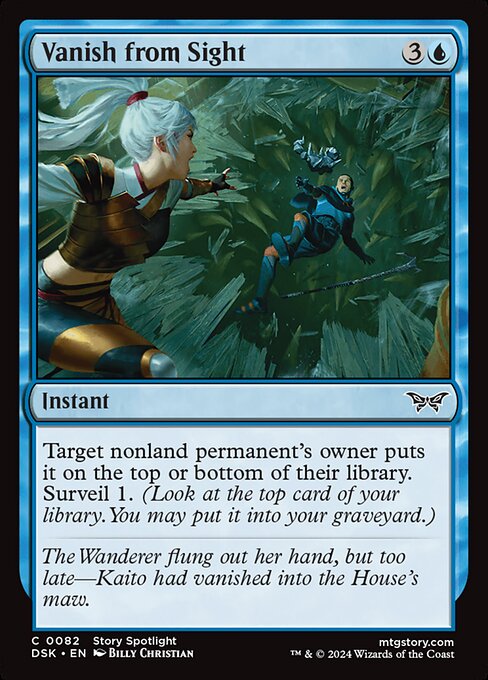
Vanish from Sight
AI Rating: 2.1Pro Rating: 2.5
This effect for 4 mana is always solid removal. It's never insane, but it trades 1-for-1 and as an instant has 2-for-1 potential. The surveil is nice added value.
Appendage Amalgam
AI Rating: 1.6Pro Rating: 2
This is pretty bad at first glance, but it can trigger eerie at instant speed and help you get delirium both with it's own body and Surveil.

Balemurk Leech
AI Rating: 1.6Pro Rating: 2
This stat-line is no longer very efficient, and the eerie trigger isn't anything to write home about.

Cackling Slasher
AI Rating: 1Pro Rating: 1.5
Any time we see an under-statted creature who can be decent if a creature die in a turn, it ends up being surprisingly hard to get that counter.
Come Back Wrong
AI Rating: 4.5Pro Rating: 4
This is a removal spell that lets you get access to an ETB and/or death trigger from an opposing creature, and if you're in Black/Red, you might even be abel to sacrifice it.

Commune with Evil
AI Rating: 2.6Pro Rating: 2.5
I'm interested in the first copy of this if I'm in a Delirium deck, as it can get Delirium singlehandedly. Not adding to the board is a bit of a problem, but the life gain helps.

Cracked Skull
AI Rating: 1.5Pro Rating: 1.5
Getting two pretty weak effects for three mana isn't great, but this is an Enchantment format, so this is probably a little better than it looks.

Cynical Loner
AI Rating: 2.9Pro Rating: 2
A two-mana 3/1 is fine, and this can help you get delirium or drop a reanimation target in the graveyard.

Dashing Bloodsucker
AI Rating: 2.8Pro Rating: 3
This will often be a 4/5 with lifelink on your turn and that's a very problematic body for your opponent -- and sometimes it'll be a 6/5 or bigger.

Defiled Crypt
AI Rating: 3.4Pro Rating: 1.5 // 3.0
This is Raise Dead with some legit upside, especially in Black/White decks.
Demonic Counsel
AI Rating: 1.4Pro Rating: 1
You have to get Delirium going for this to ever be worth it, and tutors are always surprisingly underwhelming in Limited.
Derelict Attic
AI Rating: 1.6Pro Rating: 2
Three mana to draw 2 and lose 2 life is decently playable, and this one triggers eerie. Widow's Walk isn't great, but it's upside on a decent card.
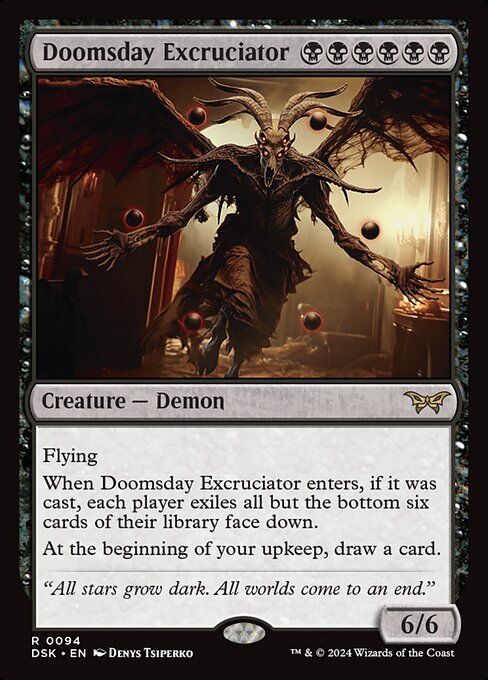
Doomsday Excruciator
AI Rating: 2.1Pro Rating: 0 // 4.0
You can't play this unless you're reanimating it. The good news is, Black/White decks can definitely pull this off, and this is a premium target.
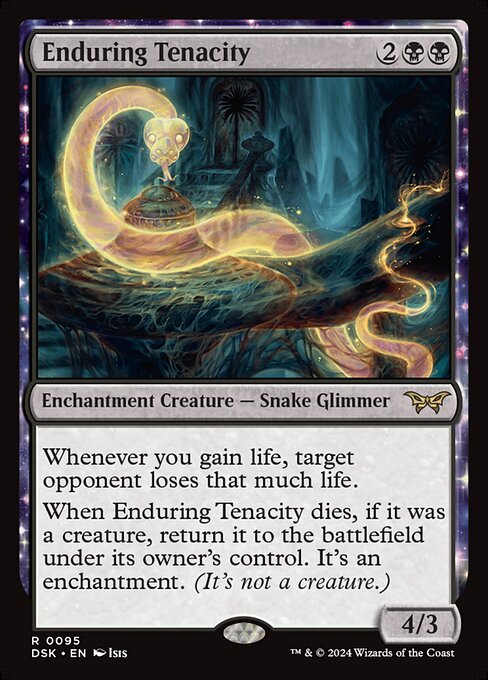
Enduring Tenacity
AI Rating: 4.1Pro Rating: 2.5
Life gain is not a big theme in this format, so the ability doesn't come up a whole lot.
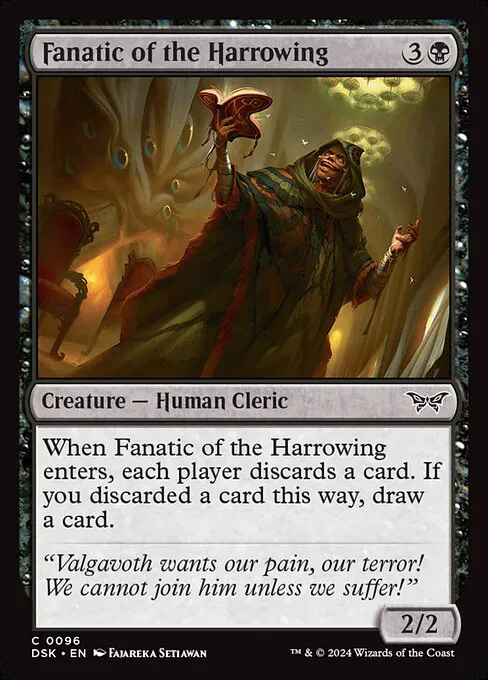
Fanatic of the Harrowing
AI Rating: 1.8Pro Rating: 2.5
Making your opponent discard while you get to loot is pretty nice, especially in a graveyard format.
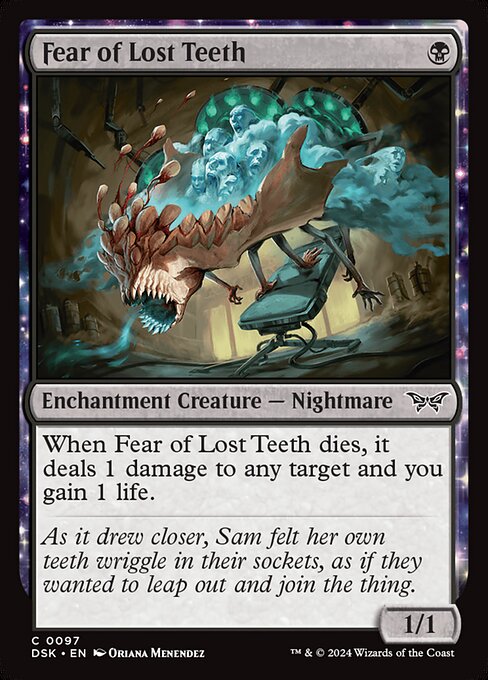
Fear of Lost Teeth
AI Rating: 2Pro Rating: 3
This gives you a lot for one mana. It's got a solid baseline and it's great sacrifice fodder and gets you halfway to delirium all on it's own.

Fear of the Dark
AI Rating: 1.8Pro Rating: 3
This will frequently have Menace and Deathtouch. It won't quite always have them -- Glimmers are around, including at lower rarities -- but it has them often enough to be a nice 5-drop, especially in decks that care about Enchantments.
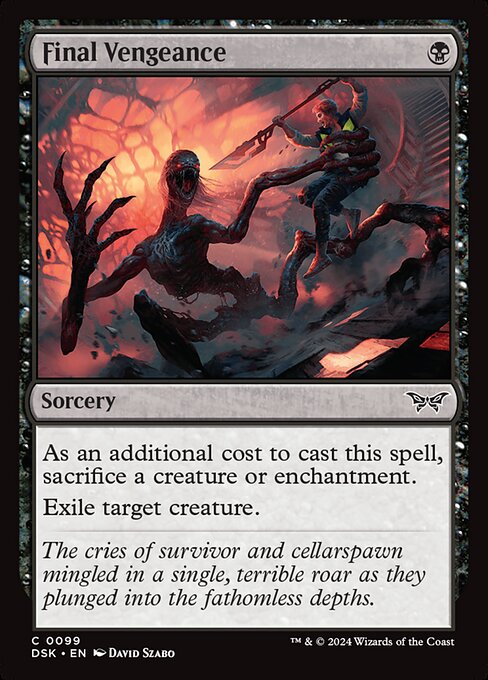
Final Vengeance
AI Rating: 3.3Pro Rating: 1.5 // 3.5
If you're in the BR sacrifice deck you can do some nasty things with this. If you're not...you can end up 2-for-1ing yourself with this, and that's not what you want to be doing.
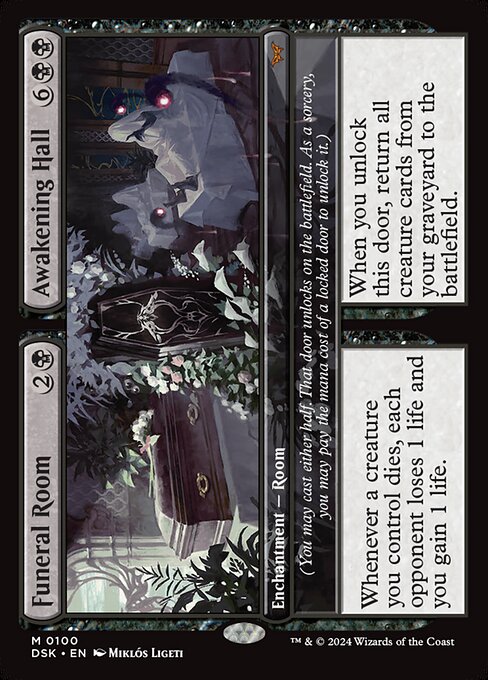
Funeral Room
AI Rating: 4.6Pro Rating: 3
The Funeral Room side is pretty medium on it's own, but it's stapled to a gamebreaking win condition. And sure, you're not always going to get to 8 mana -- but if you do, it's game over.

Give In to Violence
AI Rating: 1Pro Rating: 2
This is a little bit too expensive for me to be excited about, but it's a trick that does the job in Black aggro decks.
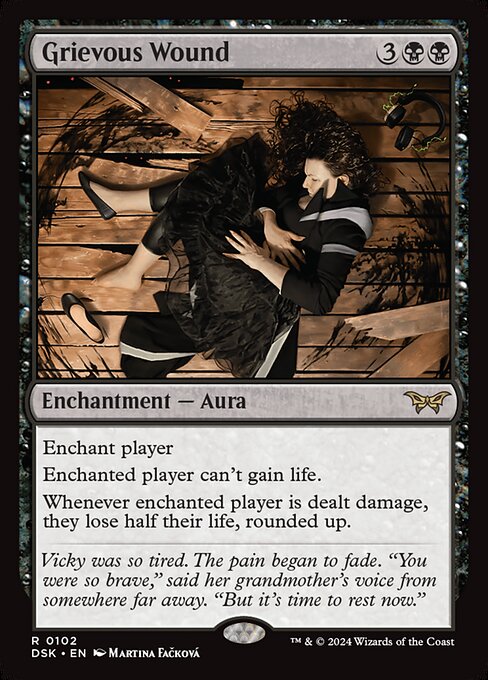
Grievous Wound
AI Rating: 3.2Pro Rating: 0
This costs 5 mana and basically does nothing unless you're already ahead and can attack your opponent effectively.

Innocuous Rat
AI Rating: 2.6Pro Rating: 3.5
Spending two mana to get a 1/1 and a 2/2 is great, and that 2/2 has big upside.
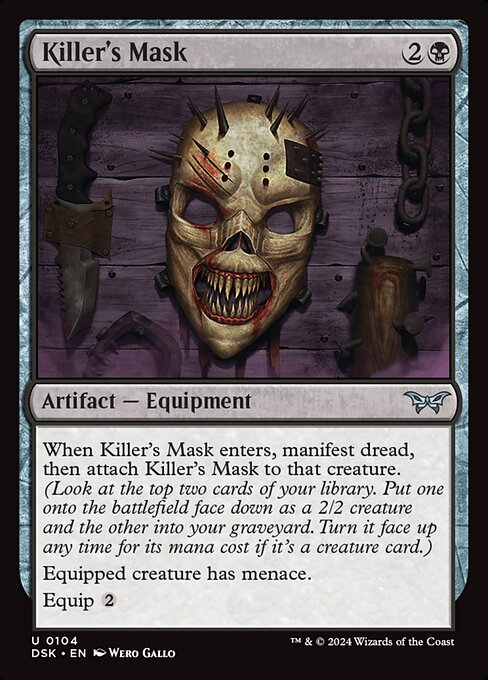
Killer's Mask
AI Rating: 2.7Pro Rating: 3.5
This is a three mana 2/2 Menace with massive upside because of Manifest Dread, and because a Menace equipment is a decent thing to have around.

Let's Play a Game
AI Rating: 1.9Pro Rating: 1.5
Even if you always got all three of these effects, they are narrow enough that this card wouldn't be insane, so jumping through hoops to get them all doesn't seem worth it to me.

Leyline of the Void
AI Rating: 2.1Pro Rating: 0
Even in a graveyard set, this isn't worth it. Limited decks aren't focused enough for this to legitimatley shut any of them down. It's not worth the card.
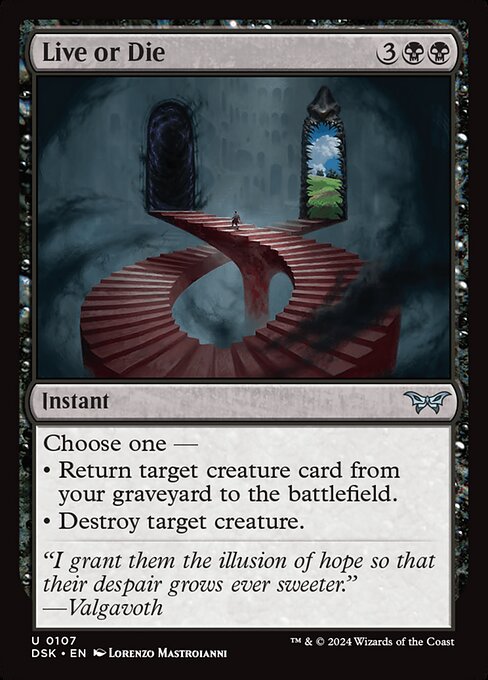
Live or Die
AI Rating: 3.8Pro Rating: 3
The modality here is important, because getting only one of these options wouldn't be great. Reanimating a creature at instant speed can generate blowouts when the situation is right, and you can just cast it as an inefficient removal spell when you have to.
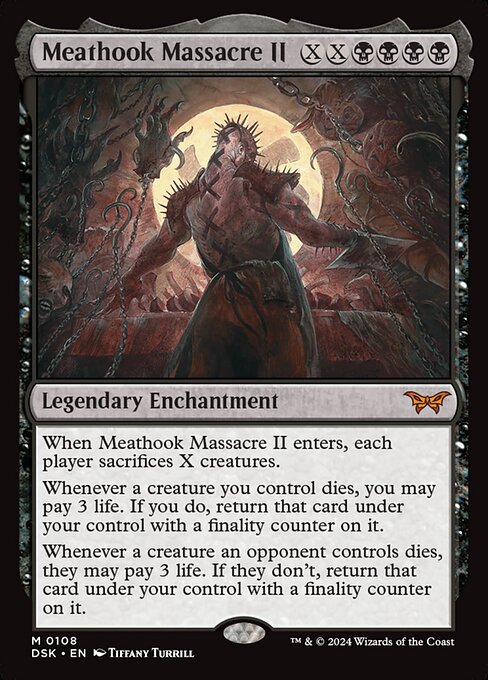
Meathook Massacre II
AI Rating: 4.1Pro Rating: 2
This doesn't live up to the bomb status of it's predecessor. It's too hard to cast and you have to sink lots of mana into it for it to do anything meaningful.

Miasma Demon
AI Rating: 2.6Pro Rating: 3
This is a big flyer that can turn every card in your hand into a free -2/-2 removal spell. That can help you set up delirium or reanimate something, while also killing stuff.

Murder
AI Rating: 3.8Pro Rating: 2.5
The double Black can be surprisingly tough to have when you need it in Limited, but it's still nice removal.
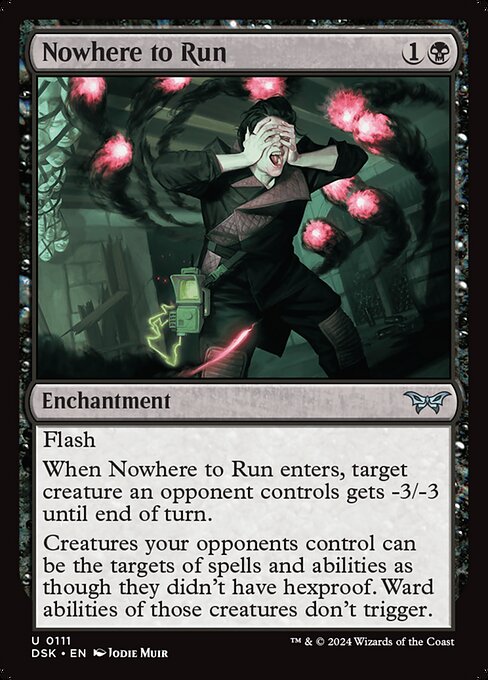
Nowhere to Run
AI Rating: 4.1Pro Rating: 4
Two mana for -3/-3 at instant speed is already great, but this also triggers Eerie and is good sacrifice fodder. Sometimes the ward/hexproof upside will matter too.

Osseous Sticktwister
AI Rating: 3.8Pro Rating: 4
This has a nice baseline and major upside. The Delirium trigger is legit. While the first one might not hurt your opponent too much, after that, the choices are going to be tough to make.
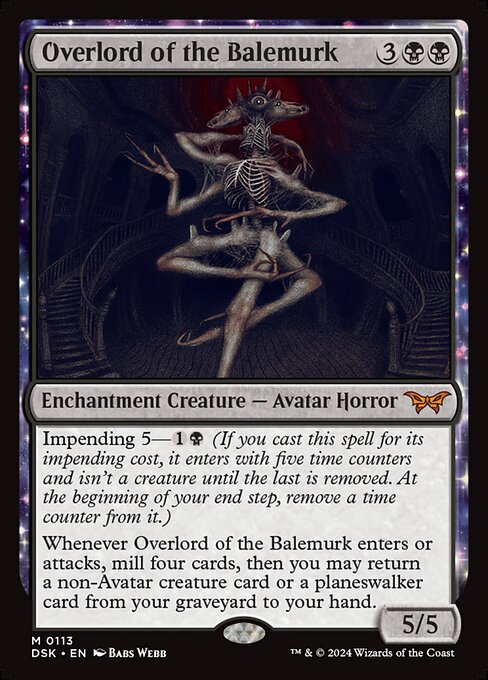
Overlord of the Balemurk
AI Rating: 4.6Pro Rating: 4.5
This generates a 2-for-1 up front while loading your graveyard in a format where that's a huge deal, and if your opponent doesn't stop it, it's going to just win the game for you.

Popular Egotist
AI Rating: 2.4Pro Rating: 2.5
This sacrifice is a little more expensive than I would like it to be, but also coming with a general sacrifice payoff is pretty sweet.
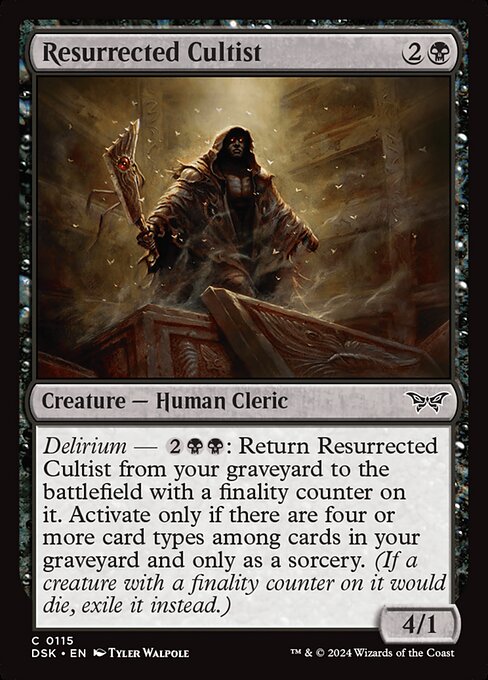
Resurrected Cultist
AI Rating: 1.5Pro Rating: 1.5
A 4/1's not great, and being able to bring it back once doesn't really make up for that.

Spectral Snatcher
AI Rating: 2.1Pro Rating: 2.5
This is tough to kill without your opponent 2-for-1ing themselves, and the fact you can cycle it away early for a Swamp and reanimate it is pretty great for Black/white decks.

Sporogenic Infection
AI Rating: 3.4Pro Rating: 3
This is a pretty weird take on an edict effect. You have some control over it, since the creature it gets put on can't be sacrificed -- and you can even put it on your own creature if your opponent only has one. But it definitely removes something and then gives you a ltitle upside beyond that.
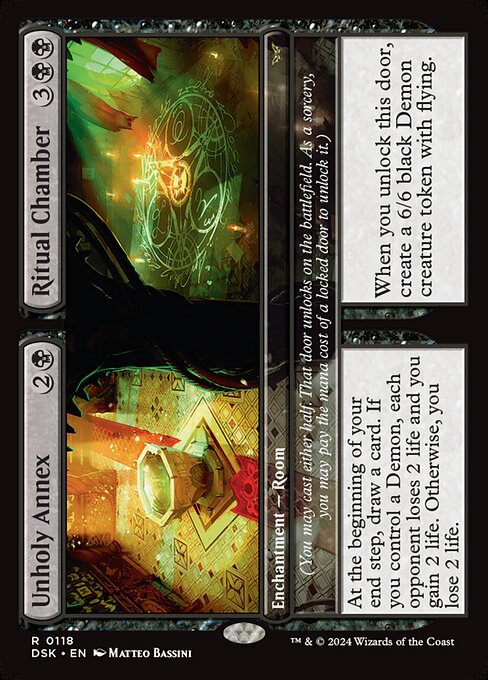
Unholy Annex
AI Rating: 4.8Pro Rating: 5
You usually want to get the demon first in this case -- a 5-mana 6/6 Flyer is great, and then if you can start drawing cards and draining 2 life every time you do, the game's going to end in your favor.
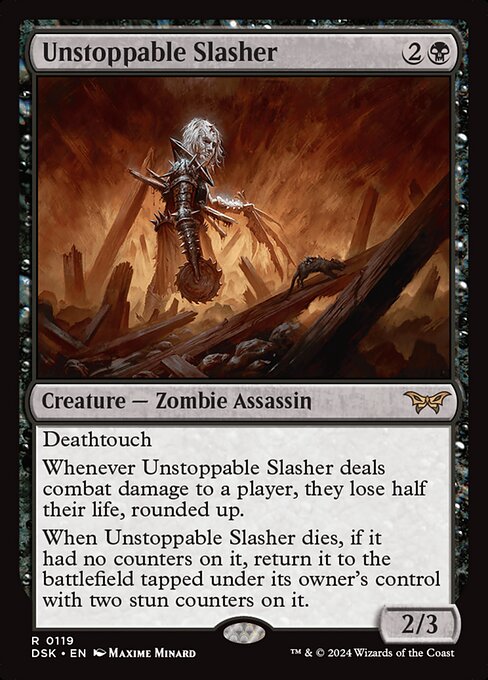
Unstoppable Slasher
AI Rating: 4.8Pro Rating: 4
Your opponent can't ignore this in any way. Either they let it through and lose a bunch of life, or they have to trade for it because it has death touch. And it doesn't stay dead, either!
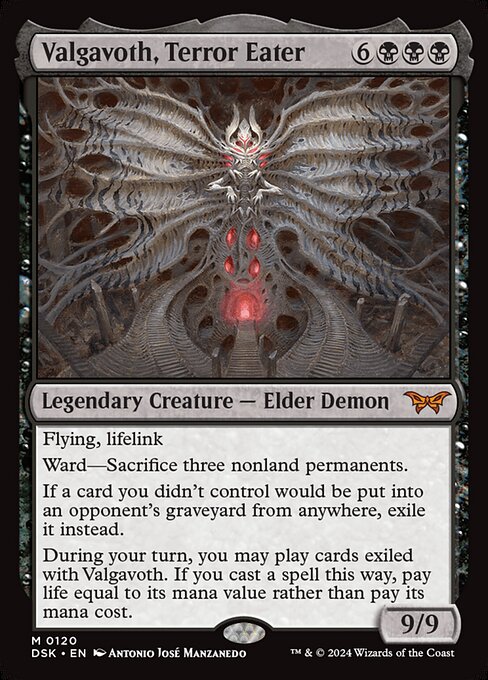
Valgavoth, Terror Eater
AI Rating: 4.6Pro Rating: 0 // 4.5
You can't really play this unless you can reanimate it, but the Black/White deck can definitely do that, and it's game over when they pull it off.

Valgavoth's Faithful
AI Rating: 3Pro Rating: 1.0 // 3.0
You only want this if you're in a really grindy graveyard deck, but it's going to work well in Black/White.

Vile Mutilator
AI Rating: 3.8Pro Rating: 3
This is great when you reanimate it, and definitely gives you 7 mana worth of value when you have to cast it.
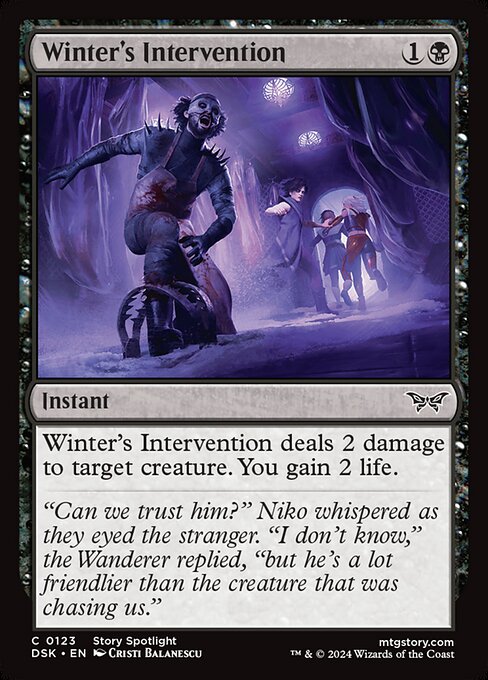
Winter's Intervention
AI Rating: 2.5Pro Rating: 3
Removing a creature -- and sometimes even trading up -- is pretty great when you also gain life.
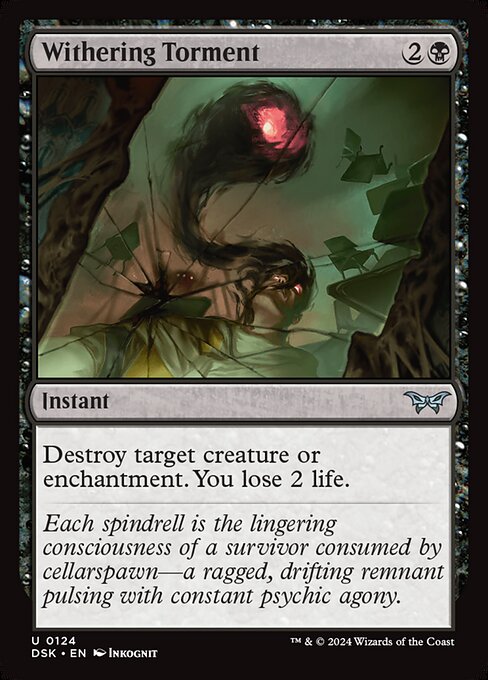
Withering Torment
AI Rating: 4.1Pro Rating: 3.5
This has lots of targets in the format, and it's well worth losing life for removal this efficient and flexible.
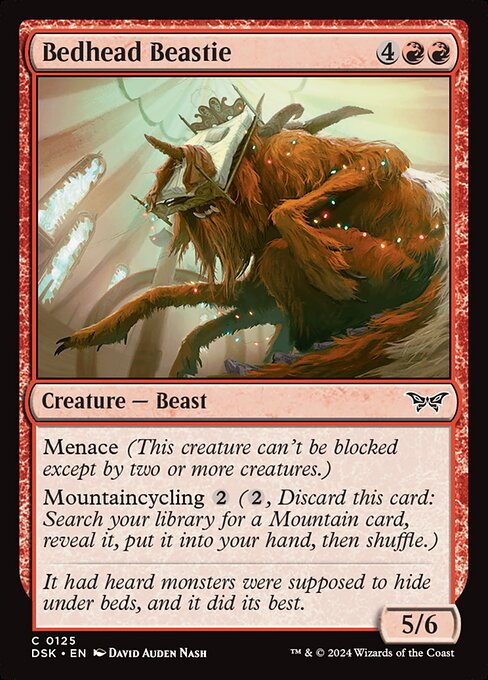
Bedhead Beastie
AI Rating: 1.6Pro Rating: 2
This is a fairly imposing presence in the late game, though it's nothing to right home about. Mountaincycling makes it a little better.

Betrayer's Bargain
AI Rating: 4.4Pro Rating: 3.5
The floor is a 4-mana deal 5, and that's very playable -- but this will often cost two and give you some sacrifice synergy.

Boilerbilges Ripper
AI Rating: 1.3Pro Rating: 2
You have to sacrifice something that isn't worth an entire card, or this won't feel worth it. When you can do that, though -- this ETB is pretty strong.
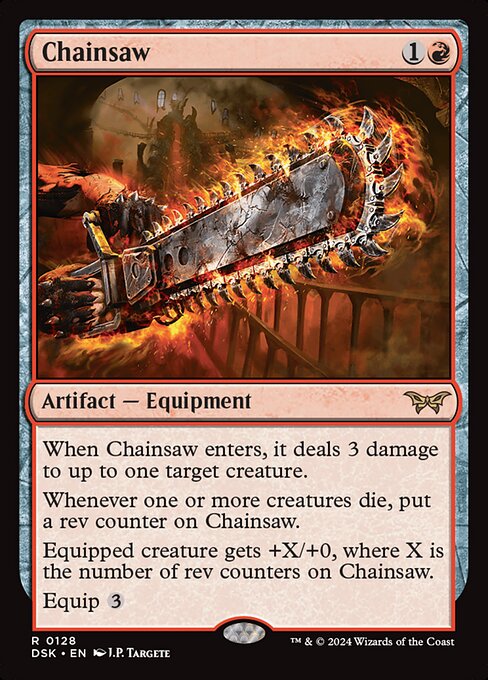
Chainsaw
AI Rating: 4.6Pro Rating: 4
This is a nice removal spell up front, and it becomes a scarier and scarier equipment throughout the game. It can be especilly nasty if you play it early.
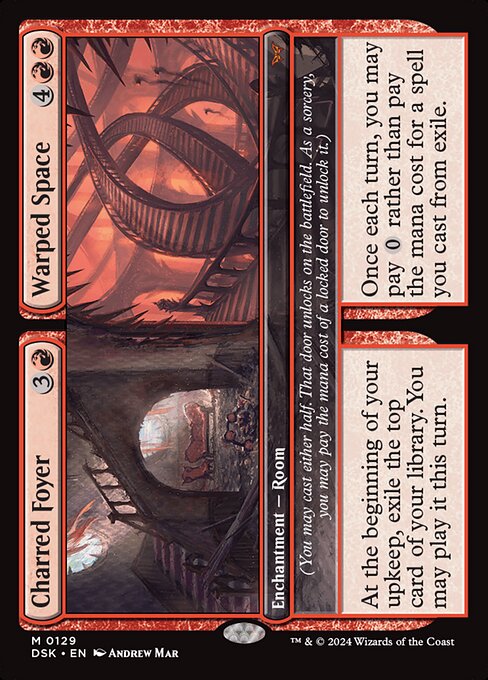
Charred Foyer
AI Rating: 4.3Pro Rating: 2.5
The "Warped Space" side is almost entirely useless, since by the time you unlock it you're likely going to be able to play anything the Foyer draws you. So, in Limited the Foyer side is pretty much where all the value is. Drawing extra cards is good, but this doesn't add to the board and that holds it back.

Clockwork Percussionist
AI Rating: 2.9Pro Rating: 2
This is a decent one drop, especially for Black-Red where you can sacrifice it and get the trigger.
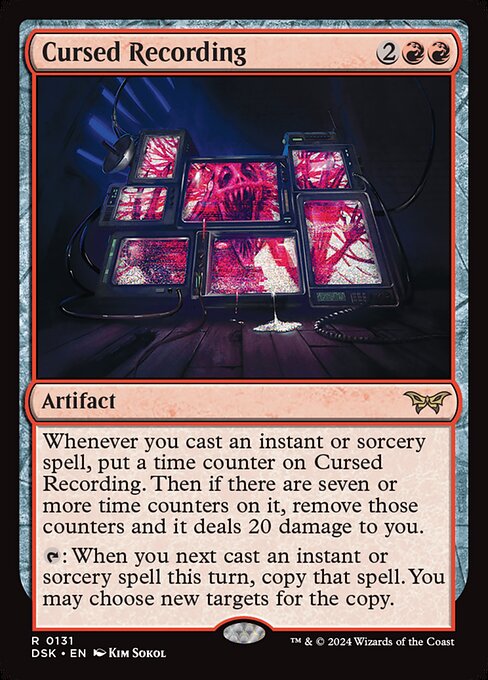
Cursed Recording
AI Rating: 2.3Pro Rating: 2.0 // 4.0
This format has fewer instants and sorceries than usual and that holds this back a little, but doubling your spells is a big deal, although deploying this where you don't add to the board can be a little scary.

Diversion Specialist
AI Rating: 2.9Pro Rating: 3.5
A 4-mana 4/3 with Menace is pretty solid, and this sacrifice trigger is great when you have fodder.
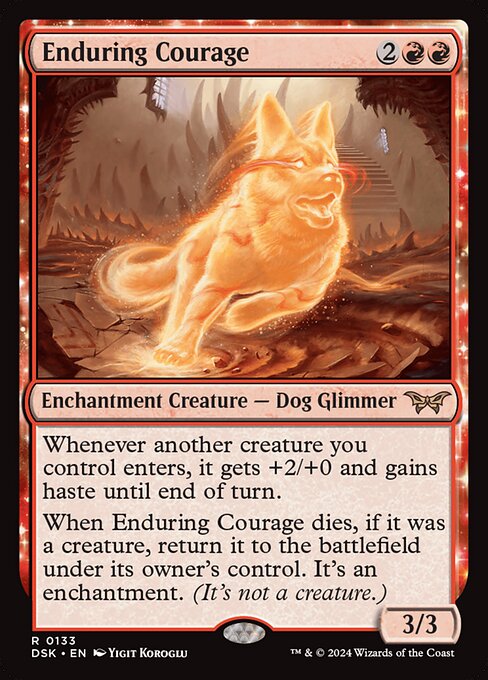
Enduring Courage
AI Rating: 4.6Pro Rating: 3.5
The stat-line's not good, but this trigger is pretty nice and challenging for your opponent to get rid of -- though it is the kind of thing that's only useful when you can attack, and that isn't always the case.

Fear of Being Hunted
AI Rating: 3.8Pro Rating: 2
This isn't super easy to cast on turn three, when it's probably at it's best. And it isn't like this stat-line is insane to begin with. The Enchantment type does help make this better.

Fear of Burning Alive
AI Rating: 3.7Pro Rating: 2.5 // 4.0
If this always does 4 to your opponent and 4 to one of their creature's, it's a bomb. I think you'll get delirium often enough, especially in Red-Green, for it to perform really, really well.
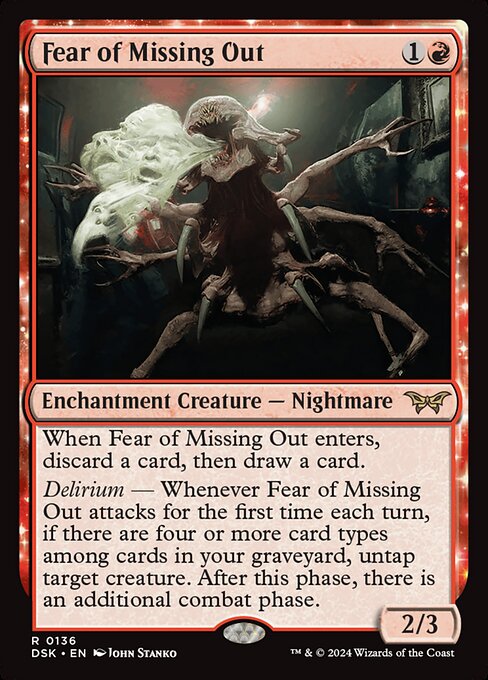
Fear of Missing Out
AI Rating: 4.6Pro Rating: 3.5
Even without Delirium this is a card you always play. And that's good, because extra combat phases generally aren't great in Limited, so it's just upside on an already good card.
Glassworks
AI Rating: 3.7Pro Rating: 4
Three mana to do 4 to something is perfectly solid, and this comes with Enchantment and door upside, plus just unlocking Shattered Yard late is pretty great.

Grab the Prize
AI Rating: 1.4Pro Rating: 1.5
If you need to get delirium, this can help while digging you deeper in your library. But without a spell deck in this format, it's probably going to underperform.
Hand That Feeds
AI Rating: 2.5Pro Rating: 2.5
This will be a two mana 4/2 with Menace often enough that it's a nice two drop.

Impossible Inferno
AI Rating: 1.6Pro Rating: 3
5 mana removal generally isn't premium, but if you get Delirium -- which is very doable -- this becomes a 2-for-1 and makes up for the cost.

Infernal Phantom
AI Rating: 2.2Pro Rating: 3.5
This is a nightmare for your opponent to interact with since even without Eerie it's going to be able to frequently 2-for-1 your opponent, and with eerie, it gets even sillier.

Irreverent Gremlin
AI Rating: 3.5Pro Rating: 3.5
A two mana 2/2 menace is pretty nice, and it's very easy to trigger the rummage effect.
Leyline of Resonance
AI Rating: -0Pro Rating: 0
This only doubles spells you target your creatures with, that's way too narrow.

Most Valuable Slayer
AI Rating: 3Pro Rating: 2.5
This can buff stuff the turn it comes down, and the boost it offers is enough to make your attacks much better.

Norin, Swift Survivalist
AI Rating: 2.4Pro Rating: 1
Norin's trigger can let you retrigger ETBs, but having to recast the things that get blocked is a pretty big problem. It is a "may" trigger at least.

Overlord of the Boilerbilges
AI Rating: 5Pro Rating: 5
Even without impending this is a bomb, so the fact that you can get the 4 damage even earlier when you need to is incredible.

Painter's Studio
AI Rating: 4Pro Rating: 2
Neither side really impact the board and that's a pretty big problem. Painter's Studio is basically a red Divination, and the Gallery can augment attacks -- but it's a bit of a win-more card.
Piggy Bank
AI Rating: 3.3Pro Rating: 3.5
This is a great rate and you're almost always going to feel like you're coming out ahead when it dies thanks to that Treasure.
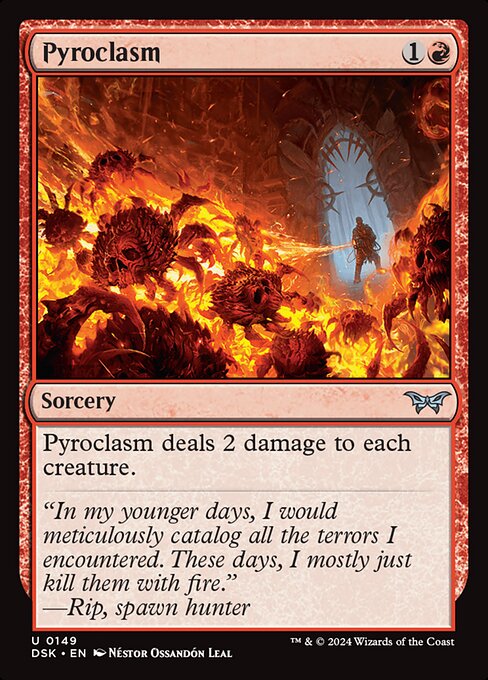
Pyroclasm
AI Rating: 2.5Pro Rating: 0.5
This is a sideboard card and a really narrow one -- you need to have high toughness creatures and your opponent needs to have lots of low toughness creatures.
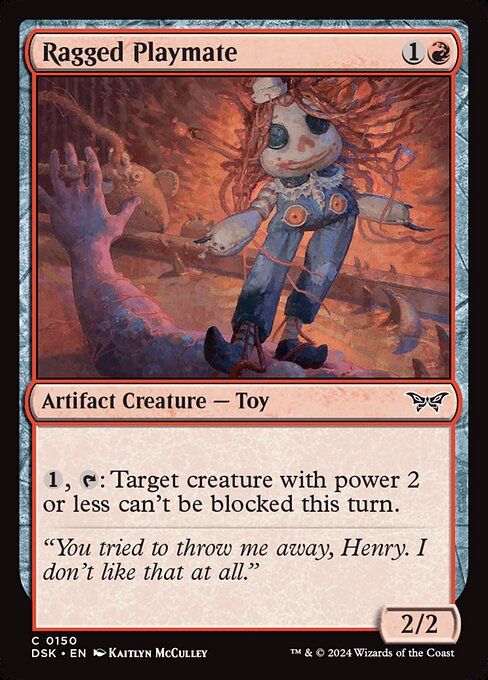
Ragged Playmate
AI Rating: 2.2Pro Rating: 2
This is a sub-par stat-line and it has a mediocre activated ability, but it's a two drop with two types, so it's more playable than it looks.
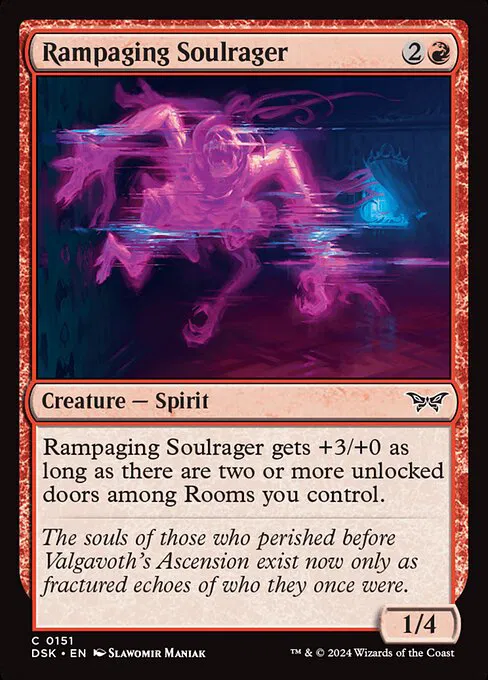
Rampaging Soulrager
AI Rating: 0.8Pro Rating: 1.5
A three mana 1/4 is bad, and making this into a 4/4 is going to take significant work.

Razorkin Hordecaller
AI Rating: 4.1Pro Rating: 3.5
This plays offense and defense pretty well thanks to the token it makes, and it's a pretty good rate overall.
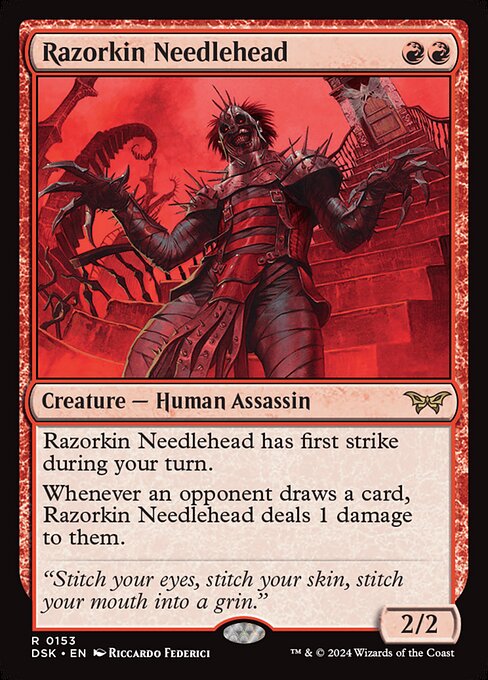
Razorkin Needlehead
AI Rating: 4.2Pro Rating: 3
This is a strong two drop, though it is held back by requiring double red. Still, it can attack on most boards and it's trigger certainly puts your opponent under pressure.

Ripchain Razorkin
AI Rating: 1.4Pro Rating: 2
The stat-line's not great here, and the activated ability is really only good in the late game.

The Rollercrusher Ride
AI Rating: 4.9Pro Rating: 5
Even without delirium you can pay 6 total mana to do 3 to three targets which is an excellent card, and once you have Delirium it's even more gamebreaking.

Scorching Dragonfire
AI Rating: 3.9Pro Rating: 3.5
This is premium removal, and exiling the creature is a big deal in a graveyard format -- and it even stops death triggers!
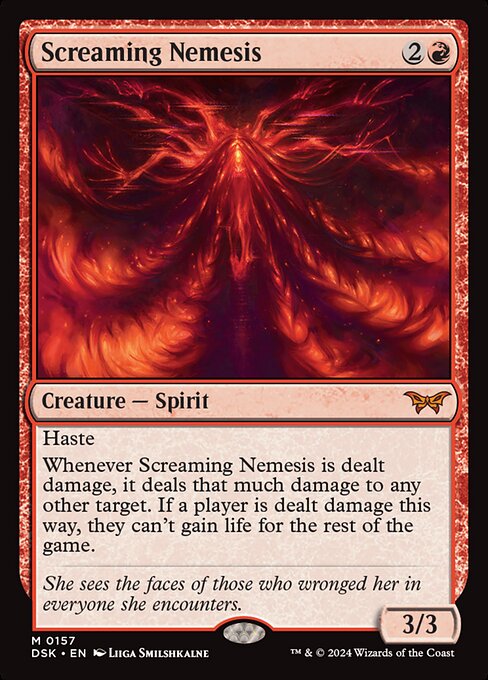
Screaming Nemesis
AI Rating: 5Pro Rating: 4
This is really tough to take down in a way that doesn't put your opponent way behind, as doing damage to it in any way will let you kill something in most cases.

Ticket Booth
AI Rating: 2.4Pro Rating: 3
I love that the Booth adds a real body to the board earlier, and you can unlock the Tunnel late at a time where it makes your attacks way better.

Trial of Agony
AI Rating: 2.3Pro Rating: 2.5
You're never going to kill the creature you most want to kill with this, but paying one mana to kill your opponent's second best creature is still worth it. And sometimes making two things unable to block is going to win you the game.
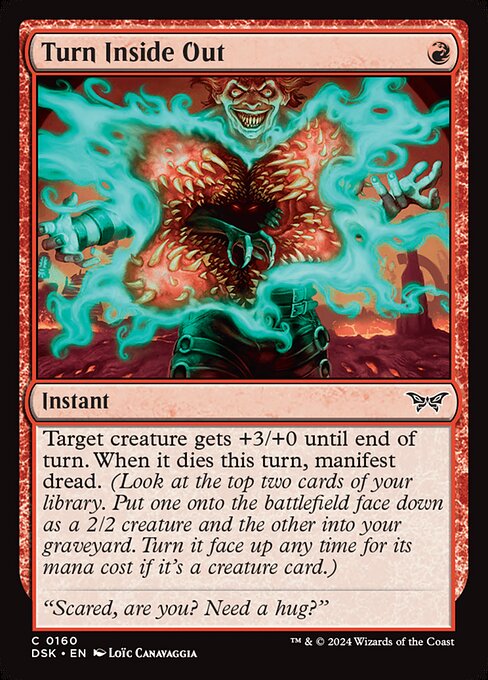
Turn Inside Out
AI Rating: 2.7Pro Rating: 2.5
This is a solid trick because it's going to let your creature kill your opponent's in most cases, and getting a 2/2 if your creature dies means you come out ahead.

Untimely Malfunction
AI Rating: 2.2Pro Rating: 2
While all three modes on this are pretty situational, when they are useful, they have a big impact on the game.

Vengeful Possession
AI Rating: 3.3Pro Rating: 1.5 // 3.5
If you're Black/Red, this is going to be one of the best cards in your deck since you can steal an opposing creature and sacrifice it.

Vicious Clown
AI Rating: 2Pro Rating: 2
3 mana for a creature that is always a 4/3 isn't exactly exciting, and this is worse in most ways.
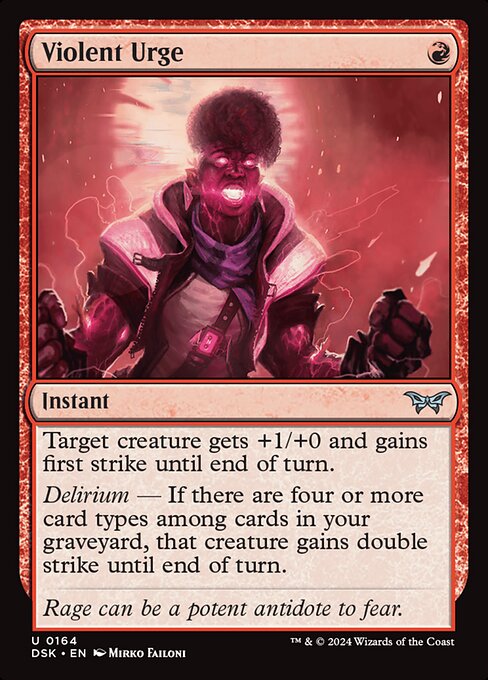
Violent Urge
AI Rating: 2.2Pro Rating: 2
Without Delirium this is a sub-part trick, with it it's significantly better -- and can even find lethal out of nowhere.

Waltz of Rage
AI Rating: 4.3Pro Rating: 5
It'll be pretty easy to turn this into a wrath that kills everything but your best creature -- while helping you replace your creatures that died! That's pretty insane.
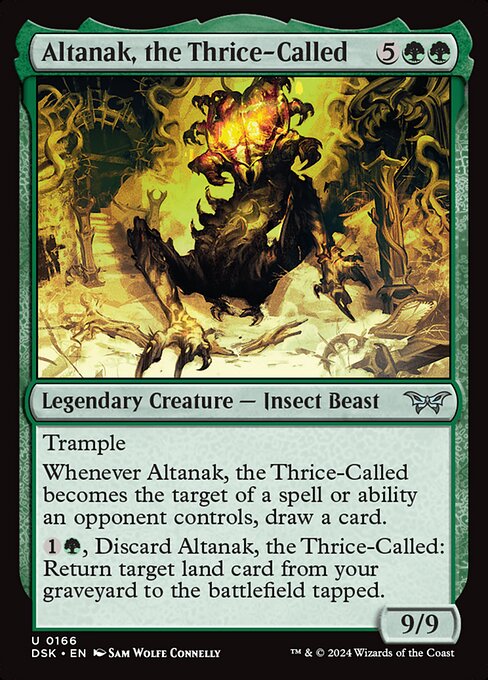
Altanak, the Thrice-Called
AI Rating: 3.7Pro Rating: 3
It's a lot of mana, but it's castable and it's basically always going to be a 2-for-1.

Anthropede
AI Rating: 1.5Pro Rating: 1.5
These are below-rate stats, and while blowing up a room has value -- the cost is pretty real here, and you certainly won't always have a target anyway.

Balustrade Wurm
AI Rating: 4.7Pro Rating: 4.5
A 5-mana 5/5 with trample and haste is going to lots of damage in a hurry, and this one can even come back from the graveyard!

Bashful Beastie
AI Rating: 2.4Pro Rating: 2.5
A 5-mana 5/4 that dies into a 2/2 token is solid, and this is significantly better than that.

Break Down the Door
AI Rating: 3.5Pro Rating: 2.5
There are enough artifacts and enchantments in this set for this to be main deck material, especially because even when you don't have a target you can get a 2/2.
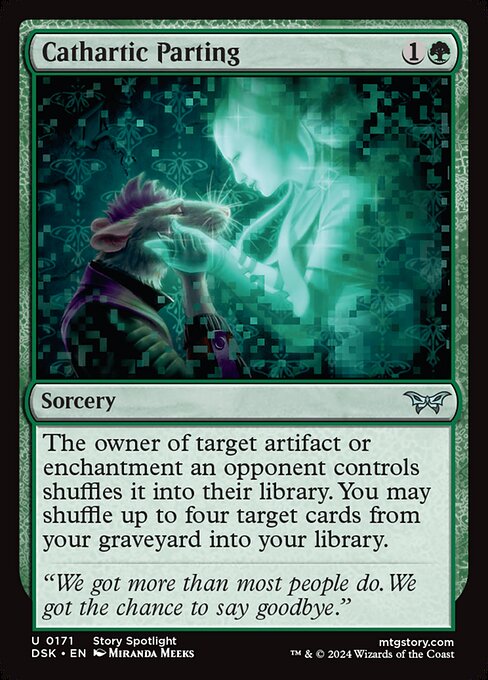
Cathartic Parting
AI Rating: 2.4Pro Rating: 2.5
There are enough artifacts and enchantments in this set for this to be main deck material, and shuffling your stuff back into your library can have real value too.

Cautious Survivor
AI Rating: 1.5Pro Rating: 2
A 4-mana 4/4 is fine, but this has one of the weaker survival triggers in the set.

Coordinated Clobbering
AI Rating: 3.9Pro Rating: 4
This would be good in a set without the survival mechanic -- in a set where tapping your creatures can come with extra value, it's pretty insane.

Cryptid Inspector
AI Rating: 2.2Pro Rating: 3
This isn't very hard to grow, especially in Blue/Green, and having Vigilance makes it both a brick wall and a great attacker.
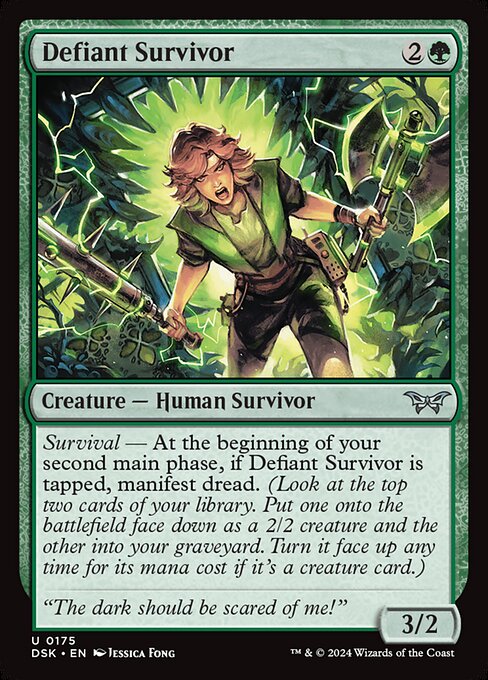
Defiant Survivor
AI Rating: 3.9Pro Rating: 3.5
The stat-line here isn't great, but this is probably the strongest survival trigger on any Common or Uncommon in the set. Triggering it even once is incredible.
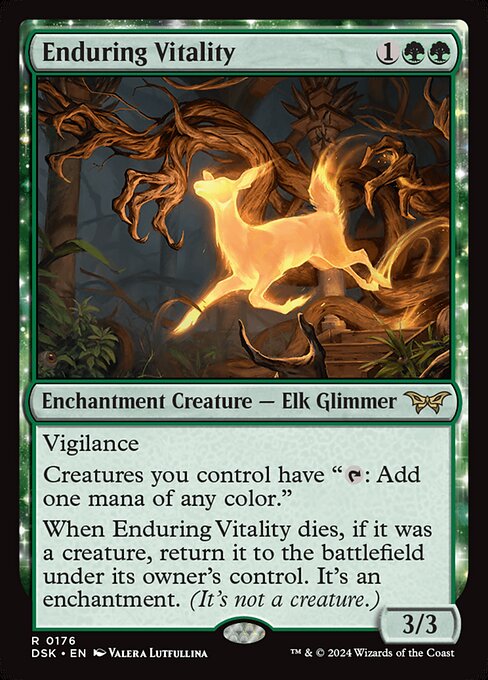
Enduring Vitality
AI Rating: 4.7Pro Rating: 4
If you drop this on three, you've got a great chance of powering something out ahead of schedule on your next turn, and while this card's utility does go down the later the game goes, it's still a three mana 3/3 with Vigilance.

Fear of Exposure
AI Rating: 3.6Pro Rating: 3.5
This alternate cost is pretty easy to pay, and you might even get some extra value thanks to Survival.

Flesh Burrower
AI Rating: 2.4Pro Rating: 2.5
This has a solid baseline, and while the attack trigger isn't always relevant, it is often enough for this to be solid.

Frantic Strength
AI Rating: 1.4Pro Rating: 1.5
This can trigger Eerie at instant speed or save a Survival creature in combat, but it's pretty clunky.

Grasping Longneck
AI Rating: 1.9Pro Rating: 2.5
This has passable stats and a death trigger that makes up for it's low toughness, and the Enchantment typing is pretty important.
Greenhouse
AI Rating: 2.2Pro Rating: 1
Neither side affects the board, and Greenhouse is almost entirely irrelevant. The Gazebo is an overcosted draw spell.
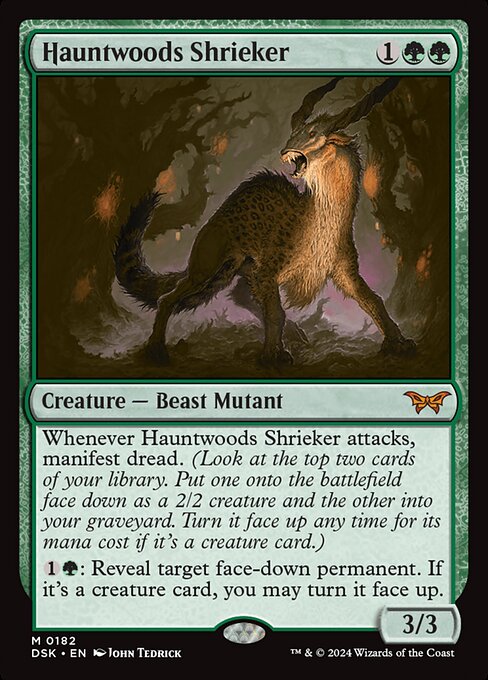
Hauntwoods Shrieker
AI Rating: 4.4Pro Rating: 4.5
This would be pretty good even if you took away one of it's abilities, but generating Manifests and then letting you flip them on the cheap -- while also having solid stats to begin with -- makes this a bomb.
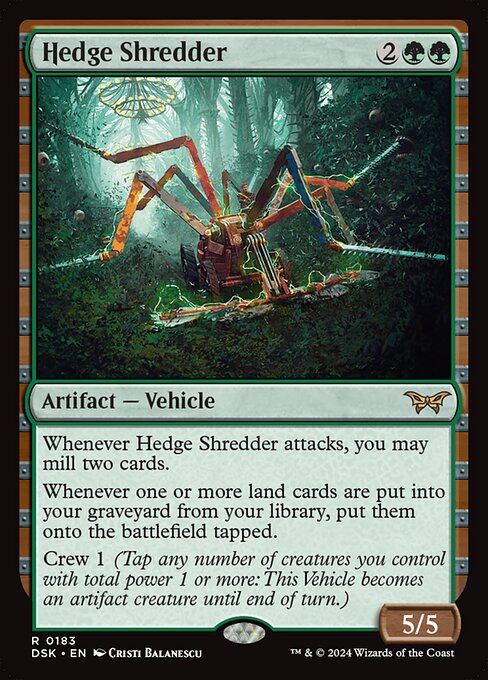
Hedge Shredder
AI Rating: 4.4Pro Rating: 3.5
This is easy to crew and milling yourself is a big deal in this set.
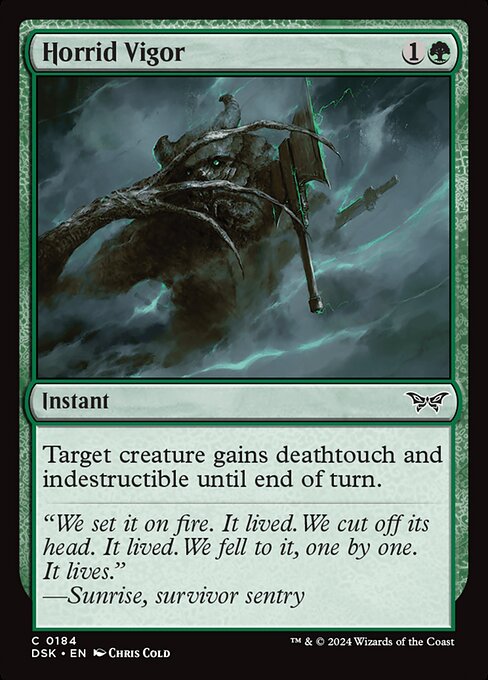
Horrid Vigor
AI Rating: 1.5Pro Rating: 2.5
This wins a creature virtually any combat and blanks virtually any removal spell -- that's exactly what you want in a trick.

House Cartographer
AI Rating: 3.6Pro Rating: 3
This Survival trigger is a great way to avoid missing a land drop, and it can fix your mana too.
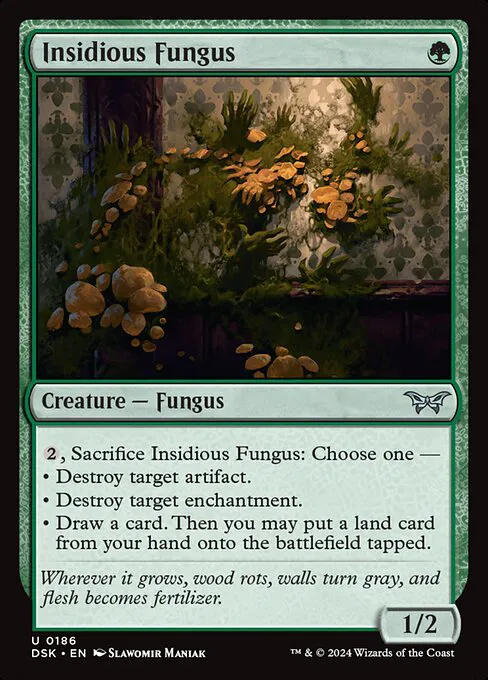
Insidious Fungus
AI Rating: 3.6Pro Rating: 2.5
This will have plenty of targets, and when it doesn't throwing it away for Explore isn't too shabby.

Kona, Rescue Beastie
AI Rating: 4.6Pro Rating: 2
This kind of effect always underperforms. You just don't have permanents in your hand often enough for this to do something meaningful.
Leyline of Mutation
AI Rating: 1.4Pro Rating: 0
This gives your cards an alternate cost that you can never pay. 'nough said.
Manifest Dread
AI Rating: 3.4Pro Rating: 2.5
This is right on rate for manifesting dread, and particualrly spicy in a Blue/green deck with lots of payoffs for manifest.

Moldering Gym
AI Rating: 2.8Pro Rating: 2.5
Weight Room adds to the board, so this looks pretty solid to me. It's kind of like fixing in the early game that's kind of free, since you get a big creature later.

Monstrous Emergence
AI Rating: 3.5Pro Rating: 4
This is a super pushed Green removal spell, since it takes away all the downsides bite/fight cards usually have. For one thing, your opponent can't blow you out. For another, even if you dont' have a big enough creature in play, you probably have one in your hand that can do the job.

Omnivorous Flytrap
AI Rating: 4.8Pro Rating: 4.5
This has passable base stats, and getting delirium online is pretty doable in Green, so you're going to be generating tons of counters.
Overgrown Zealot
AI Rating: 3.8Pro Rating: 3
This offers good fixing and works well with manifest, but it's a pretty bad top-deck.

Overlord of the Hauntwoods
AI Rating: 4.9Pro Rating: 3.5
This gives you pretty good value no matter how you cost it, though it's never going to feel nearly as busted as the other Overlords.
Patchwork Beastie
AI Rating: 3.5Pro Rating: 3
This helps you det delirium and then takes advantage of that fact -- that's exactly what you want from a delirium card.

Rootwise Survivor
AI Rating: 2.7Pro Rating: 2.5
Haste means finding a window where you can get this in and trigger survival is easier, but the below-rate stats are pretty concerning.

Say Its Name
AI Rating: 2.7Pro Rating: 3
This is a great enabler for green graveyard decks, and the combo with Altanak isn't impossible.

Slavering Branchsnapper
AI Rating: 2.4Pro Rating: 2
This is a big creature late -- albeit one that doesn't really give you 6 mana's worth of value -- and you can throw it away early for a land, which is necessary sometimes.
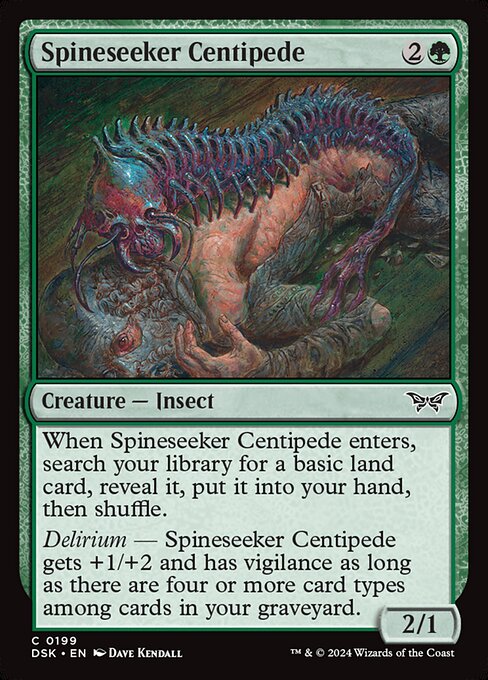
Spineseeker Centipede
AI Rating: 3.6Pro Rating: 3.5
A three mana 2/1 without the delirium effect here would probably be a 3.0, since grabbing a land is such good value -- a 2-for-1 is pretty easy to produce! So, the fact that this gains a relevant body later in the game is pretty awesome.

Threats Around Every Corner
AI Rating: 3.7Pro Rating: 4
This gives you three pieces of material on the cheap, between the 2/2, the enchantment itself, and the land. And you can even get more lands later!

Twitching Doll
AI Rating: 4.6Pro Rating: 4
Even withou the spider ability this is a card you would play 100% of the time, since it has a real body and can ramp and fix your mana. So, the fact taht this can produce a bunch of tokens in the late game is pretty awesome.

Tyvar, the Pummeler
AI Rating: 4.7Pro Rating: 5
Tyvar is efficient and super hard to kill provided you have another creature around, and his activated ability turns most boards lethal.

Under the Skin
AI Rating: 4.4Pro Rating: 3.5
This is a sweet 2-for-1, and you can even get back the card you put into your graveyard with the manifest trigger.

Valgavoth's Onslaught
AI Rating: 4.9Pro Rating: 5
If you pay 5 total mana you get two 4/4s with big upside. That's insane, and it only gets better from there.

Walk-In Closet
AI Rating: 2.7Pro Rating: 0
Both sides of this are pretty bad in Limited. Playing lands from graveyard is rarely useful, and if you unlock the Cellar, you probably dont' have mana to cast anything from your graveyard.

Wary Watchdog
AI Rating: 3.1Pro Rating: 2.5
This can put up to three cards into the graveyard all on it's own, and it has passable stats to begin with.
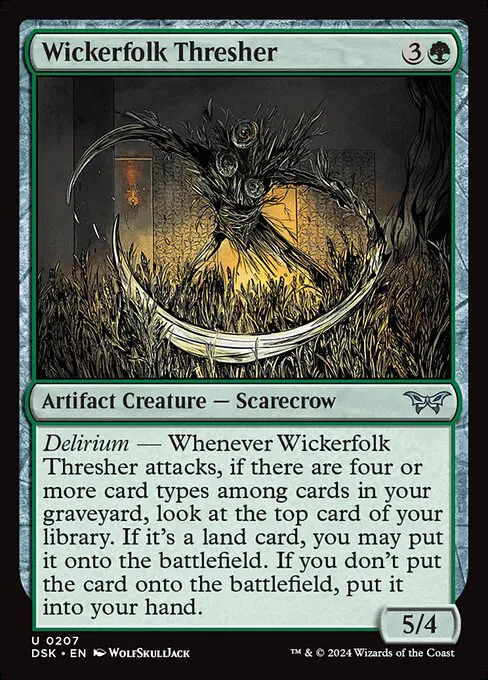
Wickerfolk Thresher
AI Rating: 4.3Pro Rating: 4
This Delirium trigger usually means you're going to get at least a 2-for-1, and left unchecked Wickerfolk Thresher takes over the game -- all while having a very solid baseline.
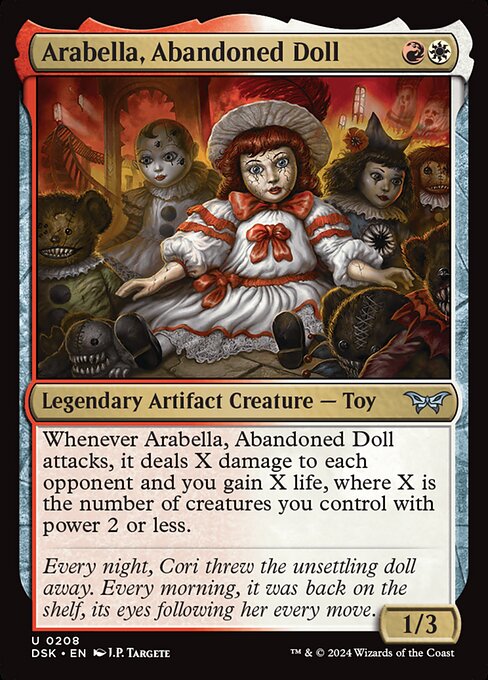
Arabella, Abandoned Doll
AI Rating: 3.5Pro Rating: 3
This trigger can drain a ton of life, and if you are able to keep her alive for another swing, it's going to be game over much of the time.
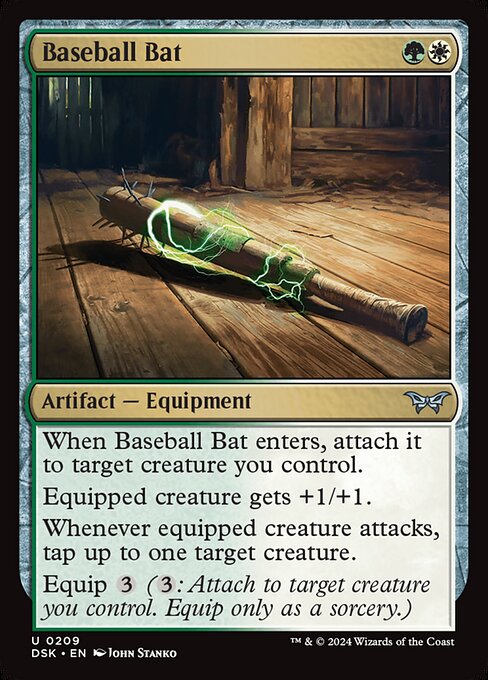
Baseball Bat
AI Rating: 2.2Pro Rating: 2.5
This is pretty good the turn you play it, and probably allows you to get in for a big swing -- and it can even enable survival. But after that first equip, it's pretty clunky.
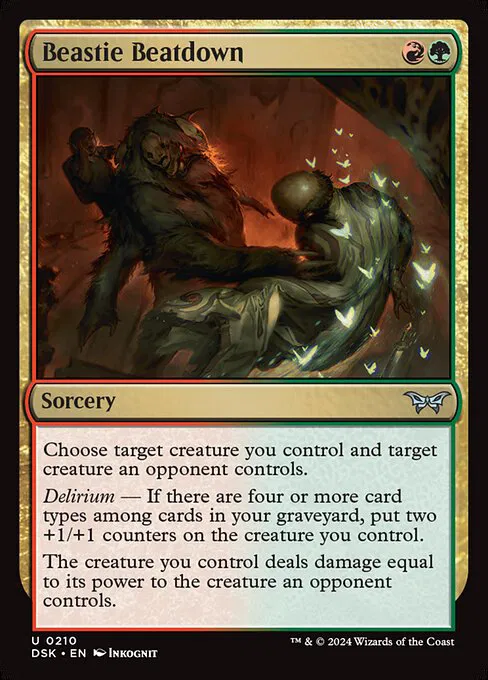
Beastie Beatdown
AI Rating: 3.3Pro Rating: 3.5
Even without Delirium you'd play this, and when you do have it, this lets your creatures punch up in a big way, and they can usually attack too!
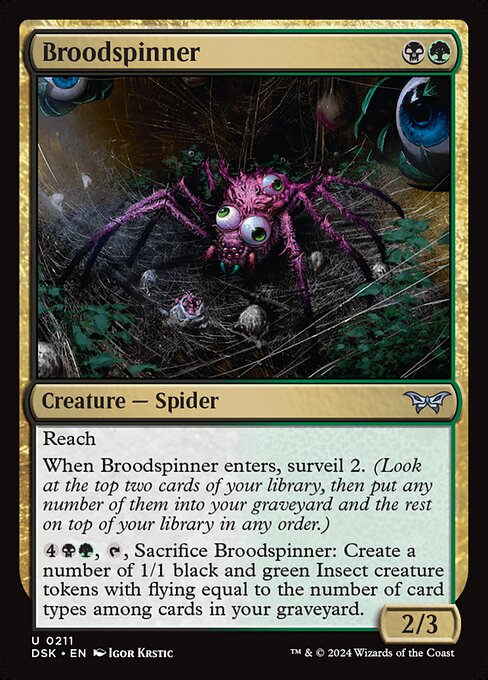
Broodspinner
AI Rating: 3.8Pro Rating: 4
This is great when you play it on two, and the ability is a game-winner in the late game.
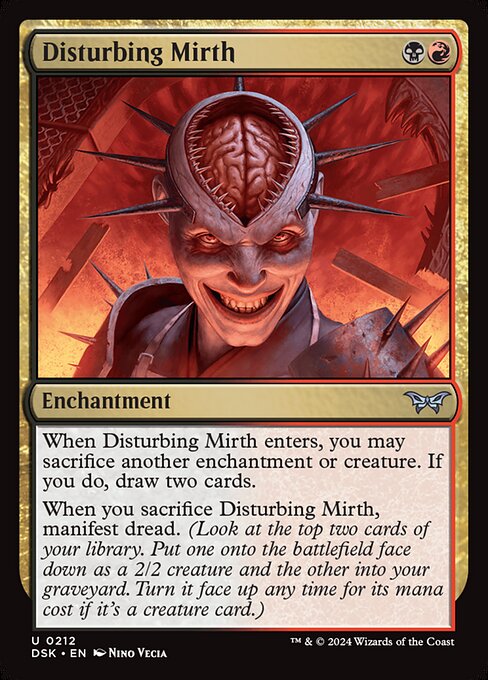
Disturbing Mirth
AI Rating: 3.4Pro Rating: 3
Red/Black has enough ways to sacrifice Enchantments that this is going to generate serious value. They're great in multiples, too.
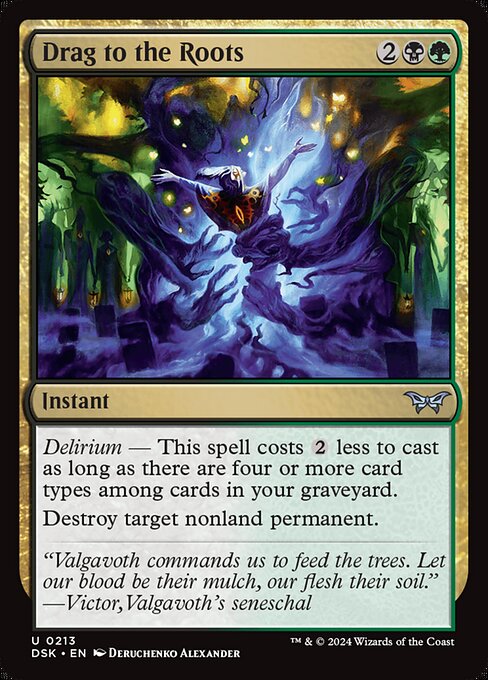
Drag to the Roots
AI Rating: 3.2Pro Rating: 3.5
The baseline is solid removal, and the upside is super efficient removal.

Fear of Infinity
AI Rating: 2.5Pro Rating: 2
I think not being able to block hurts this in a big way. Lifelink makes up for it a little bit. If this format ends up being slower, this'll go up -- but right now I'm not super impressed.
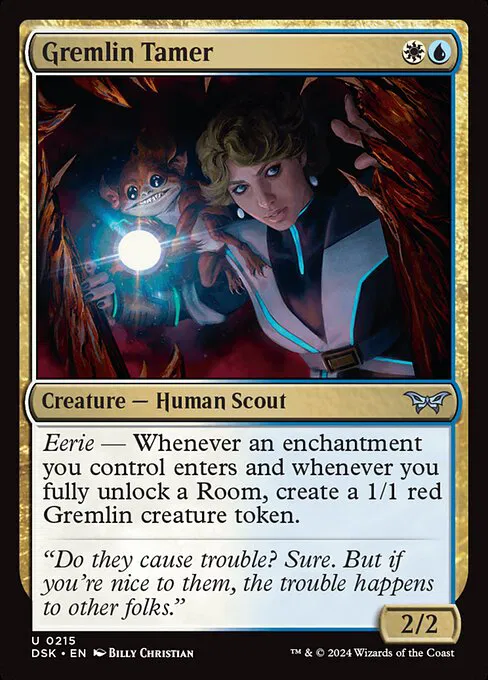
Gremlin Tamer
AI Rating: 3.8Pro Rating: 4
This is a great eerie trigger. Even getting it once is a big deal, and this turns into an insane engine if it isn't killed.
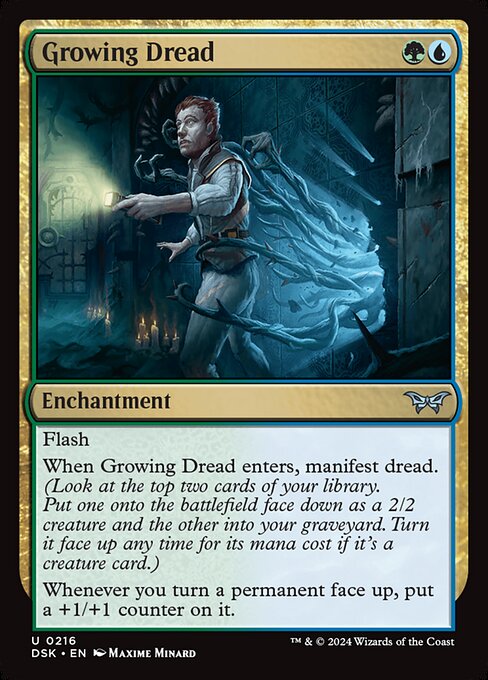
Growing Dread
AI Rating: 3.4Pro Rating: 3.5
Two mana for a 2/2 with flash and additional upside is great, and when you choose to manifest creatures this gives you a big bonus.
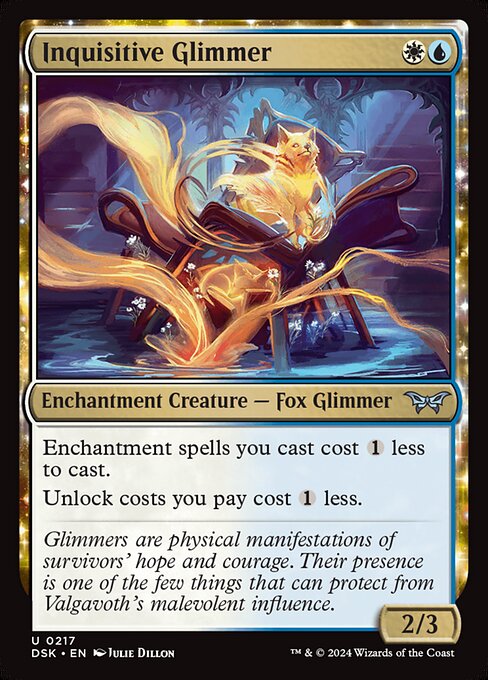
Inquisitive Glimmer
AI Rating: 3.5Pro Rating: 3
This has nice stats and an ability that makes it easier to trigger eerie.
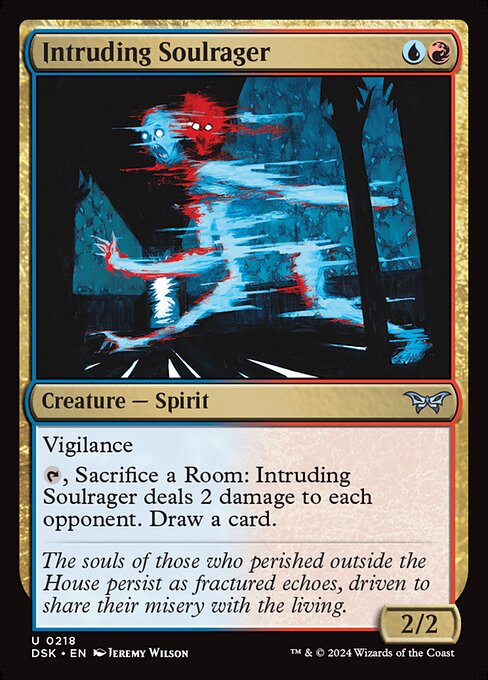
Intruding Soulrager
AI Rating: 1.1Pro Rating: 2.5
This is kind of awkward. There are lots of doors that won't be worth sacrificing, but when this does have one that is worth it, it'll feel pretty good.
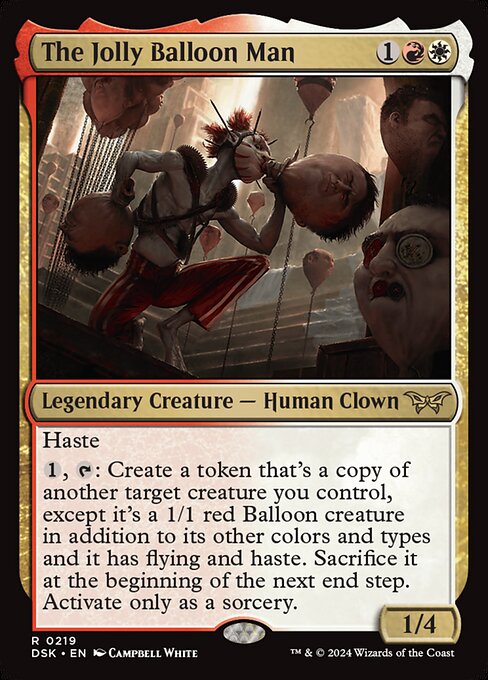
The Jolly Balloon Man
AI Rating: 3.8Pro Rating: 4
These tokens mean business, and with all of the ETB and death triggers these days, rebuying those won't be hard.
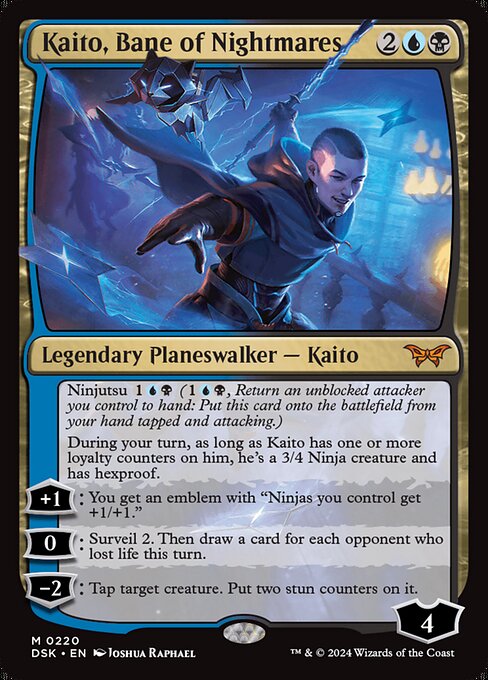
Kaito, Bane of Nightmares
AI Rating: 4.8Pro Rating: 4
Kaito is strong, but not the type of planeswalker who takes over any game when he hits the table. His +1 mostly only affects him in this set, unfortunately, and he doesn't make tokens or protect himself in a meaningful way, like most bomb walkers.
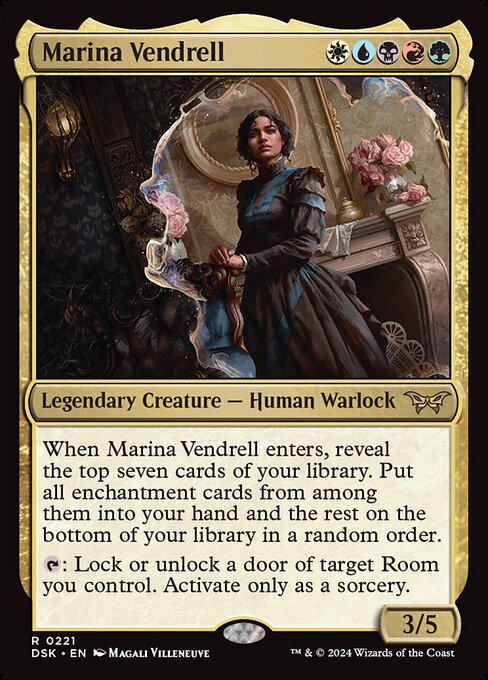
Marina Vendrell
AI Rating: 2.5Pro Rating: 1
This is hard to cast and hard to abuse, so I don't think it even deserves a build around grade.
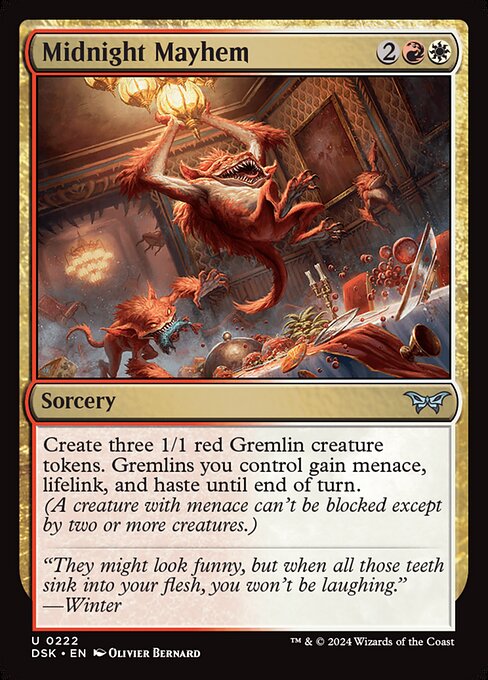
Midnight Mayhem
AI Rating: 3.8Pro Rating: 3
This will really make your attack way better if you're ahead, and if you're behind getting those three tokens makes it pretty hard for you to lose before your next turn.

Nashi, Searcher in the Dark
AI Rating: 3.7Pro Rating: 3.5
If he gets in, you're going to be pretty happy no matter what the outcome of his combat damage trigger is. The problem is a two mana 2/2 menace probably isn't getting in after the early game.
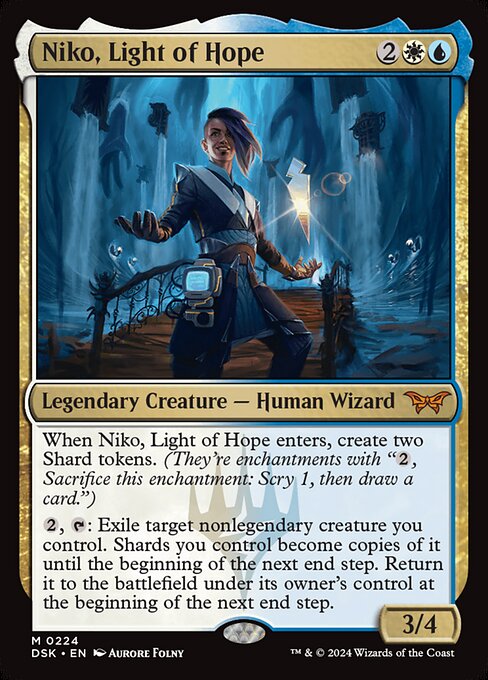
Niko, Light of Hope
AI Rating: -0Pro Rating: 5
This is a three-for-1 upfront -- and one that triggers eerie twice. Niko's activated ability isn't always useful, but it's upside on a card that's alredy excellent.
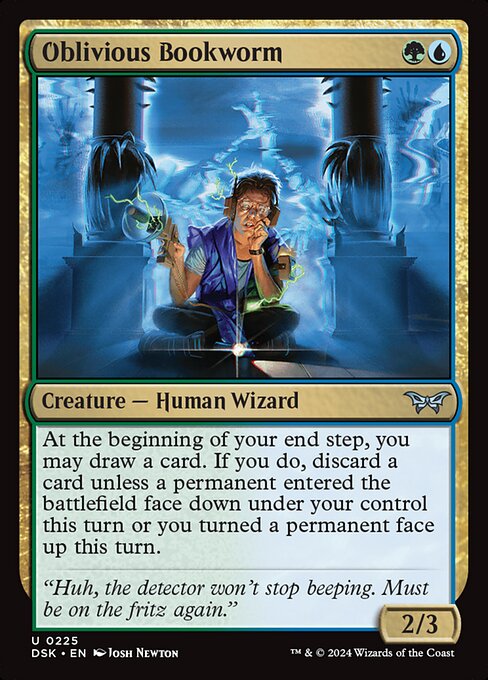
Oblivious Bookworm
AI Rating: 4Pro Rating: 4
A two mana 2/3 that loots every turn is already really, really good. And Blue/Green decks won't even have to discard with it every time.

Peer Past the Veil
AI Rating: 4Pro Rating: 2
This is good when you get it late, but pretty bad the rest of the game.
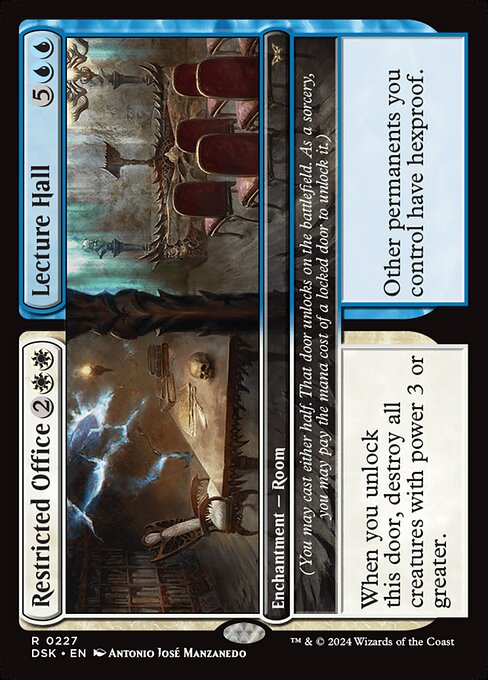
Restricted Office
AI Rating: 2.9Pro Rating: 0
The sweeper on Restricted Office is too narrow, and Lecture Hall is almost entirely meaningless in Limited.

Rip, Spawn Hunter
AI Rating: 4.2Pro Rating: 4
You're usually going to get at least one card out of this trigger, and drawing 2 isn't far-fetchd.
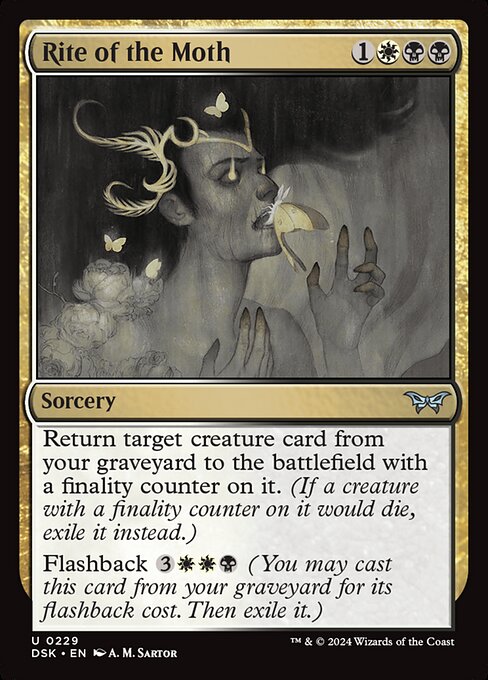
Rite of the Moth
AI Rating: 3.2Pro Rating: 3
There are lots of good reanimation targets in this format, especially in Black-White, and loading your graveyard and discarding things isn't too challenging.

Roaring Furnace
AI Rating: 4Pro Rating: 4.5
This is removal on one side and a card advantage engine on the other side. The value is pretty absurd.
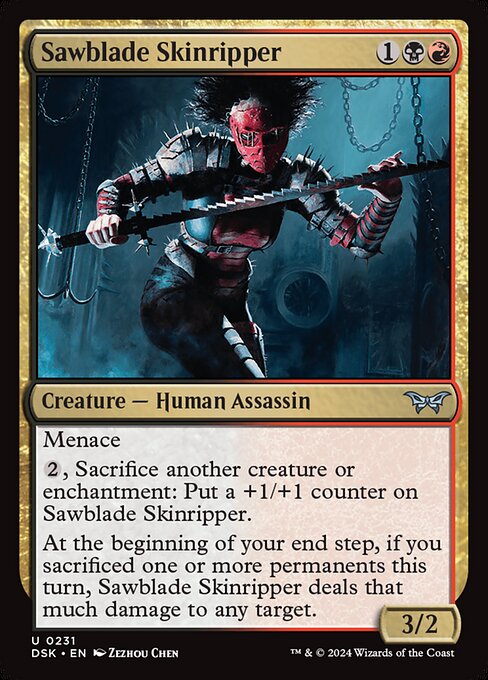
Sawblade Skinripper
AI Rating: 3.2Pro Rating: 3.5
This has nice base stats and the ability to grow and ping stuff is a huge deal, especially if you have some more sacrifice around. It counts sacrifices of any kind, too.
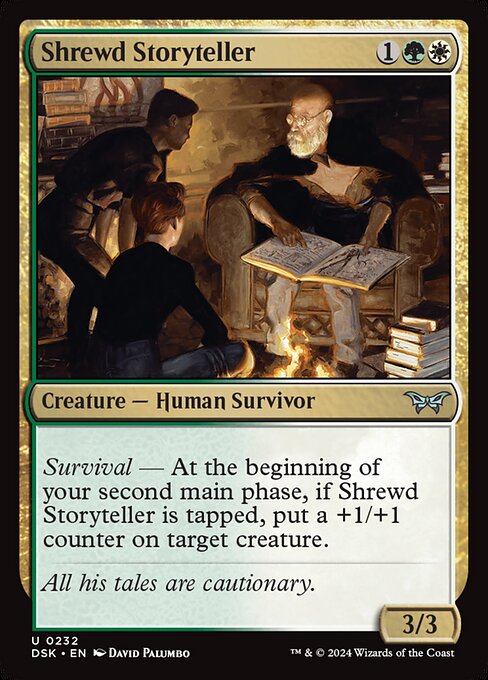
Shrewd Storyteller
AI Rating: 2.4Pro Rating: 3.5
This trigger is great because it can allow you to snowball with Survival creatures, as if they keep growing, they can keep attacking. So, whether you put the counter on the Storyteller or something else, it's going to feel pretty good.

Shroudstomper
AI Rating: 3.2Pro Rating: 3.5
This is a great reanimation target for the Black-White deck, and hard-casting it is still pretty good.
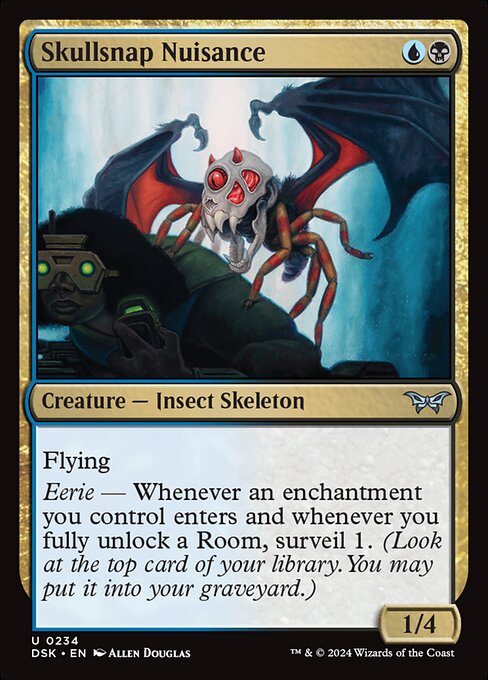
Skullsnap Nuisance
AI Rating: 2.3Pro Rating: 3
The stat-line's solid, and you're definitely going to load your graveyard and smooth out your draws with this trigger.
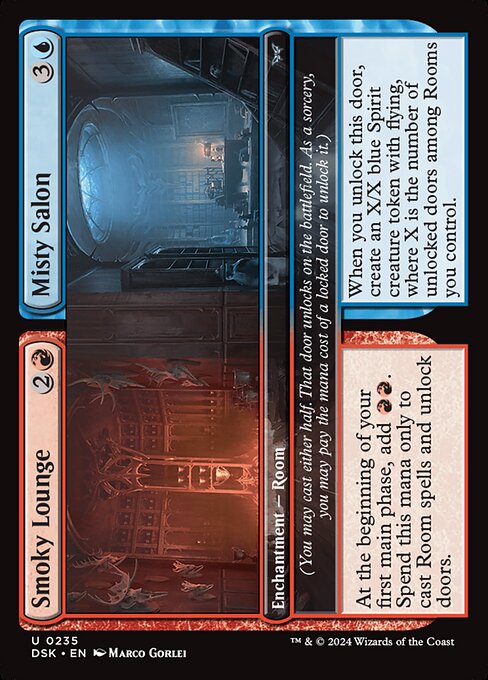
Smoky Lounge
AI Rating: 2.3Pro Rating: 1.0 // 3.5
I don't love that the Loung doesn't impact the board at all, but Misty Salon can really allow you to win the game with a bunch of doors in play. Problem is, I don't think every blue-red deck can pull that off, so it needs a build around grade.
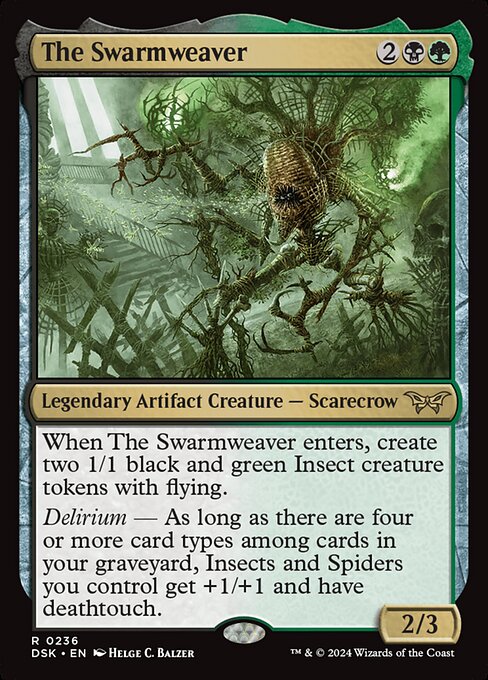
The Swarmweaver
AI Rating: 4.6Pro Rating: 5
Even without delirium this would be nuts as you get three bodies at a great rate, and once you have delirium it gets even sillier. Especially because you're likely to have more insects and spiders in Black/Green.
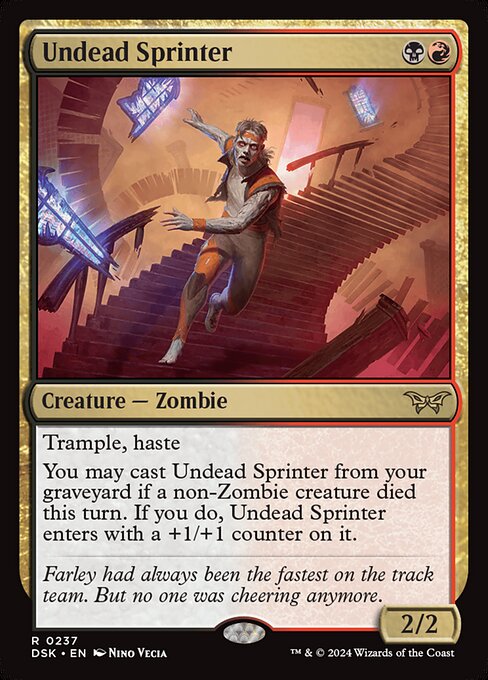
Undead Sprinter
AI Rating: 3.9Pro Rating: 3.5
This is pretty easy to get back, and that makes it good sacrifice fodder and a relentless attacker.

Victor, Valgavoth's Seneschal
AI Rating: 4.1Pro Rating: 3.5
Triggering eerie three times is possible though unlikely. But that's okay, because getting just the first trigger is pretty good.
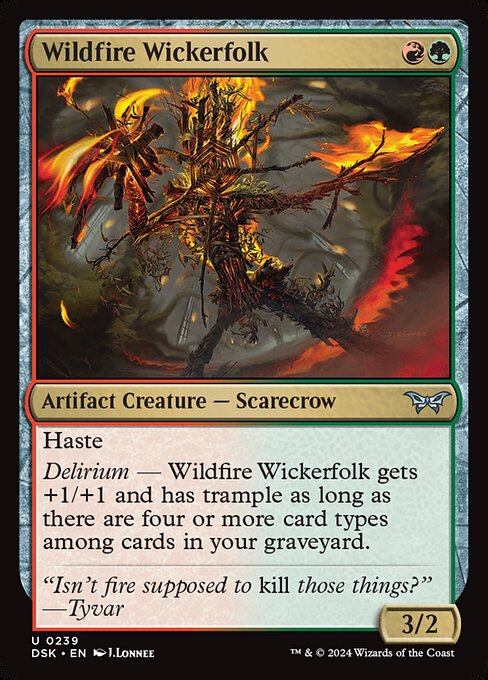
Wildfire Wickerfolk
AI Rating: 3.4Pro Rating: 3
A two mana 3/2 Haste puts your opponent under pressure early, and by the time that body's less relevant, it'll usually be a 4/3 trampler.
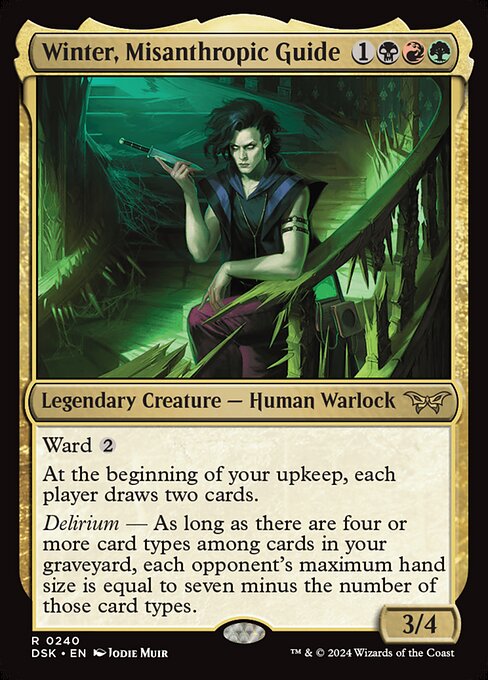
Winter, Misanthropic Guide
AI Rating: 1.8Pro Rating: 2
Letting your opponent draw isn't great, but you get the first crack at the extra cards, and you might punish your opponent a little with delirium.
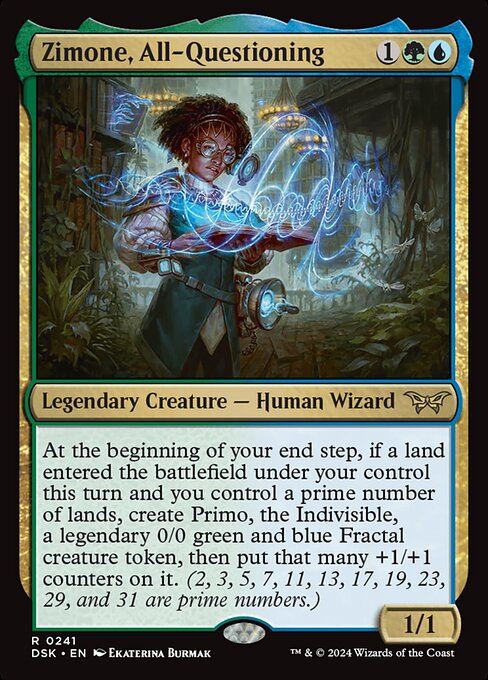
Zimone, All-Questioning
AI Rating: 4.5Pro Rating: 4
You should wait to play her until a turn where you get the creature, but that's not that hard to do -- and that makes her really good.
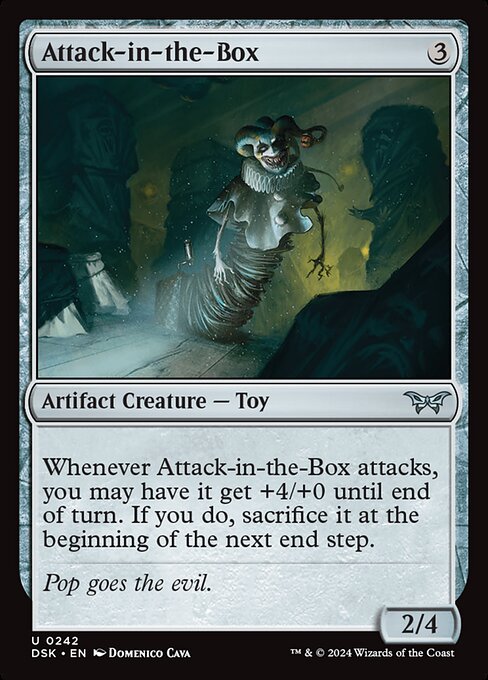
Attack-in-the-Box
AI Rating: 1.5Pro Rating: 2
This has passable base-stats, and a 6/4 can attack on just about any board -- and it can put itself into your graveyard for delirium too.

Bear Trap
AI Rating: 1.2Pro Rating: 1.5
This is inefficient removal that you'll only use if you're desperate.
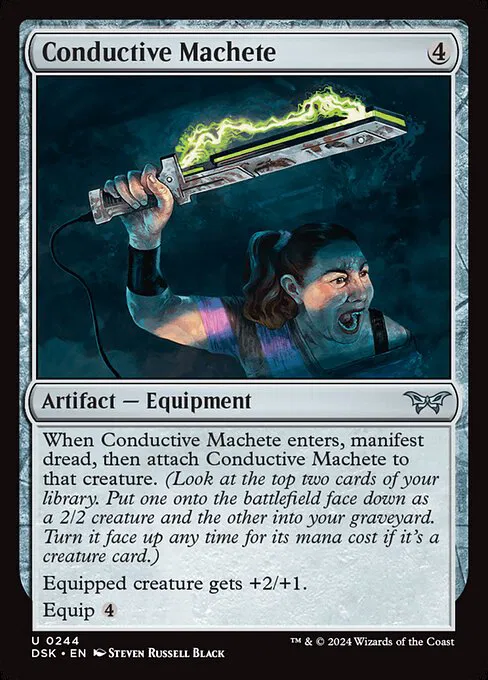
Conductive Machete
AI Rating: 3.3Pro Rating: 2.5
This is a 4-mana 4/3 with tons of upside. Hard to be upset with that.
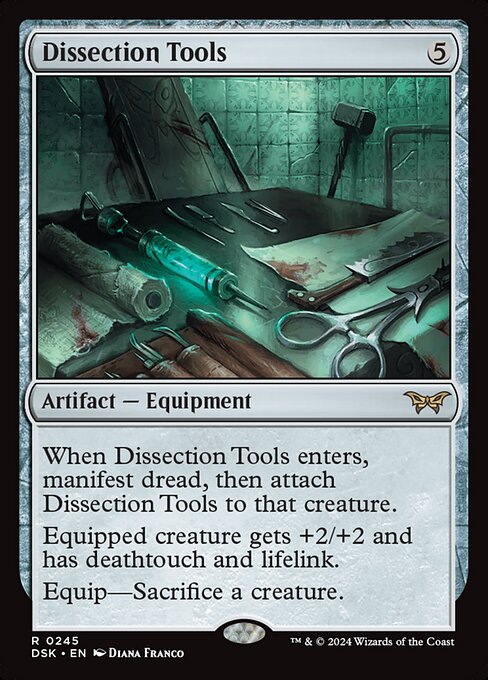
Dissection Tools
AI Rating: 4.8Pro Rating: 4
This card is doing a bad impression of Batterskull, but a bad impression of one of the best equipments of all time still makes for an excellent card. No matter what you put this on, it becomes a threat, and the free sacrifice outlet comes up too.

Found Footage
AI Rating: 1.2Pro Rating: 1.5
This helps load your graveyard, but it's other effect is more irrelevant than you'd expect.
Friendly Teddy
AI Rating: 1.4Pro Rating: 1.5
You and your opponent both draw, but you come out ahead since you're the one who had a 2/2.

Ghost Vacuum
AI Rating: 4.6Pro Rating: 2.5
This is pretty insane if you get it early, as you can disrupt graveyard decks while turning this into a win condition. If you get it late, though, it's pretty bad as you don't have the time for this sort of thing in many situations.

Glimmerlight
AI Rating: 2.9Pro Rating: 2
This is a solid equipment that can even trigger eerie.

Haunted Screen
AI Rating: 2.3Pro Rating: 2
This is better than most three mana mana rocks because it actually turns into a threat late.
Keys to the House
AI Rating: 2.8Pro Rating: 1.5
This is a slow way to fix your mana and can occasionally get you some extra door value.

Malevolent Chandelier
AI Rating: 1.5Pro Rating: 0
The stat-line is bad, and the activated ability is clunky. You shouldn't play this.
Marvin, Murderous Mimic
AI Rating: 2.7Pro Rating: 2.5
Don't count on this having an ability every time, but I think it'll have them often enough to be decent.

Saw
AI Rating: 1.4Pro Rating: 1.5
The buff is weak, and this is only worth using in the extreme late game in most cases.
Abandoned Campground
AI Rating: 1.8Pro Rating: 3
These offer great fixing, as they will usually be untapped by the mid to late game.
Blazemire Verge
AI Rating: 2.5Pro Rating: 3
These also offer great fixing, and they'll also regularly be untapped.

Bleeding Woods
AI Rating: 2.2Pro Rating: 3
These offer great fixing, as they will usually be untapped by the mid to late game.

Etched Cornfield
AI Rating: 1.2Pro Rating: 3
These offer great fixing, as they will usually be untapped by the mid to late game.

Floodfarm Verge
AI Rating: 2.9Pro Rating: 3
These offer great fixing, as they will usually be untapped by the mid to late game.
Gloomlake Verge
AI Rating: 3.8Pro Rating: 3
These offer great fixing, as they will usually be untapped by the mid to late game.
Hushwood Verge
AI Rating: 2.8Pro Rating: 3
These offer great fixing, as they will usually be untapped by the mid to late game.
Lakeside Shack
AI Rating: 2.3Pro Rating: 3
These offer great fixing, as they will usually be untapped by the mid to late game.
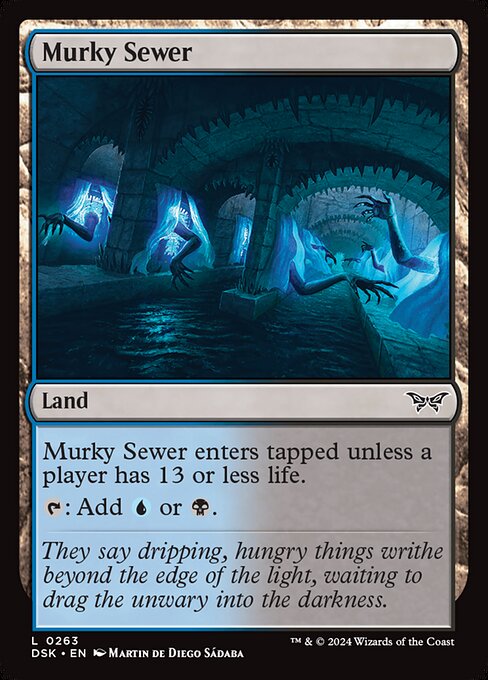
Murky Sewer
AI Rating: 1.9Pro Rating: 3
These offer great fixing, as they will usually be untapped by the mid to late game.
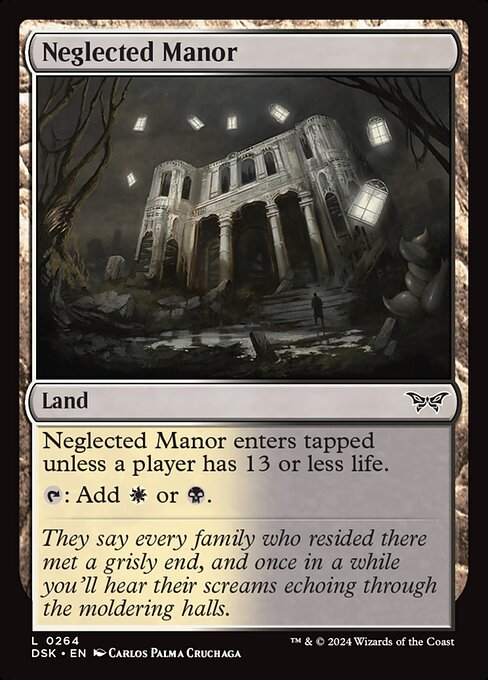
Neglected Manor
AI Rating: 1.8Pro Rating: 3
These offer great fixing, as they will usually be untapped by the mid to late game.
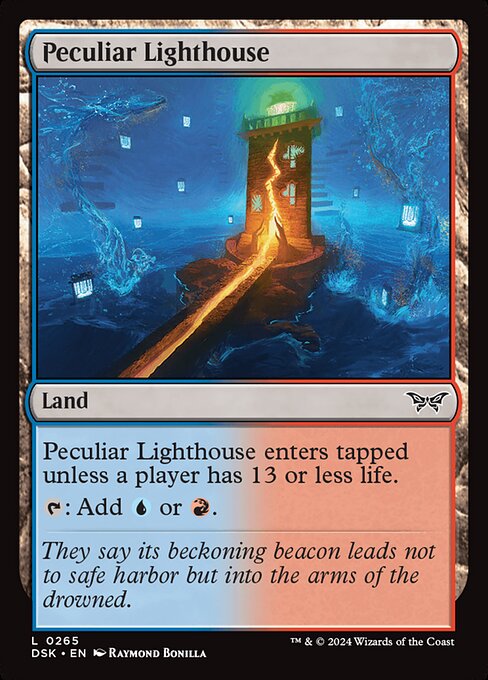
Peculiar Lighthouse
AI Rating: 1.8Pro Rating: 3
These offer great fixing, as they will usually be untapped by the mid to late game.
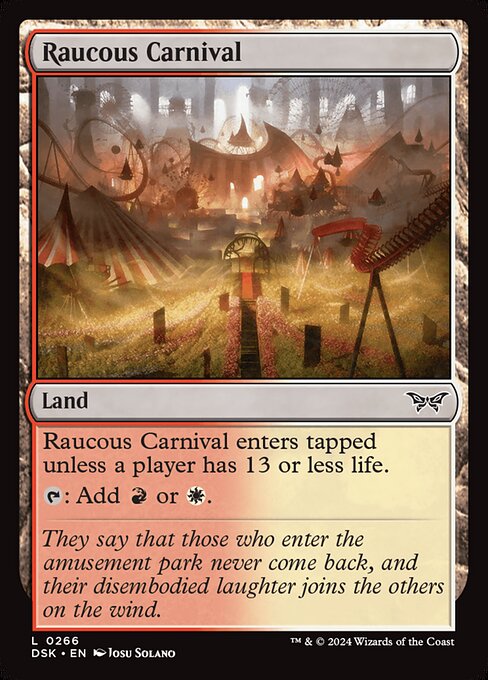
Raucous Carnival
AI Rating: 1.9Pro Rating: 3
These offer great fixing, as they will usually be untapped by the mid to late game.
Razortrap Gorge
AI Rating: 2.1Pro Rating: 3
These offer great fixing, as they will usually be untapped by the mid to late game.
Strangled Cemetery
AI Rating: 2.3Pro Rating: 3
These offer great fixing, as they will usually be untapped by the mid to late game.
Terramorphic Expanse
AI Rating: 3.1Pro Rating: 3
This is good fixing, and is also good for delirium and sacrifice decks.

Thornspire Verge
AI Rating: 3.8Pro Rating: 3
These offer great fixing, as they will usually be untapped by the mid to late game.
Valgavoth's Lair
AI Rating: 3.7Pro Rating: 3
The enchantment typing here is huge, as it gives you a way to trigger eerie with a land -- and it even fixes your mana!

Plains
AI Rating: 0.4Pro Rating:
Island
AI Rating: 0.4Pro Rating:
Swamp
AI Rating: 0.4Pro Rating:

Mountain
AI Rating: 0.4Pro Rating:

Forest
AI Rating: 0.4Pro Rating:
| Card | Pro Rating | AI Rating | APA | Picked | ALSA | Seen |
|---|---|---|---|---|---|---|
|
ss-mythic|White|Legendary Creature — Human Samurai Noble
|
5 | 5 | 1.00 | 3 | 1.00 | 3 |
|
ss-mythic|Red|Enchantment Creature — Avatar Horror
|
5 | 5 | 1.00 | 6 | 1.00 | 8 |
|
ss-mythic|Red|Creature — Spirit
|
4 | 5 | 1.00 | 1 | 1.00 | 1 |
|
ss-mythic||Enchantment — Room
|
4 | 4.9 | 1.40 | 5 | 1.40 | 5 |
|
ss-mythic|Blue|Creature — Eye
|
4 | 4.9 | 1.33 | 3 | 1.33 | 3 |
|
ss-mythic|Red|Legendary Enchantment
|
5 | 4.9 | 1.20 | 5 | 1.17 | 6 |
|
ss-mythic|Green|Enchantment Creature — Avatar Horror
|
3.5 | 4.9 | 1.25 | 4 | 1.17 | 6 |
|
ss-rare|Green|Sorcery
|
5 | 4.9 | 1.41 | 86 | 1.44 | 98 |
|
ss-rare|White|Enchantment Creature — Sheep Glimmer
|
4 | 4.8 | 1.63 | 73 | 1.63 | 103 |
|
ss-rare|White|Creature — Spirit
|
5 | 4.8 | 1.45 | 91 | 1.47 | 110 |
|
ss-mythic|Blue|Enchantment Creature — Avatar Horror
|
5 | 4.8 | 1.50 | 4 | 1.40 | 5 |
|
ss-rare||Enchantment — Room
|
5 | 4.8 | 1.64 | 76 | 1.85 | 104 |
|
ss-rare|Black|Creature — Zombie Assassin
|
4 | 4.8 | 1.65 | 62 | 1.64 | 87 |
|
ss-rare|Green|Creature — Plant
|
4.5 | 4.8 | 1.66 | 83 | 1.64 | 110 |
|
ss-mythic|Blue|Black|Legendary Planeswalker — Kaito
|
4 | 4.8 | 1.67 | 3 | 1.75 | 4 |
|
ss-rare||Artifact — Equipment
|
4 | 4.8 | 1.45 | 75 | 1.49 | 87 |
|
ss-mythic|White|Enchantment Creature — Avatar Horror
|
5 | 4.7 | 1.80 | 5 | 1.67 | 6 |
|
ss-rare|White|Legendary Creature — Human Wizard
|
4 | 4.7 | 1.91 | 76 | 2.05 | 120 |
|
ss-rare|Blue|Enchantment Creature — Cat Glimmer
|
4.5 | 4.7 | 1.89 | 56 | 1.74 | 107 |
|
ss-rare|Blue|Creature — Human Scout
|
4.5 | 4.7 | 1.76 | 71 | 1.79 | 119 |
|
ss-rare|Blue|Enchantment Creature — Horror
|
4.5 | 4.7 | 1.81 | 73 | 1.72 | 104 |
|
ss-rare|Green|Creature — Wurm
|
4.5 | 4.7 | 1.78 | 90 | 1.81 | 117 |
|
ss-rare|Green|Enchantment Creature — Elk Glimmer
|
4 | 4.7 | 1.94 | 71 | 2.19 | 118 |
|
ss-mythic|Green|Legendary Creature — Elf Warrior
|
5 | 4.7 | 1.88 | 8 | 1.89 | 9 |
|
ss-rare|White|Creature — Human Survivor
|
4 | 4.6 | 2.00 | 52 | 1.81 | 105 |
|
ss-rare|White|Artifact — Vehicle
|
4.5 | 4.6 | 2.07 | 72 | 2.01 | 114 |
|
ss-mythic||Enchantment — Room
|
3 | 4.6 | 2.17 | 29 | 2.39 | 65 |
|
ss-mythic|Black|Enchantment Creature — Avatar Horror
|
4.5 | 4.6 | 2.00 | 5 | 1.83 | 6 |
|
ss-mythic|Black|Legendary Creature — Elder Demon
|
0 // 4.5 | 4.6 | 2.14 | 21 | 2.43 | 63 |
|
ss-rare|Red|Artifact — Equipment
|
4 | 4.6 | 2.06 | 63 | 1.96 | 106 |
|
ss-rare|Red|Enchantment Creature — Dog Glimmer
|
3.5 | 4.6 | 2.00 | 45 | 1.85 | 90 |
|
ss-rare|Red|Enchantment Creature — Nightmare
|
3.5 | 4.6 | 2.20 | 88 | 2.15 | 141 |
|
ss-rare|Green|Legendary Creature — Beast Survivor
|
2 | 4.6 | 2.05 | 41 | 2.60 | 139 |
|
ss-rare|Green|Artifact Creature — Spider Toy
|
4 | 4.6 | 2.22 | 65 | 2.04 | 110 |
|
ss-rare|Black|Green|Legendary Artifact Creature — Scarecrow
|
5 | 4.6 | 2.03 | 96 | 2.36 | 131 |
|
ss-rare||Artifact
|
2.5 | 4.6 | 2.16 | 73 | 2.37 | 156 |
|
ss-uncommon|White|Enchantment — Aura
|
3.5 | 4.5 | 2.45 | 29 | 2.48 | 42 |
|
ss-rare|White|Sorcery
|
4 | 4.5 | 2.31 | 45 | 2.53 | 105 |
|
ss-mythic||Enchantment — Room
|
2.5 | 4.5 | 2.40 | 15 | 2.41 | 71 |
|
ss-rare|Black|Sorcery
|
4 | 4.5 | 2.34 | 61 | 2.65 | 133 |
|
ss-rare|Blue|Green|Legendary Creature — Human Wizard
|
4 | 4.5 | 2.36 | 11 | 2.37 | 22 |
|
ss-uncommon|Blue|Sorcery
|
4 | 4.4 | 2.57 | 14 | 2.88 | 54 |
|
ss-uncommon|Red|Instant
|
3.5 | 4.4 | 2.63 | 19 | 3.04 | 57 |
|
ss-mythic|Green|Creature — Beast Mutant
|
4.5 | 4.4 | 2.67 | 3 | 2.67 | 3 |
|
ss-rare|Green|Artifact — Vehicle
|
3.5 | 4.4 | 2.56 | 57 | 2.79 | 144 |
|
ss-uncommon|Green|Sorcery
|
3.5 | 4.4 | 2.58 | 26 | 2.84 | 57 |
|
ss-uncommon|White|Creature — Human Scout
|
4 | 4.3 | 2.95 | 19 | 2.73 | 56 |
|
ss-uncommon||Enchantment — Room
|
2.5 | 4.3 | 2.86 | 14 | 3.28 | 57 |
|
ss-uncommon|Blue|Enchantment Creature — Nightmare
|
2 | 4.3 | 3.00 | 14 | 2.59 | 47 |
|
ss-mythic||Enchantment — Room
|
2.5 | 4.3 | 3.08 | 13 | 2.95 | 82 |
|
ss-rare|Red|Sorcery
|
5 | 4.3 | 3.09 | 86 | 3.22 | 192 |
|
ss-uncommon|Green|Artifact Creature — Scarecrow
|
4 | 4.3 | 2.95 | 22 | 3.07 | 49 |
|
ss-rare|Red|Creature — Human Assassin
|
3 | 4.2 | 3.33 | 46 | 2.90 | 136 |
|
ss-rare|White|Green|Legendary Creature — Human Survivor
|
4 | 4.2 | 3.33 | 12 | 3.82 | 24 |
|
ss-uncommon|White|Sorcery
|
3.5 | 4.1 | 3.60 | 15 | 3.47 | 57 |
|
ss-common|White|Enchantment
|
3.5 | 4.1 | 3.50 | 32 | 3.01 | 121 |
|
ss-uncommon|Blue|Creature — Human Detective
|
1.5 // 4.0 | 4.1 | 3.44 | 16 | 3.50 | 62 |
|
ss-uncommon|Blue|Creature — Human Wizard
|
3.5 | 4.1 | 3.57 | 7 | 3.35 | 70 |
|
ss-rare|Black|Enchantment Creature — Snake Glimmer
|
2.5 | 4.1 | 3.51 | 45 | 3.14 | 162 |
|
ss-mythic|Black|Legendary Enchantment
|
2 | 4.1 | 3.57 | 23 | 3.01 | 94 |
|
ss-uncommon|Black|Enchantment
|
4 | 4.1 | 3.61 | 18 | 3.14 | 41 |
|
ss-uncommon|Black|Instant
|
3.5 | 4.1 | 3.56 | 16 | 2.85 | 69 |
|
ss-uncommon|Red|Creature — Human Clown Berserker
|
3.5 | 4.1 | 3.41 | 17 | 3.75 | 56 |
|
ss-rare|White|Black|Legendary Creature — Human Warlock
|
3.5 | 4.1 | 3.60 | 5 | 3.52 | 25 |
|
ss-uncommon|White|Creature — Human Survivor
|
3.5 | 4 | 3.72 | 25 | 3.41 | 53 |
|
ss-uncommon|White|Artifact Creature — Toy
|
3.5 | 4 | 3.83 | 23 | 3.43 | 55 |
|
ss-uncommon||Enchantment — Room
|
3.5 | 4 | 3.75 | 20 | 3.30 | 57 |
|
ss-uncommon||Enchantment — Room
|
2 | 4 | 3.71 | 14 | 3.14 | 72 |
|
ss-uncommon|Blue|Green|Creature — Human Wizard
|
4 | 4 | 3.90 | 29 | 3.68 | 78 |
|
ss-rare|Red|Green|Instant
|
2 | 4 | 3.67 | 3 | 4.70 | 27 |
|
ss-rare||Enchantment — Room
|
4.5 | 4 | 3.72 | 60 | 3.33 | 156 |
|
ss-uncommon|White|Enchantment — Aura
|
2 | 3.9 | 4.14 | 7 | 4.21 | 45 |
|
ss-uncommon|White|Enchantment Creature — Cat Glimmer
|
3 | 3.9 | 4.18 | 17 | 4.32 | 87 |
|
ss-uncommon|Blue|Creature — Merfolk
|
3.5 | 3.9 | 4.18 | 11 | 3.24 | 54 |
|
ss-uncommon|Blue|Enchantment — Aura
|
3 | 3.9 | 4.12 | 17 | 3.42 | 52 |
|
ss-common|Red|Instant
|
3.5 | 3.9 | 4.12 | 42 | 3.37 | 123 |
|
ss-uncommon|Green|Sorcery
|
4 | 3.9 | 3.95 | 21 | 4.22 | 76 |
|
ss-uncommon|Green|Creature — Human Survivor
|
3.5 | 3.9 | 4.20 | 25 | 3.77 | 57 |
|
ss-rare|Black|Red|Creature — Zombie
|
3.5 | 3.9 | 4.07 | 70 | 3.66 | 211 |
|
ss-uncommon|White|Creature — Human Survivor
|
2 | 3.8 | 4.39 | 18 | 4.32 | 77 |
|
ss-uncommon|Blue|Artifact — Equipment
|
3.5 | 3.8 | 4.25 | 12 | 4.44 | 75 |
|
ss-uncommon|Black|Instant
|
3 | 3.8 | 4.44 | 16 | 4.12 | 60 |
|
ss-common|Black|Instant
|
2.5 | 3.8 | 4.49 | 37 | 5.16 | 205 |
|
ss-uncommon|Black|Artifact Creature — Scarecrow
|
4 | 3.8 | 4.30 | 20 | 3.30 | 55 |
|
ss-uncommon|Black|Creature — Demon
|
3 | 3.8 | 4.33 | 15 | 3.96 | 71 |
|
ss-uncommon|Red|Enchantment Creature — Nightmare
|
2 | 3.8 | 4.23 | 13 | 3.73 | 62 |
|
ss-uncommon|Green|Creature — Elf Druid
|
3 | 3.8 | 4.38 | 24 | 3.71 | 64 |
|
ss-uncommon|Black|Green|Creature — Spider
|
4 | 3.8 | 4.38 | 26 | 4.08 | 65 |
|
ss-uncommon|White|Blue|Creature — Human Scout
|
4 | 3.8 | 4.31 | 16 | 4.00 | 52 |
|
ss-rare|White|Red|Legendary Creature — Human Clown
|
4 | 3.8 | 4.33 | 9 | 3.17 | 25 |
|
ss-uncommon|White|Red|Sorcery
|
3 | 3.8 | 4.42 | 19 | 4.54 | 72 |
|
ss-rare||Land
|
3 | 3.8 | 4.50 | 4 | 3.97 | 41 |
|
ss-rare||Land
|
3 | 3.8 | 4.43 | 7 | 3.54 | 46 |
|
ss-uncommon|White|Enchantment — Aura
|
3 | 3.7 | 4.62 | 16 | 4.26 | 69 |
|
ss-rare||Enchantment — Room
|
0 | 3.7 | 4.60 | 5 | 3.57 | 32 |
|
ss-uncommon|Red|Enchantment Creature — Nightmare
|
2.5 // 4.0 | 3.7 | 4.72 | 25 | 4.00 | 66 |
|
ss-common||Enchantment — Room
|
4 | 3.7 | 4.56 | 43 | 4.72 | 185 |
|
ss-uncommon|Green|Legendary Creature — Insect Beast
|
3 | 3.7 | 4.69 | 16 | 3.70 | 56 |
|
ss-uncommon|Green|Enchantment
|
4 | 3.7 | 4.72 | 25 | 3.76 | 59 |
|
ss-rare|Blue|Black|Legendary Creature — Rat Ninja Wizard
|
3.5 | 3.7 | 4.75 | 4 | 4.00 | 21 |
|
ss-rare||Enchantment Land
|
3 | 3.7 | 4.60 | 5 | 2.85 | 21 |
|
ss-uncommon|White|Artifact Creature — Toy
|
3 | 3.6 | 4.92 | 13 | 3.83 | 80 |
|
ss-uncommon|Blue|Enchantment Creature — Nightmare
|
2.5 | 3.6 | 4.91 | 11 | 4.10 | 75 |
|
ss-uncommon|Green|Enchantment Creature — Nightmare
|
3.5 | 3.6 | 4.87 | 15 | 4.52 | 63 |
|
ss-uncommon|Green|Creature — Human Scout Survivor
|
3 | 3.6 | 4.96 | 28 | 4.71 | 77 |
|
ss-uncommon|Green|Creature — Fungus
|
2.5 | 3.6 | 5.00 | 19 | 4.55 | 87 |
|
ss-common|Green|Creature — Insect
|
3.5 | 3.6 | 5.06 | 54 | 4.97 | 209 |
|
ss-uncommon|Red|Creature — Gremlin
|
3.5 | 3.5 | 5.27 | 11 | 3.92 | 70 |
|
ss-uncommon|Green|Instant
|
2.5 | 3.5 | 5.32 | 25 | 3.98 | 70 |
|
ss-common|Green|Sorcery
|
4 | 3.5 | 5.26 | 61 | 5.36 | 186 |
|
ss-uncommon|Green|Artifact Creature — Beast
|
3 | 3.5 | 5.24 | 29 | 4.07 | 79 |
|
ss-uncommon|White|Red|Legendary Artifact Creature — Toy
|
3 | 3.5 | 5.29 | 14 | 3.80 | 69 |
|
ss-uncommon|White|Blue|Enchantment Creature — Fox Glimmer
|
3 | 3.5 | 5.33 | 9 | 4.09 | 63 |
|
ss-common|White|Enchantment Creature — Nightmare
|
2.5 | 3.4 | 5.47 | 32 | 5.25 | 221 |
|
Defiled Crypt
1.5 // 3.0 This is Raise Dead with some legit upside, especially in Black/White decks.
ss-uncommon||Enchantment — Room
|
1.5 // 3.0 | 3.4 | 5.43 | 7 | 4.41 | 64 |
|
ss-uncommon|Black|Enchantment — Aura
|
3 | 3.4 | 5.39 | 23 | 5.02 | 78 |
|
ss-common|Green|Sorcery
|
2.5 | 3.4 | 5.54 | 50 | 5.70 | 242 |
|
ss-uncommon|Black|Red|Enchantment
|
3 | 3.4 | 5.58 | 12 | 5.04 | 88 |
|
ss-uncommon|Blue|Green|Enchantment
|
3.5 | 3.4 | 5.38 | 24 | 4.77 | 82 |
|
ss-uncommon|Red|Green|Artifact Creature — Scarecrow
|
3 | 3.4 | 5.57 | 21 | 4.19 | 79 |
|
ss-common|Black|Sorcery
|
1.5 // 3.5 | 3.3 | 5.74 | 31 | 5.97 | 228 |
|
ss-uncommon|Red|Artifact Creature — Boar Toy
|
3.5 | 3.3 | 5.77 | 13 | 4.76 | 59 |
|
ss-uncommon|Red|Sorcery
|
1.5 // 3.5 | 3.3 | 5.69 | 13 | 5.48 | 105 |
|
ss-uncommon|Red|Green|Sorcery
|
3.5 | 3.3 | 5.73 | 22 | 5.42 | 89 |
|
ss-uncommon||Artifact — Equipment
|
2.5 | 3.3 | 5.67 | 18 | 4.22 | 73 |
|
ss-uncommon|White|Enchantment Creature — Nightmare
|
4 | 3.2 | 5.90 | 21 | 5.07 | 72 |
|
ss-common|Blue|Enchantment — Aura
|
1 | 3.2 | 6.03 | 32 | 4.45 | 170 |
|
ss-rare|Black|Enchantment — Aura
|
0 | 3.2 | 6.00 | 6 | 5.58 | 46 |
|
ss-uncommon|Black|Green|Instant
|
3.5 | 3.2 | 6.00 | 25 | 4.78 | 84 |
|
ss-uncommon|White|Black|Sorcery
|
3 | 3.2 | 6.00 | 16 | 5.95 | 85 |
|
ss-uncommon|Black|Red|Creature — Human Assassin
|
3.5 | 3.2 | 6.00 | 16 | 5.03 | 85 |
|
ss-uncommon|White|Black|Creature — Elemental
|
3.5 | 3.2 | 6.00 | 10 | 5.36 | 88 |
|
ss-common||Enchantment — Room
|
3 | 3.1 | 6.29 | 42 | 5.64 | 230 |
|
ss-uncommon|Blue|Instant
|
2.5 | 3.1 | 6.27 | 11 | 5.49 | 90 |
|
ss-common|Green|Creature — Dog
|
2.5 | 3.1 | 6.40 | 53 | 6.28 | 231 |
|
ss-common||Land
|
3 | 3.1 | 6.20 | 41 | 5.49 | 216 |
|
ss-common||Enchantment — Room
|
3 | 3 | 6.70 | 20 | 5.37 | 189 |
|
ss-uncommon|Black|Creature — Human Cleric
|
1.0 // 3.0 | 3 | 6.69 | 13 | 5.03 | 90 |
|
ss-common|Red|Creature — Human Warrior
|
2.5 | 3 | 6.58 | 38 | 6.22 | 230 |
|
ss-uncommon|White|Creature — Human
|
2 | 2.9 | 6.86 | 7 | 4.43 | 98 |
|
ss-common|White|Instant
|
2 | 2.9 | 6.80 | 20 | 5.71 | 241 |
|
ss-common|White|Creature — Human
|
4 | 2.9 | 6.87 | 63 | 6.78 | 264 |
|
ss-uncommon|Black|Creature — Human Survivor
|
2 | 2.9 | 6.75 | 20 | 5.83 | 96 |
|
ss-common|Red|Artifact Creature — Monkey Toy
|
2 | 2.9 | 6.91 | 32 | 6.23 | 267 |
|
ss-uncommon|Red|Creature — Human Warrior
|
3.5 | 2.9 | 6.91 | 11 | 6.26 | 116 |
|
ss-rare||Enchantment — Room
|
0 | 2.9 | 7.00 | 1 | 3.66 | 32 |
|
ss-common||Artifact — Equipment
|
2 | 2.9 | 6.87 | 45 | 6.27 | 254 |
|
ss-rare||Land
|
3 | 2.9 | 7.00 | 9 | 4.97 | 37 |
|
ss-common|Blue|Instant
|
2.5 | 2.8 | 7.16 | 25 | 6.29 | 226 |
|
ss-uncommon|Black|Creature — Vampire Warrior
|
3 | 2.8 | 7.08 | 12 | 6.33 | 103 |
|
ss-common||Enchantment — Room
|
2.5 | 2.8 | 7.11 | 35 | 6.00 | 240 |
|
ss-uncommon||Artifact
|
1.5 | 2.8 | 7.10 | 10 | 6.06 | 149 |
|
Hushwood Verge
3 These offer great fixing, as they will usually be untapped by the mid to late game.
ss-rare||Land
|
3 | 2.8 | 7.10 | 10 | 5.46 | 33 |
|
ss-uncommon|White|Creature — Kor Survivor
|
2 | 2.7 | 7.36 | 11 | 4.92 | 82 |
|
ss-uncommon|Black|Artifact — Equipment
|
3.5 | 2.7 | 7.53 | 19 | 7.20 | 142 |
|
ss-common|Red|Instant
|
2.5 | 2.7 | 7.39 | 36 | 6.97 | 272 |
|
ss-uncommon|Green|Creature — Human Survivor
|
2.5 | 2.7 | 7.57 | 14 | 5.28 | 94 |
|
ss-common|Green|Sorcery
|
3 | 2.7 | 7.50 | 52 | 6.97 | 258 |
|
ss-mythic||Enchantment — Room
|
0 | 2.7 | 7.57 | 21 | 4.55 | 157 |
|
ss-rare||Legendary Artifact Creature — Toy
|
2.5 | 2.7 | 7.50 | 2 | 3.42 | 25 |
|
ss-common|White|Creature — Human Survivor
|
2.5 | 2.6 | 7.77 | 30 | 6.91 | 267 |
|
ss-uncommon|Blue|Enchantment Creature — Nightmare
|
2 | 2.6 | 7.71 | 14 | 5.62 | 103 |
|
ss-common||Enchantment — Room
|
2.5 | 2.6 | 7.71 | 21 | 6.52 | 244 |
|
ss-uncommon|Black|Sorcery
|
2.5 | 2.6 | 7.85 | 13 | 5.49 | 125 |
|
ss-common|Black|Creature — Rat
|
3.5 | 2.6 | 7.62 | 39 | 6.77 | 250 |
|
ss-uncommon|Black|Creature — Demon
|
3 | 2.6 | 7.75 | 20 | 6.08 | 112 |
|
ss-uncommon|Blue|Enchantment Creature — Nightmare
|
1.5 | 2.5 | 7.91 | 11 | 7.10 | 133 |
|
ss-common|Black|Instant
|
3 | 2.5 | 7.94 | 34 | 7.39 | 289 |
|
ss-common|Red|Creature — Mutant
|
2.5 | 2.5 | 7.89 | 27 | 6.93 | 273 |
|
ss-uncommon|Red|Sorcery
|
0.5 | 2.5 | 8.09 | 11 | 5.63 | 91 |
|
ss-uncommon|Blue|Black|Enchantment Creature — Nightmare
|
2 | 2.5 | 8.08 | 13 | 5.07 | 92 |
|
ss-rare|White|Blue|Black|Red|Green|Legendary Creature — Human Warlock
|
1 | 2.5 | 8.00 | 9 | 5.86 | 45 |
|
ss-rare||Land
|
3 | 2.5 | 8.00 | 5 | 4.10 | 34 |
|
ss-uncommon|Blue|Creature — Spirit
|
2 | 2.4 | 8.17 | 6 | 4.87 | 83 |
|
ss-rare|Blue|Legendary Enchantment Creature — Nightmare
|
1.5 | 2.4 | 8.25 | 4 | 4.37 | 32 |
|
ss-uncommon|Blue|Creature — Crab Skeleton
|
1.5 | 2.4 | 8.40 | 10 | 5.68 | 109 |
|
ss-uncommon|Black|Creature — Human Rogue
|
2.5 | 2.4 | 8.30 | 23 | 6.12 | 135 |
|
ss-uncommon|Red|Legendary Creature — Human Coward
|
1 | 2.4 | 8.14 | 7 | 6.37 | 90 |
|
ss-common||Enchantment — Room
|
3 | 2.4 | 8.39 | 54 | 7.78 | 336 |
|
ss-common|Green|Creature — Beast
|
2.5 | 2.4 | 8.31 | 48 | 7.47 | 331 |
|
ss-uncommon|Green|Sorcery
|
2.5 | 2.4 | 8.28 | 18 | 5.62 | 115 |
|
ss-common|Green|Creature — Insect
|
2.5 | 2.4 | 8.34 | 41 | 6.78 | 255 |
|
ss-common|Green|Creature — Lizard
|
2 | 2.4 | 8.39 | 46 | 7.28 | 286 |
|
ss-uncommon|White|Green|Creature — Human Survivor
|
3.5 | 2.4 | 8.14 | 7 | 6.54 | 102 |
|
ss-common|Blue|Creature — Human Detective
|
3.5 | 2.3 | 8.44 | 34 | 7.00 | 276 |
|
ss-rare|Red|Artifact
|
2.0 // 4.0 | 2.3 | 8.50 | 4 | 4.81 | 43 |
|
ss-uncommon|Red|Sorcery
|
2.5 | 2.3 | 8.69 | 13 | 5.28 | 95 |
|
ss-uncommon|Blue|Black|Creature — Insect Skeleton
|
3 | 2.3 | 8.43 | 7 | 6.39 | 128 |
|
ss-uncommon||Enchantment — Room
|
1.0 // 3.5 | 2.3 | 8.44 | 16 | 6.51 | 106 |
|
ss-uncommon||Artifact
|
2 | 2.3 | 8.67 | 15 | 6.11 | 119 |
|
Lakeside Shack
3 These offer great fixing, as they will usually be untapped by the mid to late game.
ss-common||Land
|
3 | 2.3 | 8.70 | 23 | 6.83 | 165 |
|
ss-common||Land
|
3 | 2.3 | 8.50 | 32 | 6.84 | 181 |
|
ss-common|White|Creature — Spirit
|
2 | 2.2 | 8.83 | 36 | 7.95 | 310 |
|
ss-uncommon|Red|Creature — Spirit
|
3.5 | 2.2 | 8.71 | 14 | 6.28 | 113 |
|
ss-common|Red|Artifact Creature — Toy
|
2 | 2.2 | 8.97 | 34 | 8.08 | 313 |
|
ss-uncommon|Red|Instant
|
2 | 2.2 | 8.82 | 11 | 6.40 | 116 |
|
ss-uncommon|Red|Instant
|
2 | 2.2 | 8.90 | 10 | 6.70 | 118 |
|
ss-common|Green|Creature — Elf Warrior
|
3 | 2.2 | 8.86 | 29 | 7.77 | 283 |
|
ss-uncommon||Enchantment — Room
|
1 | 2.2 | 8.92 | 13 | 6.54 | 117 |
|
ss-uncommon|White|Green|Artifact — Equipment
|
2.5 | 2.2 | 8.86 | 14 | 7.04 | 128 |
|
Bleeding Woods
3 These offer great fixing, as they will usually be untapped by the mid to late game.
ss-common||Land
|
3 | 2.2 | 8.79 | 24 | 6.37 | 157 |
|
ss-common|White|Creature — Spirit
|
2.5 | 2.1 | 9.03 | 29 | 8.15 | 329 |
|
ss-uncommon|Blue|Enchantment — Aura
|
2 | 2.1 | 9.08 | 13 | 6.95 | 112 |
|
ss-common|Blue|Instant
|
2.5 | 2.1 | 9.03 | 37 | 7.75 | 299 |
|
ss-rare|Black|Creature — Demon
|
0 // 4.0 | 2.1 | 9.00 | 5 | 6.19 | 43 |
|
ss-rare|Black|Enchantment
|
0 | 2.1 | 9.25 | 4 | 5.62 | 50 |
|
ss-common|Black|Creature — Spirit
|
2.5 | 2.1 | 9.00 | 44 | 8.19 | 323 |
|
ss-common||Land
|
3 | 2.1 | 9.24 | 21 | 6.73 | 175 |
|
ss-common|White|Sorcery
|
2 | 2 | 9.53 | 32 | 8.03 | 322 |
|
ss-common|White|Enchantment Creature — Nightmare
|
2.5 | 2 | 9.38 | 32 | 7.42 | 301 |
|
ss-common|Black|Enchantment Creature — Nightmare
|
3 | 2 | 9.39 | 36 | 7.93 | 339 |
|
ss-common|Red|Creature — Human Clown
|
2 | 2 | 9.44 | 32 | 7.86 | 352 |
|
ss-rare|White|Enchantment
|
0 | 1.9 | 9.60 | 5 | 5.63 | 65 |
|
ss-rare|Blue|Enchantment
|
0 | 1.9 | 9.67 | 6 | 6.43 | 49 |
|
ss-rare|Blue|Legendary Artifact
|
0 | 1.9 | 9.75 | 4 | 6.68 | 58 |
|
ss-common|Blue|Creature — Human Wizard
|
1.5 | 1.9 | 9.58 | 33 | 7.99 | 339 |
|
ss-uncommon|Black|Sorcery
|
1.5 | 1.9 | 9.70 | 10 | 6.00 | 105 |
|
ss-common|Green|Enchantment Creature — Horror
|
2.5 | 1.9 | 9.65 | 43 | 8.27 | 335 |
|
ss-common||Land
|
3 | 1.9 | 9.76 | 21 | 7.28 | 165 |
|
ss-common||Land
|
3 | 1.9 | 9.74 | 23 | 7.23 | 164 |
|
ss-common|White|Creature — Human Doctor
|
3 | 1.8 | 9.87 | 31 | 8.04 | 302 |
|
ss-common|White|Creature — Human Soldier
|
2.5 | 1.8 | 10.00 | 26 | 8.14 | 297 |
|
ss-common|White|Instant
|
2.5 | 1.8 | 9.82 | 40 | 7.88 | 335 |
|
ss-common|White|Creature — Goat
|
2 | 1.8 | 10.09 | 47 | 9.03 | 395 |
|
ss-common|Blue|Creature — Eye
|
2.5 | 1.8 | 9.94 | 31 | 8.41 | 313 |
|
ss-common|Blue|Instant
|
2 | 1.8 | 10.04 | 23 | 7.93 | 346 |
|
ss-common|Blue|Instant
|
2 | 1.8 | 10.03 | 34 | 8.16 | 335 |
|
ss-common|Black|Creature — Human Cleric
|
2.5 | 1.8 | 10.03 | 39 | 9.13 | 402 |
|
ss-common|Black|Enchantment Creature — Nightmare
|
3 | 1.8 | 9.94 | 34 | 8.50 | 355 |
|
ss-rare|Black|Red|Green|Legendary Creature — Human Warlock
|
2 | 1.8 | 9.83 | 6 | 5.51 | 57 |
|
ss-common||Land
|
3 | 1.8 | 10.00 | 14 | 5.99 | 160 |
|
ss-common||Land
|
3 | 1.8 | 9.86 | 21 | 7.37 | 182 |
|
ss-common||Land
|
3 | 1.8 | 9.82 | 17 | 7.36 | 195 |
|
ss-common|Blue|Creature — Shark
|
2 | 1.6 | 10.54 | 35 | 8.92 | 354 |
|
ss-rare|Blue|Legendary Enchantment — Saga
|
1.5 | 1.6 | 10.50 | 4 | 6.02 | 59 |
|
ss-common|Black|Enchantment Creature — Horror
|
2 | 1.6 | 10.47 | 19 | 7.56 | 298 |
|
ss-common|Black|Creature — Leech
|
2 | 1.6 | 10.57 | 30 | 8.19 | 323 |
|
ss-common||Enchantment — Room
|
2 | 1.6 | 10.55 | 40 | 8.07 | 324 |
|
ss-common|Red|Creature — Beast
|
2 | 1.6 | 10.45 | 31 | 8.59 | 359 |
|
ss-common|Red|Instant
|
3 | 1.6 | 10.39 | 36 | 9.19 | 364 |
|
ss-common|Black|Enchantment — Aura
|
1.5 | 1.5 | 10.76 | 34 | 9.44 | 438 |
|
ss-common|Black|Creature — Human Cleric
|
1.5 | 1.5 | 10.73 | 26 | 8.44 | 338 |
|
ss-common|Green|Creature — Insect
|
1.5 | 1.5 | 10.79 | 34 | 9.22 | 385 |
|
ss-common|Green|Creature — Elf Survivor
|
2 | 1.5 | 10.84 | 31 | 8.47 | 349 |
|
ss-common|Green|Instant
|
2.5 | 1.5 | 10.77 | 39 | 8.65 | 374 |
|
ss-uncommon||Artifact Creature — Toy
|
2 | 1.5 | 10.75 | 8 | 7.91 | 149 |
|
ss-common||Artifact Creature — Construct
|
0 | 1.5 | 10.89 | 37 | 9.63 | 398 |
|
ss-rare||Enchantment — Room
|
0 | 1.4 | 11.00 | 1 | 5.09 | 47 |
|
ss-common|White|Artifact Creature — Toy
|
2 | 1.4 | 11.21 | 39 | 8.91 | 353 |
|
ss-uncommon|White|Instant
|
0 | 1.4 | 11.00 | 5 | 6.52 | 115 |
|
ss-common|Blue|Creature — Spirit
|
2 | 1.4 | 11.00 | 21 | 8.95 | 377 |
|
ss-rare|Black|Sorcery
|
1 | 1.4 | 11.00 | 3 | 5.56 | 49 |
|
ss-common|Red|Sorcery
|
1.5 | 1.4 | 11.09 | 34 | 8.45 | 394 |
|
ss-common|Red|Creature — Human Berserker
|
2 | 1.4 | 11.14 | 28 | 9.61 | 364 |
|
ss-common|Green|Enchantment — Aura
|
1.5 | 1.4 | 11.11 | 18 | 8.74 | 333 |
|
ss-rare|Green|Enchantment
|
0 | 1.4 | 11.00 | 8 | 7.32 | 67 |
|
ss-common||Artifact Creature — Bear Toy
|
1.5 | 1.4 | 10.96 | 26 | 9.39 | 360 |
|
ss-uncommon||Artifact — Equipment
|
1.5 | 1.4 | 11.12 | 8 | 7.00 | 132 |
|
ss-common|Blue|Enchantment Creature — Horror
|
2 | 1.3 | 11.41 | 22 | 9.01 | 375 |
|
ss-common|Blue|Creature — Fish Insect
|
1.5 | 1.3 | 11.31 | 29 | 8.75 | 335 |
|
ss-common|Red|Creature — Human Assassin
|
2 | 1.3 | 11.36 | 36 | 9.70 | 427 |
|
ss-common||Artifact
|
1.5 | 1.2 | 11.58 | 38 | 9.47 | 384 |
|
ss-common||Artifact — Clue
|
1.5 | 1.2 | 11.68 | 37 | 9.88 | 419 |
|
ss-common||Land
|
3 | 1.2 | 11.50 | 14 | 7.00 | 165 |
|
ss-common|Blue|Sorcery
|
2 | 1.1 | 11.83 | 29 | 9.96 | 462 |
|
ss-uncommon|Blue|Red|Creature — Spirit
|
2.5 | 1.1 | 11.83 | 12 | 7.20 | 138 |
|
ss-common|Black|Creature — Human Assassin
|
1.5 | 1 | 12.16 | 32 | 9.96 | 428 |
|
ss-common|Black|Instant
|
2 | 1 | 12.19 | 32 | 9.86 | 442 |
|
ss-common|Red|Creature — Spirit
|
1.5 | 0.8 | 12.74 | 23 | 10.18 | 413 |
|
ss-common||Basic Land — Plains
|
0.4 | 14.00 | 14 | 10.65 | 264 | |
|
ss-common||Basic Land — Island
|
0.4 | 14.00 | 22 | 10.99 | 245 | |
|
ss-common||Basic Land — Swamp
|
0.4 | 14.00 | 27 | 11.04 | 247 | |
|
ss-common||Basic Land — Mountain
|
0.4 | 14.00 | 12 | 10.79 | 274 | |
|
ss-common||Basic Land — Forest
|
0.4 | 14.00 | 9 | 10.29 | 228 | |
|
ss-rare|Red|Enchantment
|
0 | -0 | 15.00 | 0 | 5.19 | 40 |
|
ss-mythic|White|Blue|Legendary Creature — Human Wizard
|
5 | -0 | 15.00 | 0 | 2.00 | 2 |
Enter The Battlefield Prepared
With the MTGA Assistant deck tracker|
|
Azorius | 1957 matches | 236 decks |
|
|
Golgari | 1882 matches | 231 decks |
|
|
Boros | 1725 matches | 213 decks |
|
|
Rakdos | 1459 matches | 177 decks |
|
|
Simic | 1272 matches | 162 decks |
|
|
Gruul | 1242 matches | 154 decks |
|
|
Orzhov | 1188 matches | 146 decks |
|
|
Selesnya | 1032 matches | 125 decks |
|
|
Dimir | 481 matches | 58 decks |
|
|
Abzan | 389 matches | 46 decks |
|
|
Jund | 339 matches | 42 decks |
|
|
Sultai | 296 matches | 38 decks |
|
|
Izzet | 293 matches | 36 decks |
|
|
Esper | 262 matches | 30 decks |
|
|
Bant | 155 matches | 20 decks |
|
|
Five Color | 150 matches | 18 decks |
|
|
Naya | 113 matches | 13 decks |
|
|
Grixis | 103 matches | 12 decks |
|
|
Temur | 89 matches | 11 decks |
|
|
Mardu | 95 matches | 11 decks |
|
|
Four Color | 93 matches | 11 decks |
|
|
Jeskai | 75 matches | 10 decks |
|
|
Four Color | 72 matches | 9 decks |
|
|
Mono Green | 60 matches | 7 decks |
|
|
Mono Red | 47 matches | 6 decks |
|
|
Mono Blue | 44 matches | 5 decks |
|
|
Mono White | 35 matches | 4 decks |
|
|
Four Color | 35 matches | 4 decks |
|
|
Mono Black | 9 matches | 1 decks |
|
|
Four Color | 9 matches | 1 decks |
|
|
Four Color | 8 matches | 1 decks |
Card name